Grinch Crinkle Cookies – Soft, Chewy Christmas Cookies with a Snowy Sugar Coating
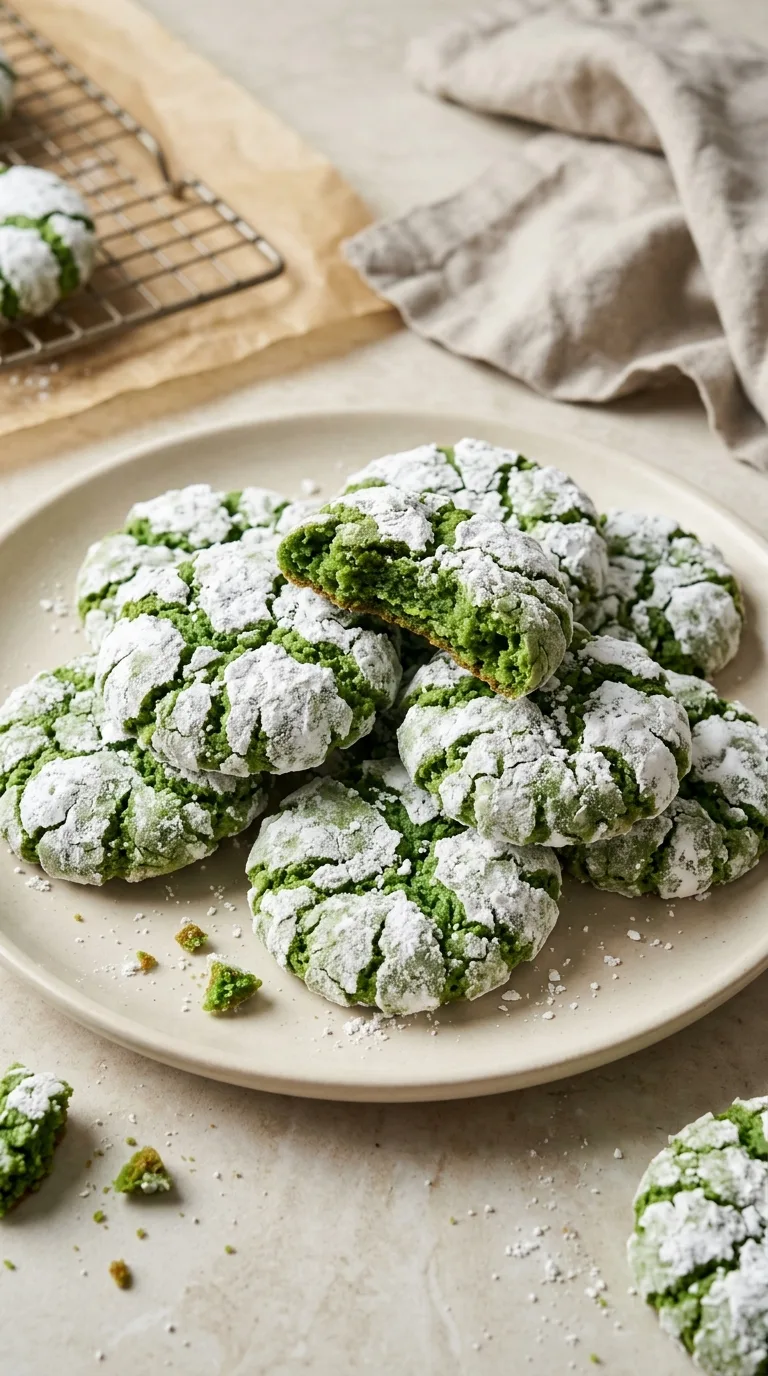
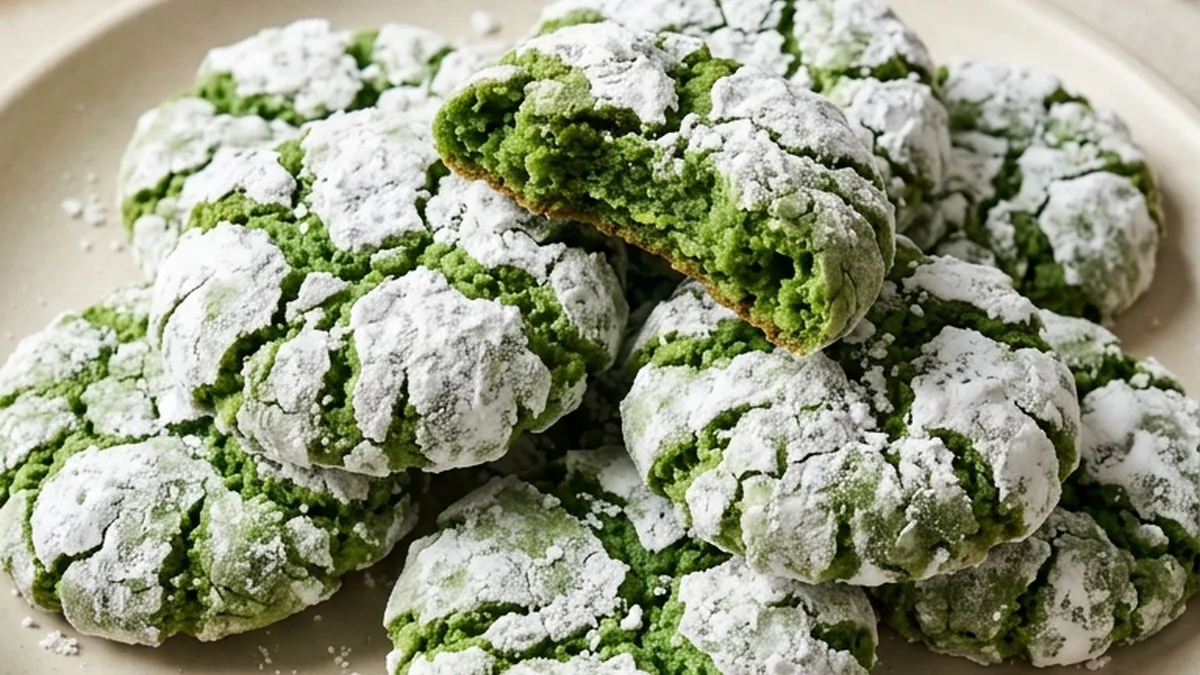
Grinch Crinkle Cookies are festive Christmas cookies with a bright green center, a snowy powdered sugar coating, and a tiny red candy heart inspired by the Grinch. These soft, chewy vanilla cookies have lightly crisp edges and a delicate crackled surface that develops as they bake. Their cheerful green-and-red appearance makes them a fun addition to holiday cookie platters, Christmas parties, and homemade cookie gift boxes.
This version uses a simple homemade cookie dough rather than a boxed cake mix, giving you more control over the sweetness and texture. A short chilling period helps the dough hold its shape, while a double coating of granulated sugar and powdered sugar creates more defined crinkles. The cookies are easy to prepare ahead of time, and the red candy hearts are added while the cookies are still warm.
Why This Recipe Works
- Butter creates a tender, flavorful cookie. Creaming softened butter with sugar gives the dough a smooth texture and helps produce cookies with lightly crisp edges and soft centers.
- Chilling controls spreading. Refrigerating the dough for 45 minutes makes it easier to scoop and helps the cookies stay thick enough to develop attractive cracks.
- Two sugar coatings create defined crinkles. A thin layer of granulated sugar underneath the powdered sugar helps keep the white coating visible as the cookies expand.
- Gel food coloring produces a vivid green. Concentrated gel coloring gives the cookies their Grinch-inspired appearance without adding much extra liquid.
- Red candy hearts complete the design. Adding the hearts immediately after baking allows them to settle into the warm cookie surface without melting into the dough.
Equipment Needed
- Electric hand mixer or stand mixer with paddle attachment
- Large mixing bowl
- Medium mixing bowl
- Measuring cups and spoons
- Digital kitchen scale for accurate measurements
- Two large baking sheets, approximately 13 × 18 inches (33 × 46 cm)
- Parchment paper
- 1½-tablespoon (22 ml) cookie scoop
- Wire cooling rack
- Two small shallow bowls for rolling the dough in sugar
Ingredients List

For the Green Cookie Dough:
- 2 1/4 cups (270 g) all-purpose flour, spooned and leveled
- 1 teaspoon (4 g) baking powder
- 1/4 teaspoon (1 g) baking soda
- 1/2 teaspoon (3 g) fine salt
- 1/2 cup (113 g) unsalted butter, softened
- 3/4 cup (150 g) granulated sugar
- 1 large egg (about 50 g without shell), room temperature
- 2 teaspoons (10 ml) vanilla extract
- 1/4 teaspoon (about 1 ml) green gel food coloring, or as needed
For the Crinkle Coating:
- 1/4 cup (50 g) granulated sugar
- 3/4 cup (90 g) powdered sugar, sifted
For Decoration:
- 24 pieces (about 5–10 g) red heart-shaped candy sprinkles, optional
Ingredient Notes and Substitutions
All-Purpose Flour
All-purpose flour provides enough structure to keep these cookies thick while allowing the centers to remain tender.
For a gluten-free variation, a commercial 1: 1 gluten-free baking flour containing xanthan gum may work, but the cookies can spread differently or develop a slightly more delicate texture. Avoid replacing all-purpose flour with almond flour alone because it does not provide the same structure.
Unsalted Butter
Butter contributes richness, a tender crumb, and lightly crisp edges.
Salted butter can replace unsalted butter in the same amount. Reduce the added fine salt from ½ teaspoon to ¼ teaspoon. The finished cookies may taste slightly saltier depending on the butter brand.
Green Gel Food Coloring
Green gel coloring gives Grinch Crinkle Cookies their characteristic bright green color without significantly changing the consistency of the dough.
Liquid food coloring can be used, but it is less concentrated and may require a larger amount. Excess liquid coloring can soften the dough and encourage spreading. Start with a small amount and increase gradually.
Baking Powder and Baking Soda
These two leavening agents work together to give the cookies a gentle lift and encourage the surface to crack as the dough expands.
Baking powder provides lift, while baking soda influences spreading and browning. There is no reliable one-for-one substitution between them in this recipe without adjusting other ingredients.
Powdered Sugar
Powdered sugar creates the white, snowy coating that makes the green cracks stand out.
Confectioners' sugar is another name for powdered sugar and can be used interchangeably. Granulated sugar alone will not produce the same white crinkle effect.
Step-by-Step Instructions
Prepare the Dry Ingredients
In a medium mixing bowl, whisk together the 2¼ cups (270 g) all-purpose flour, 1 teaspoon (4 g) baking powder, ¼ teaspoon (1 g) baking soda, and ½ teaspoon (3 g) fine salt. Whisk for approximately 30 seconds to distribute the leavening agents evenly. Set the mixture aside while preparing the butter and sugar.
Cream the Butter and Sugar
Place the ½ cup (113 g) softened unsalted butter and ¾ cup (150 g) granulated sugar in a large mixing bowl. Using an electric mixer on medium speed, beat for 2–3 minutes until the mixture looks lighter in color and creamy. Scrape down the sides of the bowl as needed. The butter should be soft enough to mix easily but not melted or greasy.
Add the Egg, Vanilla, and Green Coloring
Add the large egg and 2 teaspoons (10 ml) vanilla extract to the creamed butter mixture. Beat on medium-low speed until combined, approximately 30–45 seconds. Add ¼ teaspoon (about 1 ml) green gel food coloring and mix until the color is evenly distributed. The mixture should appear bright green, smooth, and creamy. If the color looks too pale, add a very small additional amount of gel coloring. Keep in mind that the flour will slightly soften the intensity of the green color.
Combine the Wet and Dry Ingredients
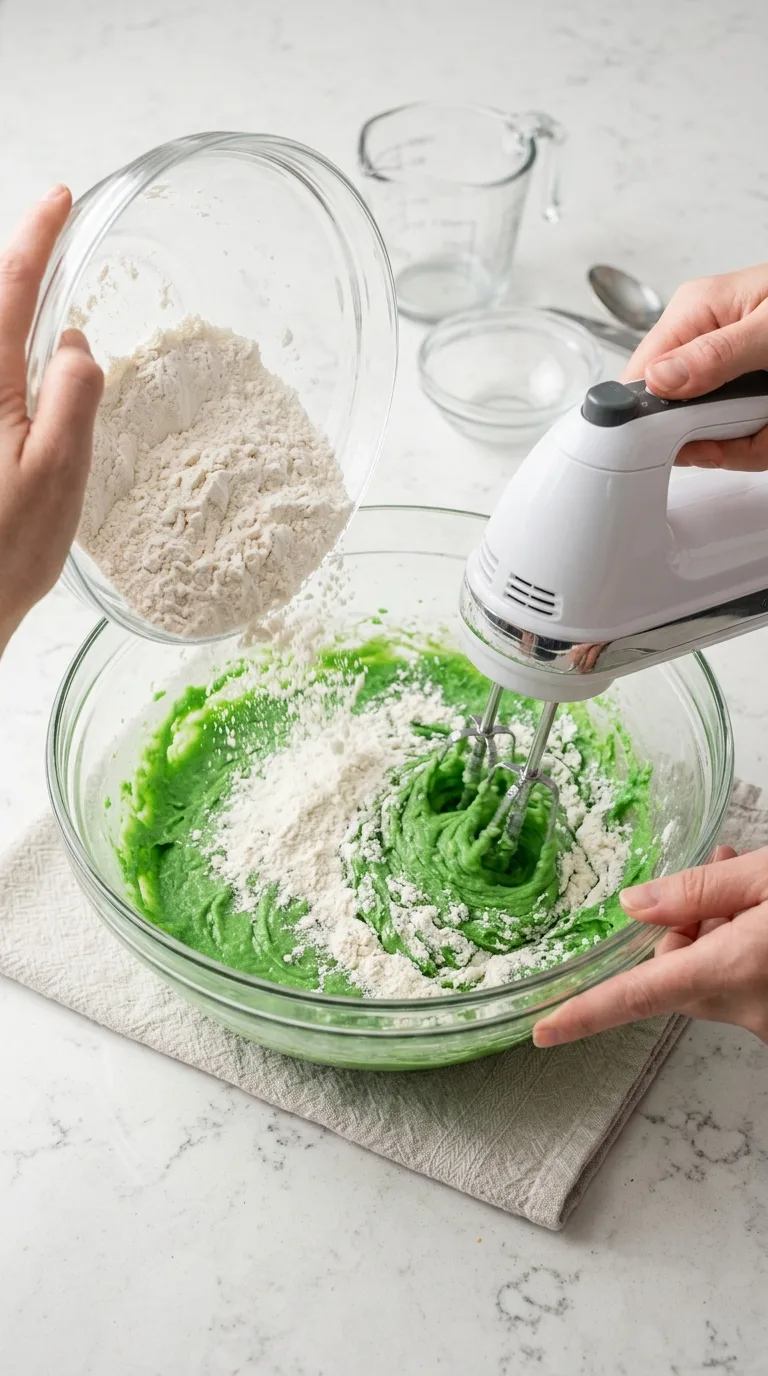
Add the prepared flour mixture to the green butter mixture in two additions. Mix on low speed just until the flour disappears and a thick, soft cookie dough forms. The dough should be slightly tacky but not runny. It should hold together when gathered with a spoon. Avoid overmixing once the flour has been incorporated, as excessive mixing can produce tougher cookies.

Chill the Cookie Dough
Cover the bowl tightly with plastic wrap or a reusable lid. Refrigerate the dough for 45 minutes. The chilled dough should feel firmer and be easier to scoop without sticking excessively to your hands. If it still feels unusually soft after chilling, refrigerate it for another 10–15 minutes before shaping. This extra time will extend the total preparation time.
Preheat the Oven and Prepare the Baking Sheets
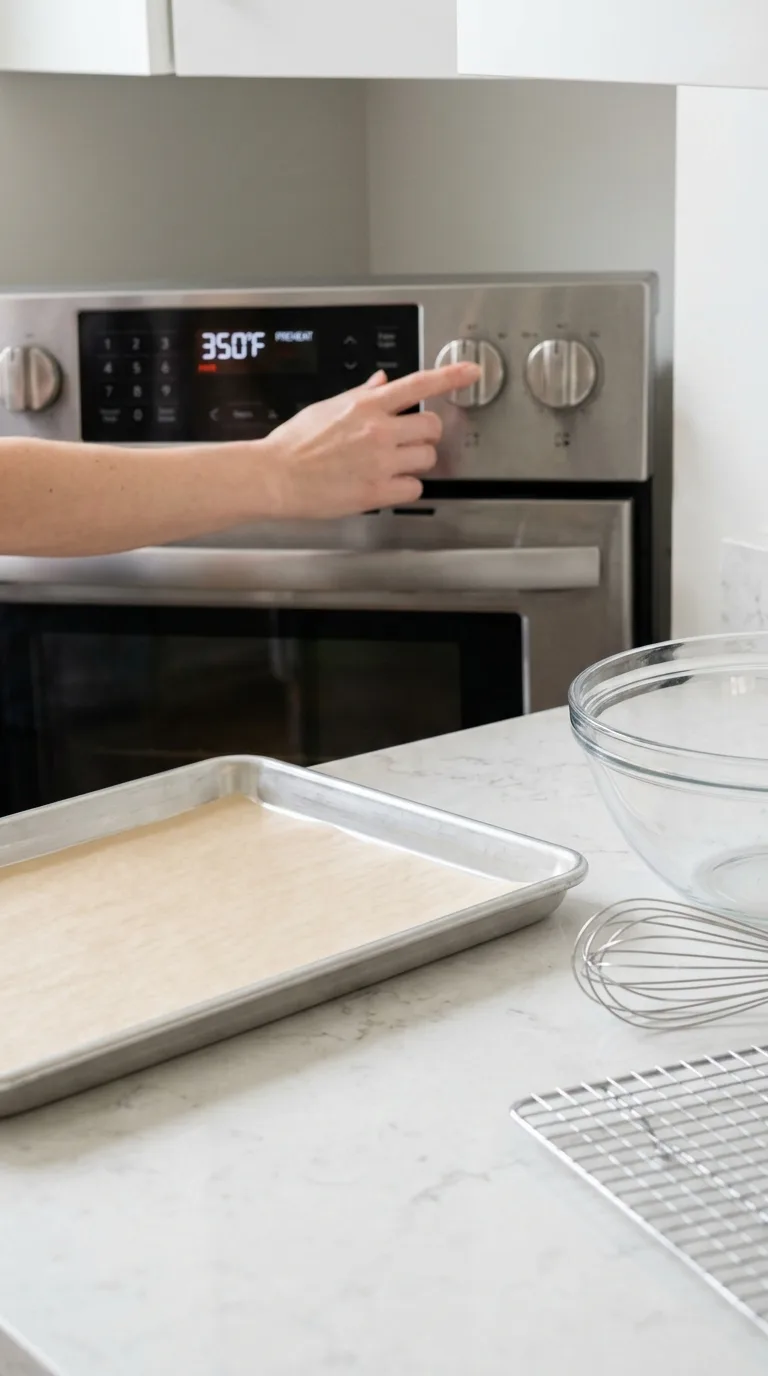
Toward the end of the chilling period, preheat the oven to 350°F (175°C). Line two large baking sheets, approximately 13 × 18 inches (33 × 46 cm), with parchment paper. Position an oven rack in the center of the oven. For consistent results, bake one sheet at a time.
Prepare the Sugar Coatings
Place the remaining ¼ cup (50 g) granulated sugar in one shallow bowl. Place the ¾ cup (90 g) sifted powdered sugar in a separate shallow bowl. Keeping the sugars separate allows each dough ball to receive two distinct coatings. The powdered sugar should be fluffy and free from large lumps.
Scoop and Shape the Cookies
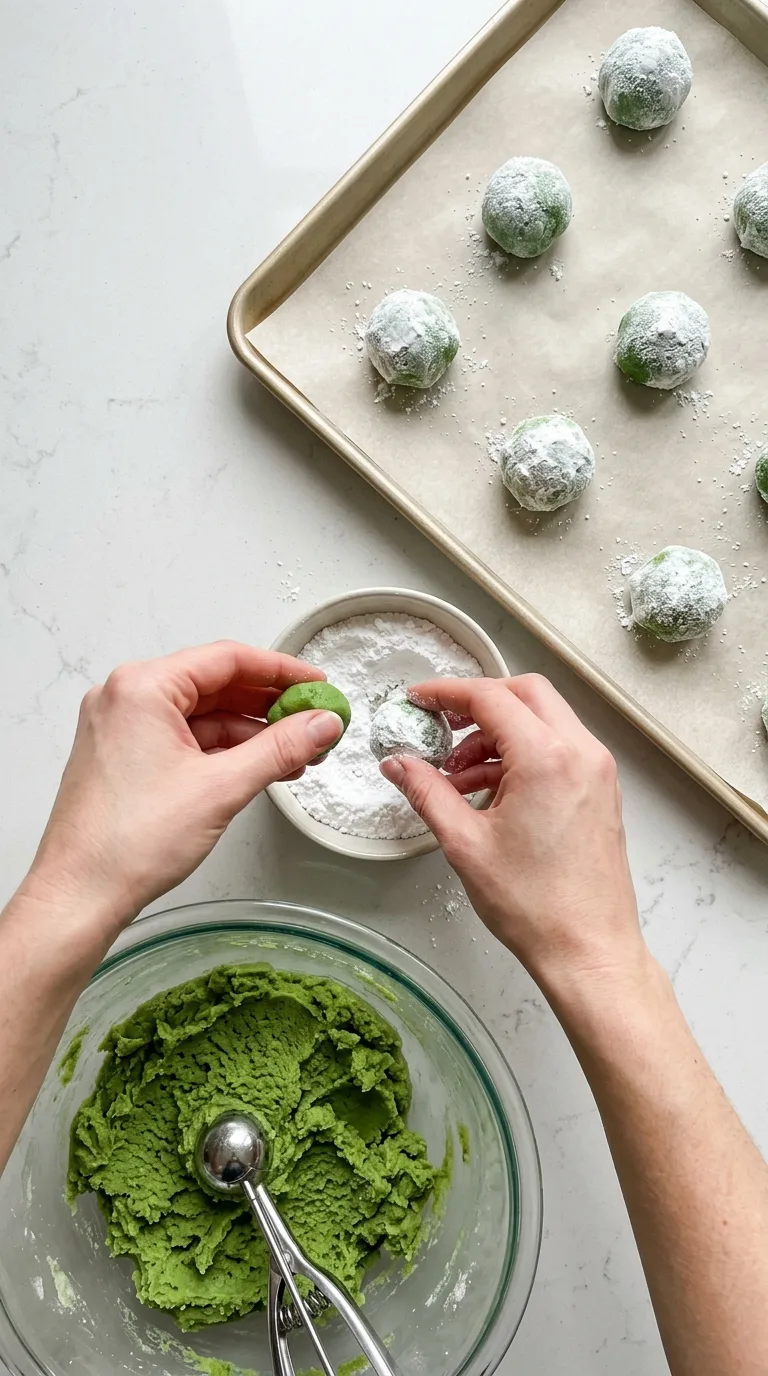
Using a 1½-tablespoon (22 ml) cookie scoop, divide the chilled dough into 24 approximately equal portions. Roll each portion gently between your palms to form a smooth ball. If the dough becomes sticky as you work, return it to the refrigerator briefly. Try to keep the dough balls similar in size so the cookies bake evenly.
Coat the Dough Balls
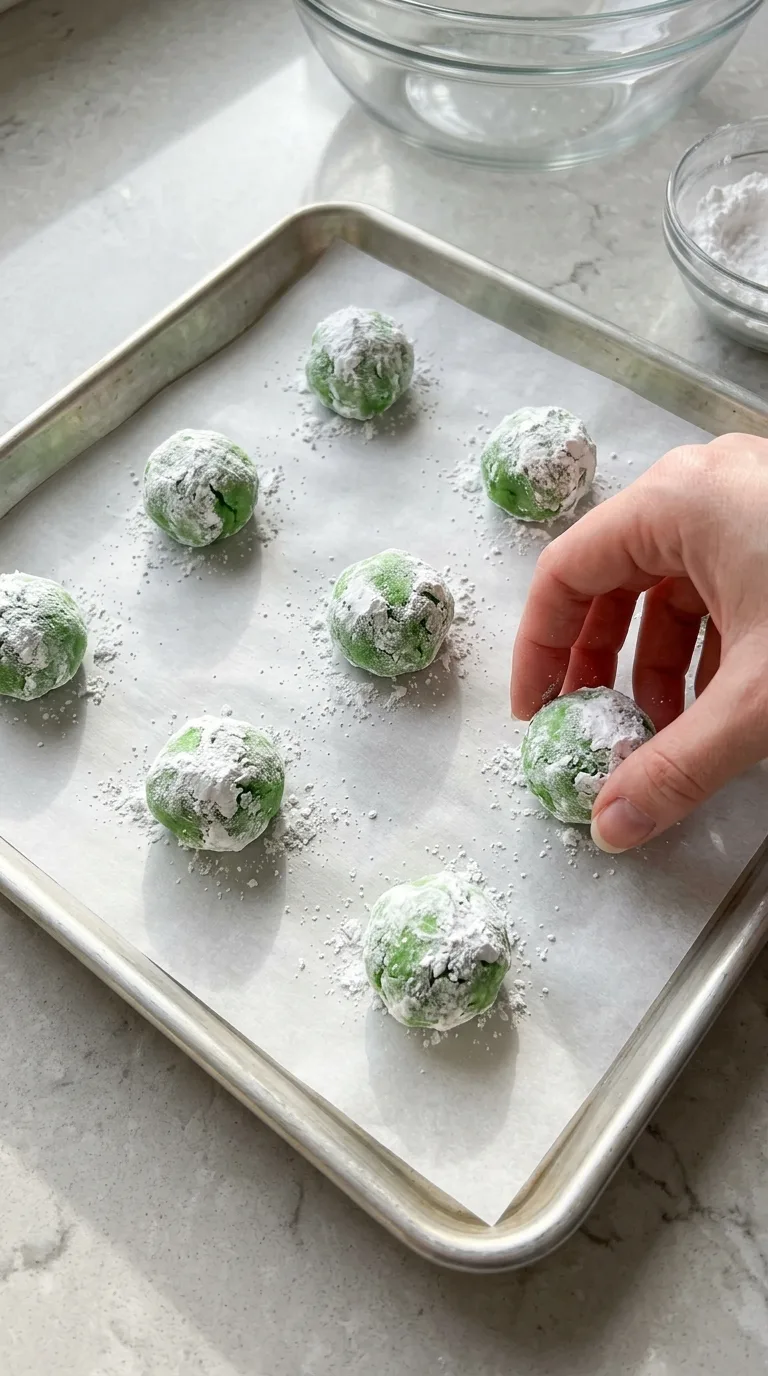
Roll each green dough ball lightly in the granulated sugar, then generously in the powdered sugar. Make sure the entire surface is covered in a thick, visible layer of powdered sugar. Do not shake off too much of the coating. A generous layer helps create the contrasting white exterior and green cracks. Place 12 coated dough balls on the first prepared baking sheet, leaving approximately 2 inches (5 cm) between them. Keep the remaining dough balls chilled while the first batch bakes.
Bake the First Batch
Bake at 350°F (175°C) for approximately 10–12 minutes. The cookies should spread slightly and develop visible cracks across their powdered sugar coating. Look for these signs of doneness: The edges appear set and no longer look wet. The tops have developed distinct cracks with green dough showing through. The centers still look slightly soft but not glossy or raw. The cookies remain mostly green and white rather than turning golden brown. Avoid baking until the entire cookie feels firm. The centers will continue setting as the cookies cool.
Add the Red Candy Hearts
Immediately after removing the baking sheet from the oven, gently press one red heart-shaped candy sprinkle onto the top of each warm cookie, if using. Position the heart near the center or slightly off-center for a playful Grinch-inspired appearance. Use only enough pressure to secure the decoration without flattening the cookie. The hearts should remain visible on the snowy surface.
Cool the Cookies
Let the cookies rest on the baking sheet for 5 minutes. During this time, the soft centers will firm up enough to handle without breaking. Carefully transfer the cookies to a wire cooling rack and allow them to cool for another 20 minutes. The finished cookies should have lightly crisp edges, tender centers, and a visible powdered sugar coating.
Bake the Remaining Batch
Arrange the remaining 12 coated dough balls on the second prepared baking sheet. Bake at 350°F (175°C) for another 10–12 minutes, following the same doneness cues. Add the remaining red candy hearts immediately after baking, if using. Cool for 5 minutes on the baking sheet and another 20 minutes on a wire rack. Once both batches have cooled, the Grinch Crinkle Cookies are ready to serve.
Tips for Success
- Measure the Flour Carefully Too much flour can make crinkle cookies dry, dense, and less likely to spread. For consistent results, weigh the flour using a kitchen scale. If using measuring cups, spoon the flour into the cup and level the top without packing it down. ### Keep the Butter at the Right Temperature Softened butter should yield slightly when pressed but still hold its shape. Butter that is too warm can cause excessive spreading, while cold butter may not cream properly with the sugar. ### Use a Generous Powdered Sugar Coating A thin coating can dissolve into the cookie surface during baking, leaving less visible contrast. Rolling the dough in granulated sugar first helps protect the powdered sugar layer from moisture in the dough. ### Avoid Overbaking The green color makes browning less useful as a doneness indicator. Instead, watch for set edges, a cracked surface, and centers that no longer appear wet. Overbaking can make the cookies dry and reduce their soft, chewy texture. ### Keep the Dough Cool Between Batches Warm dough spreads more quickly in the oven. If your kitchen is warm, keep the second batch refrigerated until the oven is ready. ### Choose the Right Candy Hearts Small, flat candy hearts are easier to attach and less likely to fall off during storage. Avoid large, heavy decorations that may crack the soft cookie surface or become uncomfortable to bite.
Storage, Freezing, and Make-Ahead Instructions
Room-Temperature Storage
Allow the cookies to cool completely before storing.
Place them in an airtight container with parchment paper between layers to protect the powdered sugar coating and candy hearts.
Store at room temperature in a cool, dry place for up to 4 days for the best texture.
Avoid storing warm cookies in a sealed container because trapped moisture can make the powdered sugar sticky.
Refrigerator Storage
Refrigeration is not necessary for fully baked Grinch Crinkle Cookies.
The refrigerator can dry out the centers and introduce moisture that causes the powdered sugar coating to dissolve.
If refrigeration is necessary because of a particularly warm environment, keep the cookies tightly sealed and bring them to room temperature before serving.
Freezing Baked Cookies
The baked cookies can be frozen for up to 2 months for best quality.
To freeze:
Cool the cookies completely.
Arrange them in a single layer on a tray and freeze until firm.
Transfer them to a freezer-safe airtight container, separating layers with parchment paper.
Thaw at room temperature while still covered to reduce condensation on the sugar coating.
For the neatest appearance, freeze cookies without the red candy hearts and add the decorations later using a tiny dab of thick powdered sugar icing, if desired. Freezing may slightly soften the powdered sugar coating.
Freezing Unbaked Cookie Dough
Uncoated cookie dough balls can be frozen for up to 2 months.
Arrange the dough balls on a parchment-lined tray and freeze until solid. Transfer them to a freezer-safe bag or container.
When ready to bake, thaw the dough balls in the refrigerator until firm but no longer frozen solid, then roll them in granulated sugar and powdered sugar.
Bake as directed, adjusting the time slightly if the dough is especially cold.
Do not freeze the dough balls after applying the powdered sugar coating, as the coating can absorb moisture during thawing.
Make-Ahead Instructions
The cookie dough can be prepared up to 48 hours in advance.
Cover tightly and refrigerate until ready to bake.
If the dough becomes very firm, let it stand at room temperature for 5–10 minutes, just until it is easy to scoop.
Roll the dough balls in sugar immediately before baking for the clearest crinkle pattern.

FAQ
Can I make Grinch Crinkle Cookies ahead of time?
Yes. You can prepare the cookie dough up to 48 hours in advance and keep it tightly covered in the refrigerator. Shape and coat the dough balls just before baking. You can also bake the cookies 1–2 days ahead and store them in an airtight container at room temperature.
Why didn't my Grinch Crinkle Cookies crack?
Crinkle cookies may develop fewer cracks if the dough is too warm, the leavening agents are old, or the cookies do not spread enough during baking. Make sure the baking powder and baking soda are fresh, measure the flour accurately, and chill the dough as directed. A generous powdered sugar coating also makes the cracks easier to see.
Can I make Grinch Crinkle Cookies without food coloring?
Yes. You can omit the green gel food coloring without significantly changing the flavor or texture. The cookies will have a pale golden color instead of the traditional Grinch-inspired green. Natural green colorings, such as matcha powder, may change the flavor and require recipe adjustments.
How do I know when Grinch Crinkle Cookies are done baking?
The cookies are ready when the edges look set, the tops have developed visible cracks, and the centers no longer appear wet. They should still feel slightly soft when removed from the oven. Allowing them to cool on the baking sheet for 5 minutes helps the centers finish setting without becoming dry.
Can I freeze Grinch Crinkle Cookies?
Yes. Fully cooled baked cookies can be frozen in an airtight freezer-safe container for up to 2 months for best quality. You can also freeze uncoated dough balls for the same period. Thaw the dough in the refrigerator before rolling it in the sugar coatings and baking. The powdered sugar on baked cookies may lose some of its snowy appearance after freezing.
Why did my powdered sugar disappear during baking?
Powdered sugar can absorb moisture from the cookie dough and become translucent in the oven. Rolling the dough balls in granulated sugar before applying a thick powdered sugar coating helps reduce this problem. Avoid coating the dough too far in advance, especially if the dough is warm or sticky.
Ingredients
Method
- In a medium mixing bowl, whisk together the 2¼ cups (270 g) all-purpose flour, 1 teaspoon (4 g) baking powder, ¼ teaspoon (1 g) baking soda, and ½ teaspoon (3 g) fine salt. Whisk for approximately 30 seconds to distribute the leavening agents evenly. Set the mixture aside while preparing the butter and sugar.
- Place the ½ cup (113 g) softened unsalted butter and ¾ cup (150 g) granulated sugar in a large mixing bowl. Using an electric mixer on medium speed, beat for 2–3 minutes until the mixture looks lighter in color and creamy. Scrape down the sides of the bowl as needed. The butter should be soft enough to mix easily but not melted or greasy.
- Add the large egg and 2 teaspoons (10 ml) vanilla extract to the creamed butter mixture. Beat on medium-low speed until combined, approximately 30–45 seconds. Add ¼ teaspoon (about 1 ml) green gel food coloring and mix until the color is evenly distributed. The mixture should appear bright green, smooth, and creamy. If the color looks too pale, add a very small additional amount of gel coloring. Keep in mind that the flour will slightly soften the intensity of the green color.
- Add the prepared flour mixture to the green butter mixture in two additions. Mix on low speed just until the flour disappears and a thick, soft cookie dough forms. The dough should be slightly tacky but not runny. It should hold together when gathered with a spoon. Avoid overmixing once the flour has been incorporated, as excessive mixing can produce tougher cookies.
- Cover the bowl tightly with plastic wrap or a reusable lid. Refrigerate the dough for 45 minutes. The chilled dough should feel firmer and be easier to scoop without sticking excessively to your hands. If it still feels unusually soft after chilling, refrigerate it for another 10–15 minutes before shaping. This extra time will extend the total preparation time.
- Toward the end of the chilling period, preheat the oven to 350°F (175°C). Line two large baking sheets, approximately 13 × 18 inches (33 × 46 cm), with parchment paper. Position an oven rack in the center of the oven. For consistent results, bake one sheet at a time.
- Place the remaining ¼ cup (50 g) granulated sugar in one shallow bowl. Place the ¾ cup (90 g) sifted powdered sugar in a separate shallow bowl. Keeping the sugars separate allows each dough ball to receive two distinct coatings. The powdered sugar should be fluffy and free from large lumps.
- Using a 1½-tablespoon (22 ml) cookie scoop, divide the chilled dough into 24 approximately equal portions. Roll each portion gently between your palms to form a smooth ball. If the dough becomes sticky as you work, return it to the refrigerator briefly. Try to keep the dough balls similar in size so the cookies bake evenly.
- Roll each green dough ball lightly in the granulated sugar, then generously in the powdered sugar. Make sure the entire surface is covered in a thick, visible layer of powdered sugar. Do not shake off too much of the coating. A generous layer helps create the contrasting white exterior and green cracks. Place 12 coated dough balls on the first prepared baking sheet, leaving approximately 2 inches (5 cm) between them. Keep the remaining dough balls chilled while the first batch bakes.
- Bake at 350°F (175°C) for approximately 10–12 minutes. The cookies should spread slightly and develop visible cracks across their powdered sugar coating. Look for these signs of doneness: The edges appear set and no longer look wet. The tops have developed distinct cracks with green dough showing through. The centers still look slightly soft but not glossy or raw. The cookies remain mostly green and white rather than turning golden brown. Avoid baking until the entire cookie feels firm. The centers will continue setting as the cookies cool.
- Immediately after removing the baking sheet from the oven, gently press one red heart-shaped candy sprinkle onto the top of each warm cookie, if using. Position the heart near the center or slightly off-center for a playful Grinch-inspired appearance. Use only enough pressure to secure the decoration without flattening the cookie. The hearts should remain visible on the snowy surface.
- Let the cookies rest on the baking sheet for 5 minutes. During this time, the soft centers will firm up enough to handle without breaking. Carefully transfer the cookies to a wire cooling rack and allow them to cool for another 20 minutes. The finished cookies should have lightly crisp edges, tender centers, and a visible powdered sugar coating.
- Arrange the remaining 12 coated dough balls on the second prepared baking sheet. Bake at 350°F (175°C) for another 10–12 minutes, following the same doneness cues. Add the remaining red candy hearts immediately after baking, if using. Cool for 5 minutes on the baking sheet and another 20 minutes on a wire rack. Once both batches have cooled, the Grinch Crinkle Cookies are ready to serve.