Ingredients
Method
Method
- Place the 1 cup (226 g) softened unsalted butter and 1 cup (120 g) powdered sugar in a large mixing bowl. Beat with an electric mixer on medium speed for about 2–3 minutes, until the mixture looks smooth, creamy, and slightly lighter in color. Avoid excessive whipping. Too much incorporated air can encourage the cookies to puff and distort their spiral shape.
- Add the 1 large egg (about 50 g without shell) and 2 teaspoons (10 ml) pure vanilla extract. Mix on low to medium speed until incorporated, scraping down the sides of the bowl as needed. The mixture should look creamy and mostly uniform. A slightly curdled appearance at this stage is not necessarily a problem; it should come together when the flour is added.
- Add the 2 3/4 cups (330 g) all-purpose flour and 1/2 teaspoon (about 3 g) fine salt. Mix on low speed just until the flour disappears and a soft dough forms. The dough should feel pliable and slightly firm rather than wet or sticky. If it looks crumbly, gently press a small amount together with your fingers. It should hold its shape without falling apart. Avoid prolonged mixing, which can make the cookies tougher.
- Divide the dough into three equal portions: Leave one portion uncolored to create the natural vanilla layer. Place the second portion in a separate bowl and work in 1/4 teaspoon (about 1 ml) red gel food coloring until the color is evenly distributed. Add 1/4 teaspoon (about 1 ml) green gel food coloring to the third portion and mix until uniform. Use gentle folding and pressing motions rather than vigorous kneading. The dough should remain smooth and cohesive without becoming greasy.
- Place the uncolored dough between sheets of parchment paper and roll it into a rectangle approximately 8 × 10 inches (20 × 25 cm). Aim for an even thickness of about 1/8 inch (3 mm). Repeat with the red and green dough portions, creating rectangles of similar dimensions. If the dough becomes too soft to lift or begins sticking to the parchment, refrigerate it briefly until it firms up.
- Remove the upper sheet of parchment from each dough rectangle. Place the green dough on the work surface with its parchment underneath. Carefully invert the uncolored dough over the green layer, then peel away its parchment. Position the red dough on top and remove its parchment. Gently roll over the stacked layers with the rolling pin to help them adhere. The layers should look flat and even, with minimal air trapped between them.
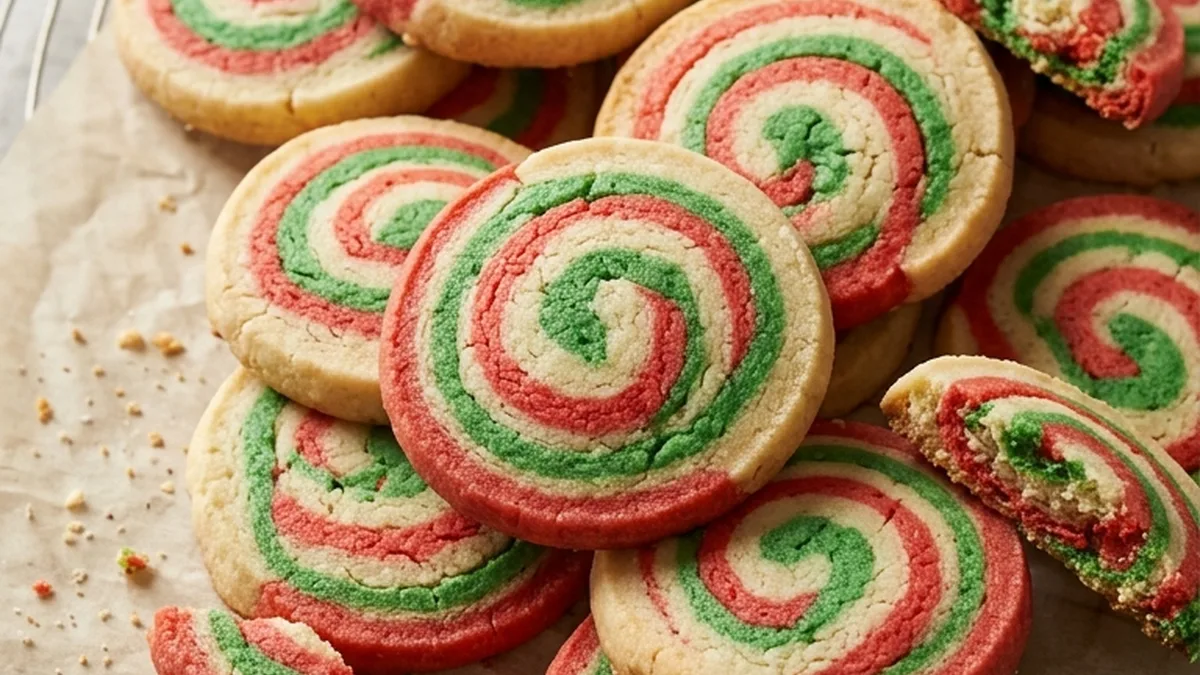
- Starting from one of the 8-inch (20 cm) sides, roll the stacked dough into a tight log, using the bottom parchment sheet to help lift and guide the dough. Keep the roll snug without squeezing so hard that the colored layers smear together. If small cracks appear along the outside, gently press them closed as you roll. The finished log should be approximately 8 inches (20 cm) long, with a clearly visible red, green, and vanilla spiral at each end.
- Wrap the log tightly in plastic wrap and refrigerate for 2 hours, or until firm enough to slice without flattening. For a rounder shape, gently rotate the wrapped log occasionally during the early part of chilling. The dough should feel firm when pressed but not frozen solid.
- Preheat the oven to 350°F (175°C). Line two 13 × 18-inch (33 × 46 cm) rimmed baking sheets with parchment paper. Position an oven rack in the center of the oven. Baking one sheet at a time helps promote even browning.
- Unwrap the chilled dough and place it on a cutting board. Using a sharp, thin-bladed knife, cut the log into approximately 1/4-inch (6 mm) thick slices. Arrange the slices on the prepared baking sheets, leaving approximately 1 1/2 inches (4 cm) between cookies. The batch should yield approximately 30 cookies, depending on the final log dimensions and slice thickness. If a slice becomes slightly oval, gently reshape it with your fingers. If the dough starts to smear or flatten while slicing, return the log to the refrigerator until firm.
- Bake at 350°F (175°C) for approximately 12 minutes per batch, until the cookies look set and the bottom edges are just beginning to turn pale golden. The tops should remain mostly light in color, and the red and green spirals should still look distinct. Avoid waiting for deep golden tops. Excessive browning can dull the holiday colors and make the cookies dry. Because ovens vary, watch the visual cues closely toward the end of baking.
- Allow the cookies to rest on their baking sheet for 5 minutes. Transfer them carefully to a wire rack and let them cool completely for approximately 25 minutes. The cookies will become firmer as they cool, developing lightly crisp edges while retaining a tender center. Once completely cooled, arrange them on a Christmas cookie platter or pack them into airtight gift containers.