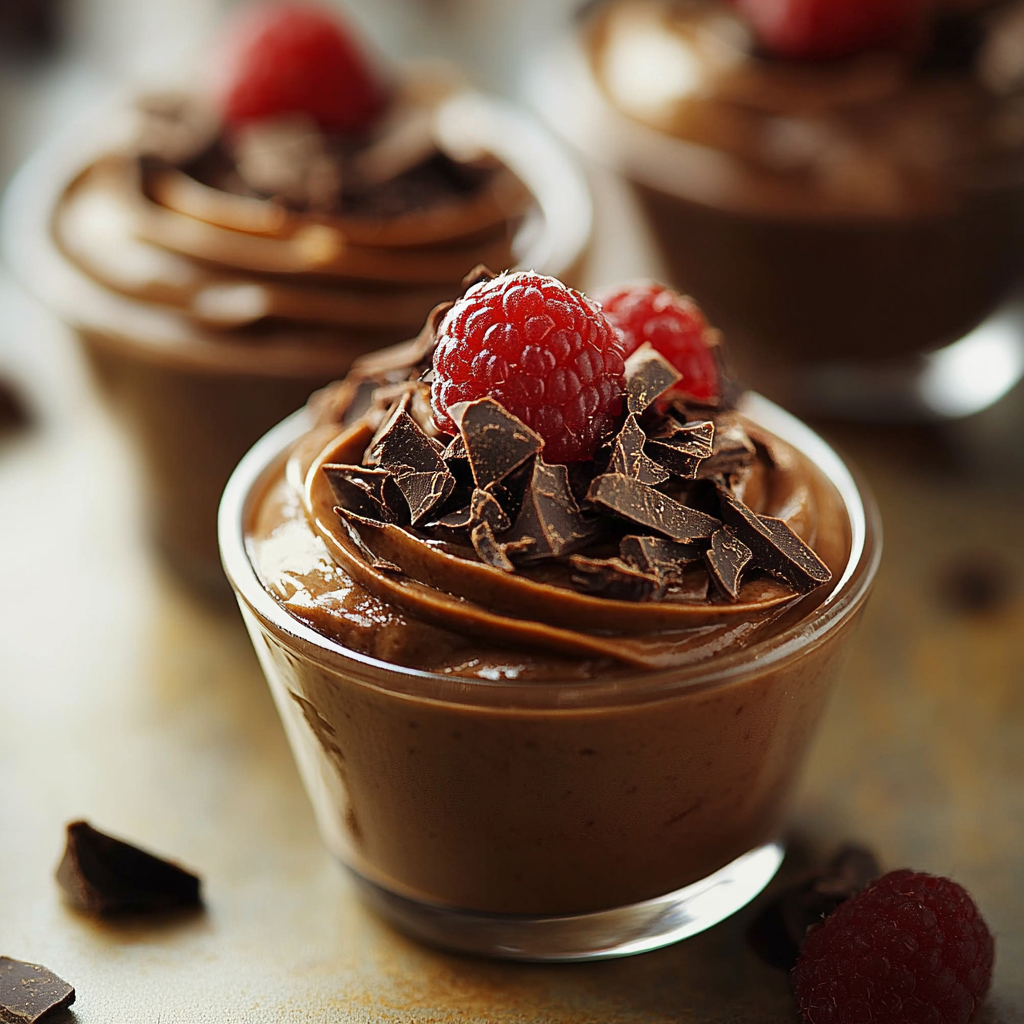
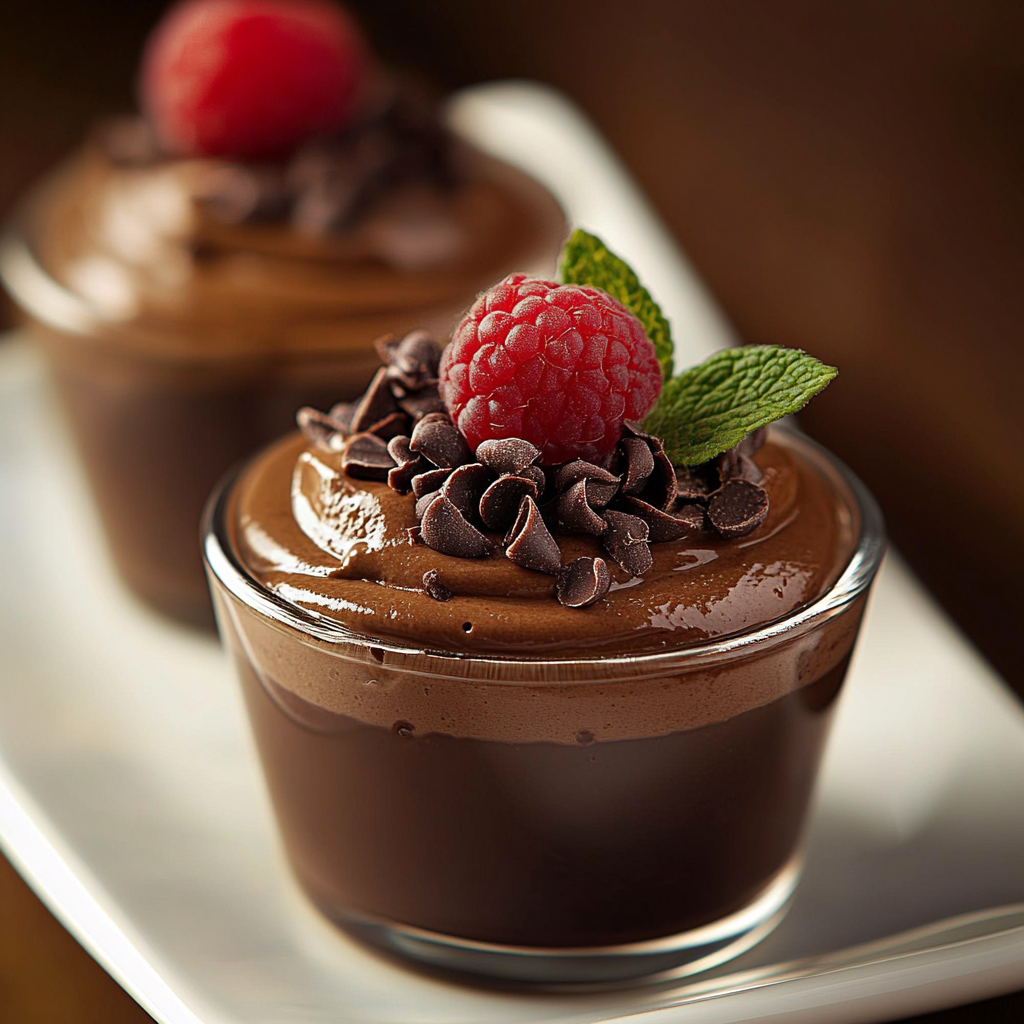
Chocolate Mousse cups are the ultimate indulgence for any chocolate lover. They combine the airy texture of mousse with rich, velvety chocolate to create a dessert that melts in your mouth. Imagine sitting down after a long day with a dessert that not only satisfies your sweet tooth but also gives you a luxurious experience. These delightful treats are perfect for special occasions or even just a cozy night in.

In this recipe, we will guide you through the process of making these dreamy Chocolate Mousse cups from scratch. You’ll discover how simple ingredients can come together to create an impressive dessert that is sure to wow your guests. The best part? These mousse cups can be prepared ahead of time, allowing you to enjoy more time with family and friends while still serving a gourmet dish.
Whether you’re planning a dinner party or simply craving something sweet, these Chocolate Mousse cups are an ideal choice. With layers of rich chocolate flavor and a light texture, this recipe balances elegance and ease perfectly. Let’s dive into the ingredients you’ll need, followed by detailed preparation steps that will have you creating this exquisite dessert in no time.
Main Ingredients
To make the perfect Chocolate Mousse cups, you’ll need just a few core ingredients that combine to create rich flavors and textures. Below is the list of essential ingredients along with their precise measurements.
Dark Chocolate (200 grams)
Dark chocolate serves as the foundation of our mousse. Choose high-quality chocolate with at least 70% cocoa content for deep flavor and richness. Dark chocolate contains antioxidants and has less sugar compared to milk chocolate, making it a healthier option for desserts. Chop the chocolate into small pieces before melting; this ensures even melting without burning.
Heavy Cream (300 ml)
Heavy cream provides the luscious texture characteristic of mousse. It adds richness and body while also allowing the dessert to achieve its lightness when whipped. Use cold heavy cream for whipping; this helps it hold its shape better once incorporated into the melted chocolate mixture. You can experiment with flavored creams if you’re looking for a twist on traditional recipes.
Egg Whites (3 large)
Egg whites give structure and aeration to your mousse. They must be whipped until stiff peaks form before folding them into the chocolate mixture. This process incorporates air into the dessert, resulting in its signature fluffy texture. Ensure no yolk enters your egg whites; any fat can hinder their ability to whip properly.
Granulated Sugar (50 grams)
Granulated sugar enhances sweetness without overpowering the rich flavors of dark chocolate. It dissolves easily when mixed with other ingredients, contributing to a smooth texture in your mousse. Adjust the amount based on your personal preference for sweetness; however, keep in mind that too much sugar can alter the overall taste balance.
Vanilla Extract (1 teaspoon)
Vanilla extract adds depth of flavor and complements the richness of dark chocolate beautifully. Always choose pure vanilla extract rather than synthetic options; it makes a noticeable difference in taste quality. Adding vanilla enhances both aroma and flavor profile in your Chocolate Mousse cups without dominating them.
How to Prepare Chocolate Mousse Cups
Making Chocolate Mousse cups may seem intimidating at first glance, but with clear instructions and careful attention to detail, you’ll find it quite manageable! Follow these step-by-step instructions for a flawless result.
Step 1: Melt the Dark Chocolate
Begin by breaking your dark chocolate into small pieces using either a sharp knife or by hand if preferable; smaller pieces melt more evenly. Place them in a heatproof bowl over simmering water—this method is known as a double boiler technique—to gently melt the chocolate without scorching it directly over heat. Stir occasionally until completely melted and smooth; remove from heat once done but ensure it cools slightly before adding other ingredients.
Step 2: Whip Heavy Cream
In another mixing bowl, pour cold heavy cream and begin whipping using an electric mixer on medium speed until soft peaks form—this should take about 2-3 minutes depending on your mixer’s strength. Be cautious not to over-whip; you want soft peaks so that when folded into melted chocolate later on, they maintain their structure without becoming grainy or butter-like.
Step 3: Prepare Egg Whites
In yet another clean mixing bowl (ensure there is no grease present), add your egg whites along with granulated sugar—this helps stabilize them while whipping—and beat on medium-high speed until stiff peaks form as well (approximately 5-7 minutes). The mixture should appear glossy and hold its shape firmly when you lift out your whisk attachment.
Step 4: Combine Ingredients
Now it’s time to combine all elements! Start by adding about one-third of whipped cream into melted dark chocolate—this lightens up the mixture initially—and gently fold using a spatula until blended well without deflating too much air from whipped cream’s volume; repeat this process two more times until all whipped cream is incorporated smoothly into chocolaty goodness!
Step 5: Fold in Egg Whites
Next comes adding beaten egg whites into your mixture carefully using similar folding techniques as before—this step is crucial since we want our final product airy yet still rich! Again ensure everything blends seamlessly but retains some volume; be gentle during this stage as over-mixing could lead us back towards density rather than lightness expected from proper mousse consistency!
Step 6: Chill Before Serving
Transfer prepared mousse mixture evenly among individual serving cups or glasses—these will showcase its lovely layers beautifully once served! Cover each cup loosely with plastic wrap or foil then refrigerate for at least two hours (or overnight if possible) before serving time arrives—a longer chilling period allows flavors develop while achieving optimal firmness necessary when presenting dessert later on!
Serving and Storing Tips
Once you’ve completed your indulgent Chocolate Mousse cups, it’s crucial to know how best to serve and store them so they remain fresh and delicious whenever enjoyed!
Serving Suggestion
When ready to serve these delightful treats after chilling adequately! You may want garnish each cup elegantly—for instance fresh berries like raspberries or strawberries atop frothy whipped cream dollop enhances visual appeal alongside taste contrasts provided by tartness offsetting sweetness found within decadent chocolaty base itself! Consider drizzling melted dark chocolate sauce over top too—extra touch elevates presentation even further while providing additional richness everyone loves savoring during their bites!
Storage Guidelines
If you happen not finish all servings right away don’t worry—Chocolate Mousse keeps well stored appropriately! Cover tightly using plastic wrap ensuring minimal air exposure which maintains moisture within each cup preventing drying out during storage period lasts up till four days maximum inside refrigerator safely! Avoid freezing since texture changes adversely upon thawing leading less enjoyable experience compared fresh-made versions enjoyed straight after preparation instead!
Enjoy making these heavenly Chocolate Mousse cups at home—you’re sure impress anyone lucky enough indulge alongside you!
Mistakes to avoid:
Using Low-Quality Chocolate
One of the biggest mistakes when making chocolate mousse cups is using low-quality chocolate. The quality of chocolate directly impacts the flavor and texture of your dessert. When you choose a poor-quality product, you might end up with a mousse that tastes waxy or overly sweet. Instead, opt for high-quality dark chocolate with a cocoa content of at least 70%. This ensures a rich flavor and a smooth texture. Remember that chocolate is the star ingredient in your mousse cups; thus, investing in good chocolate will elevate your dessert significantly.
Overwhipping the Cream
Another common error is overwhipping the cream. While it is essential to achieve stiff peaks for the right consistency, overwhipping can lead to butter forming and a grainy texture in your mousse. To avoid this, whip your cream until it reaches soft peaks and then gradually incorporate it into your chocolate mixture. Be gentle during this process; folding rather than stirring helps maintain airiness and ensures a light, fluffy mousse cup.
Skipping Tempering the Chocolate
Tempering chocolate is often overlooked but crucial for achieving that glossy finish in your chocolate mousse cups. If you skip this step, you may end up with a dull appearance and undesirable texture. To temper chocolate, melt two-thirds of your chocolate over low heat, then add the remaining third to cool it down before using it in your recipe. This technique helps stabilize the cocoa butter crystals, giving your mousse cups an appealing shine.

Tips and tricks:
Use Quality Ingredients
To create delicious chocolate mousse cups, start with quality ingredients—this includes organic eggs and heavy cream. Organic eggs have richer flavors compared to conventional ones, enhancing the overall taste of your dessert. Always select fresh heavy cream since its fat content contributes to creaminess and mouthfeel. These simple choices can dramatically improve the taste and presentation of your mousse.
Chill Your Equipment
For perfect whipped cream, consider chilling your mixing bowl and beaters before starting. Cold equipment helps maintain the temperature of the cream while whipping, leading to better volume and stability. Simply place them in the refrigerator or freezer for about 10 minutes before use. This small step makes all the difference in achieving that light, airy texture essential for great chocolate mousse cups.
Experiment with Flavors
While classic chocolate is delicious on its own, don’t hesitate to experiment with flavors. Adding a hint of espresso powder or vanilla extract can enhance the depth of flavor in your mousse cups without overpowering them. You could also try incorporating orange zest or sea salt for an unexpected twist that surprises your taste buds. These additions can elevate your dessert from ordinary to extraordinary.
Suggestions for Chocolate Mousse cups:
Garnish Thoughtfully
When it comes to presenting your chocolate mousse cups, thoughtful garnishing plays a crucial role. Consider topping them with fresh berries—like raspberries or strawberries—adding both color and tartness that complements the richness of chocolate. Whipped cream can also be piped on top for added elegance. Another delightful option includes shaved chocolate or cacao nibs for added texture and visual appeal.
Serve at the Right Temperature
The temperature at which you serve chocolate mousse cups affects their taste and texture significantly. Ideally, serve them chilled but not frozen; this allows flavors to bloom while maintaining a soft consistency. Let them sit out for about 10 minutes before serving so they reach an ideal eating temperature without losing their structured form.
Pair With Complementary Drinks
Pairing drinks thoughtfully with your chocolate mousse cups enhances the overall experience for guests. A bold red wine or coffee can complement rich desserts beautifully, bringing out hidden notes within the flavors of your mousse cups. Alternatively, consider serving them alongside a light dessert wine like Port or even herbal teas that cleanse palates between bites while enhancing enjoyment without overwhelming sweetness.
FAQs for Chocolate Mousse cups :
What are Chocolate Mousse cups made of?
Chocolate Mousse cups consist of rich chocolate, cream, and eggs, creating a light and airy texture. The key ingredients include high-quality dark chocolate, which provides depth of flavor, heavy cream for creaminess, and egg whites, which add volume and fluffiness. Many recipes also incorporate sugar to sweeten the mousse, alongside vanilla extract for enhanced flavor. Some versions might include coffee or liqueur to deepen the chocolate taste. For a unique twist, you can substitute regular chocolate with white or milk chocolate. The ingredients come together to create a dessert that is both indulgent and elegant. When served in small cups or glasses, this treat becomes visually appealing as well as delicious.
How long does it take to prepare Chocolate Mousse cups?
Preparing Chocolate Mousse cups typically takes around 30 minutes of active time in the kitchen. This includes melting the chocolate, whipping the cream, and folding in the ingredients to achieve that perfect airy texture. However, it’s important to consider chilling time, which can range from 2 to 4 hours depending on your recipe. Allowing the mousse to chill is crucial for it to set properly and develop its rich flavors. If you’re in a hurry, you can shorten the chilling time by placing the mousse in smaller serving dishes. Overall, while the preparation is quick and straightforward, patience is key when waiting for the mousse to achieve its ideal consistency.
Can I make Chocolate Mousse cups ahead of time?
Yes, you can definitely make Chocolate Mousse cups ahead of time! In fact, preparing them a day in advance allows the flavors to meld beautifully while ensuring they set perfectly in the fridge. Simply prepare your mousse according to your recipe instructions and then transfer it into individual serving cups or bowls. Cover them with plastic wrap or lids before placing them in the refrigerator. This method not only saves you time on the day of serving but also enhances the flavor profile of your mousse. Just remember that you should consume them within three to four days for optimal freshness.
How do I store leftover Chocolate Mousse cups?
To store leftover Chocolate Mousse cups effectively, ensure they are covered securely with plastic wrap or stored in airtight containers. Proper storage will prevent any absorption of odors from other foods in your refrigerator and keep your dessert fresh. Ideally, consume leftover mousse within three to four days for best taste and texture. If you notice any changes in smell or texture after this point, it’s best to discard them. Avoid freezing chocolate mousse because freezing can alter its creamy consistency upon thawing.
Can I use different types of chocolate for my Chocolate Mousse cups?
Absolutely! Using different types of chocolate can create distinct flavors in your Chocolate Mousse cups. Dark chocolate is traditional because it offers a rich taste; however, you can experiment with milk chocolate for a sweeter profile or white chocolate for a lighter dessert experience. Additionally, combining various chocolates can result in complex flavors; for example, mixing dark and milk chocolates creates a balanced sweetness with depth. Just be sure that whatever type you choose melts smoothly so that it incorporates well into your mousse mixture.
Are there any variations for making Chocolate Mousse cups?
There are numerous variations available for making Chocolate Mousse cups! You can incorporate flavored extracts such as peppermint or almond for added richness and complexity. For a fruity twist, consider adding pureed berries like raspberries or strawberries into the mix or using fruit toppings when serving. If you’re looking for a healthier alternative, try substituting some heavy cream with Greek yogurt; this lowers fat content while still providing creaminess. Vegan options exist too by using aquafaba (chickpea water) instead of egg whites paired with dairy-free chocolates.
Print
Irresistible Chocolate Mousse Cups Recipe
- Total Time: 30 minutes
- Yield: 6 servings
Description
Indulge in the rich and airy delight of Chocolate Mousse Cups, a dessert that marries elegance with simplicity. These luscious treats are perfect for any occasion, from intimate dinners to festive gatherings. Crafted with high-quality dark chocolate and whipped to perfection, each cup offers a melt-in-your-mouth experience that’s impossible to resist. The best part? They can be made ahead of time, allowing you to savor every moment with your guests.
Ingredients
– 200g dark chocolate (70% cocoa)
– 300ml heavy cream
– 3 large egg whites
– 50g granulated sugar
– 1 tsp vanilla extract
Instructions
1. Melt the dark chocolate in a heatproof bowl over simmering water until smooth; let it cool slightly.
2. Whip the cold heavy cream until soft peaks form; set aside.
3. In a separate bowl, beat egg whites and sugar until stiff peaks form.
4. Gently fold one-third of the whipped cream into the melted chocolate, then gradually fold in the rest. Follow by carefully folding in the beaten egg whites until combined.
5. Divide the mixture into serving cups and refrigerate for at least 2 hours before serving.
Notes
For added flavor, consider incorporating espresso powder or orange zest into your mousse mixture. To garnish, top with fresh berries or shaved chocolate for an elegant touch.
- Prep Time: 30 minutes
- Cook Time: 0 minutes
Nutrition
- Calories: 290
- Fat: 23g
- Carbohydrates: 18g
- Protein: 4g
In summary, making delectable Chocolate Mousse cups combines simplicity with elegance—ideal for any occasion from casual gatherings to formal dinners. The essential components include quality dark chocolate, heavy cream, eggs or egg substitutes depending on dietary preferences, sugar for sweetness, and optional flavorings such as vanilla extract or coffee liqueur for enhancement. While preparation takes about 30 minutes plus chilling time ranging from 2 to 4 hours, this delicious dessert rewards patience with its delightful taste and texture.
Storing leftover mousse properly ensures freshness over several days without compromising quality; however consuming it within three to four days is recommended for optimal enjoyment. Finally, don’t hesitate to explore variations with different chocolates or even incorporate flavors that excite your palate! Whether enjoyed alone or shared among friends and family during special moments, these Chocolate Mousse cups are sure to impress anyone who experiences their rich yet airy delight.

