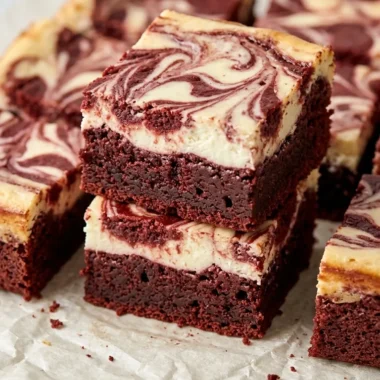
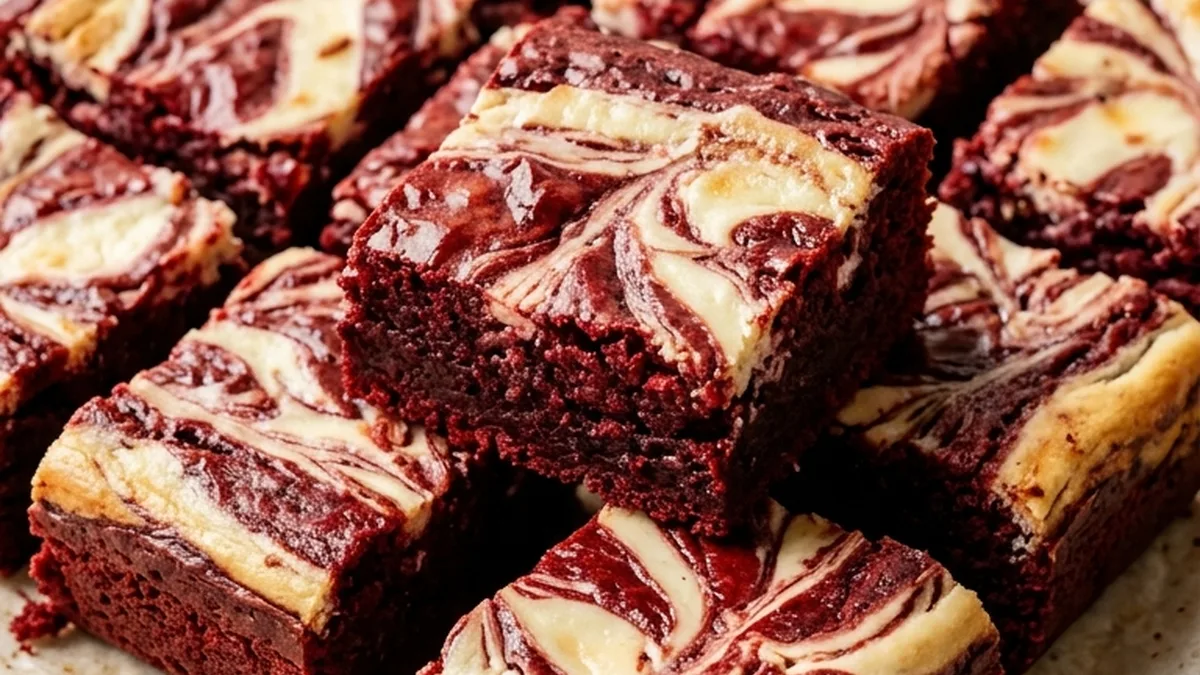
Red Velvet Brownies combine the rich cocoa flavor of classic brownies with the beautiful red color and subtle tanginess of red velvet cake. These brownies have a dense, fudgy center, tender edges, and ribbons of creamy cheesecake filling. Each bite brings together chocolate, vanilla, and cream cheese flavors in a dessert that's rich without being overly sweet.
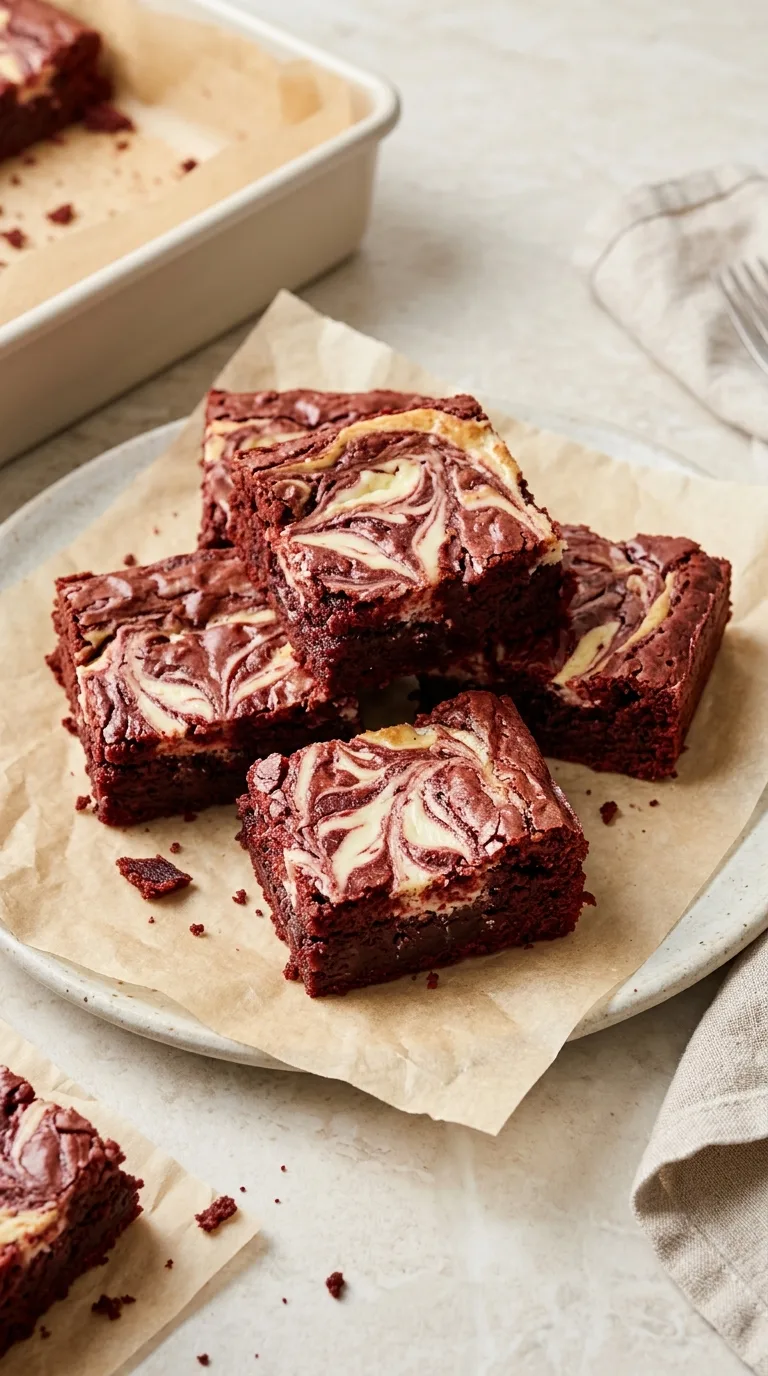
This version uses melted butter for a moist, chewy texture and a simple cream cheese swirl that bakes directly into the brownie batter. You don't need an electric mixer for the brownie base, and the entire recipe fits into one 8-inch square baking pan. Let the brownies cool completely before slicing to help the layers hold their shape.
Why This Recipe Works
Melted butter creates a fudgy texture: Using melted butter instead of creaming softened butter with sugar produces a denser brownie with a moist, chewy center.
A modest amount of cocoa preserves the red velvet character. The cocoa adds gentle chocolate flavor without overwhelming the vanilla notes or making the batter too dark.
White vinegar adds traditional red velvet tang. A small amount provides acidity that complements the cocoa and balances the sweetness.
Cream cheese adds contrast: The lightly sweetened cheesecake swirl brings a smooth, tangy element that balances the rich brownie base.
Cooling helps the brownies set: Allowing the brownies to cool completely helps the crumb and cream cheese layer firm up, making clean slices easier.
Equipment Needed
- 8 x 8-inch (20 x 20 cm) square metal baking pan
- Parchment paper
- Medium mixing bowl
- Small mixing bowl
- Whisk
- Rubber spatula
- Hand mixer or sturdy whisk for the cream cheese mixture
- Butter knife or wooden skewer for swirling
- Wire cooling rack
- Kitchen scale for accurate measurements
Ingredients List

For the Red Velvet Brownie Batter
- 1/2 cup (113 g) unsalted butter, melted and slightly cooled
- 1 cup (200 g) granulated sugar
- 2 large eggs (about 100 g without shells), at room temperature
- 1 teaspoon (5 ml) vanilla extract
- 1 teaspoon (5 ml) white vinegar
- 1 teaspoon (5 ml) red gel food coloring, or enough to achieve a deep red shade
- 3/4 cup (90 g) all-purpose flour, spooned and leveled
- 2 tablespoons (10 g) unsweetened natural cocoa powder, sifted
- 1/4 teaspoon (1.5 g) fine salt
For the Cream Cheese Swirl
- 4 ounces (113 g) full-fat block cream cheese, softened to room temperature
- 3 tablespoons (38 g) granulated sugar
- 1 large egg yolk (about 18 g), at room temperature
- 1/2 teaspoon (2.5 ml) vanilla extract
Ingredient Notes and Substitutions
Unsalted Butter: Butter provides richness, moisture, and the dense texture associated with fudgy brownies. Melted butter also makes the batter easy to prepare without an electric mixer. Salted butter can replace unsalted butter in the same quantity. Reduce the added salt to a small pinch, since the salt content of different butter brands varies.
Natural Cocoa Powder: Natural unsweetened cocoa powder gives the brownies their mild chocolate flavor while allowing the red coloring to remain noticeable. Dutch-process cocoa powder can be used in the same quantity, but its darker color may produce a deeper burgundy shade, and its flavor will be smoother and less acidic.
Red Gel Food Coloring: Red gel food coloring creates a concentrated red shade without adding much liquid to the batter. Liquid red food coloring can also work, although it is less concentrated. Start with 2 teaspoons (10 ml) and add a little more only if needed. Using large quantities of liquid coloring can slightly change the batter's consistency. The coloring can also be omitted for cocoa brownies with a cream cheese swirl, but they will not have the traditional red velvet appearance.
Full-Fat Cream Cheese: Full-fat block cream cheese provides the creamy, tangy topping and helps the swirl hold its shape during baking. Reduced-fat block cream cheese can be substituted, although the topping may be softer and slightly less rich. Whipped or spreadable cream cheese is not recommended because its different moisture and air content can affect the texture.
All-Purpose Flour: All-purpose flour provides enough structure to hold the brownies together while keeping the center fudgy. A cup-for-cup gluten-free baking flour blend containing xanthan gum may work as an alternative, although the brownies may be more delicate or slightly grainier. This substitution would benefit from a separate kitchen check.
Step-by-Step Instructions
1. Prepare the Oven and Baking Pan
Preheat the oven to 350°F (175°C). Line an 8 x 8-inch (20 x 20 cm) metal baking pan with parchment paper, leaving an overhang on two opposite sides to help lift out the brownies later.
Lightly crease the parchment into the corners so it sits flat against the pan.

2. Mix the Butter and Sugar
Pour the 1/2 cup (113 g) melted, slightly cooled butter into a medium mixing bowl.
Add the 1 cup (200 g) granulated sugar and whisk for about 1 minute, until the mixture looks glossy and evenly combined.
It may still appear slightly grainy, which is normal.

3. Add the Eggs, Vanilla, Vinegar, and Coloring
Add the 2 large eggs, one at a time, whisking until each is fully incorporated.
Mix in the 1 teaspoon (5 ml) vanilla extract, 1 teaspoon (5 ml) white vinegar, and 1 teaspoon (5 ml) red gel food coloring.
The batter should become smooth, glossy, and evenly red. If the color looks streaky, continue mixing gently until no streaks remain.
4. Fold in the Dry Ingredients
Add the 3/4 cup (90 g) all-purpose flour, 2 tablespoons (10 g) sifted natural cocoa powder, and 1/4 teaspoon (1.5 g) fine salt.
Fold gently with a rubber spatula until no dry flour remains.
The finished batter should be thick, smooth, and spreadable rather than runny. Avoid vigorous mixing once the flour is added, which can make the brownies tough.
5. Prepare the Cream Cheese Swirl
In a separate small bowl, beat the 4 ounces (113 g) softened cream cheese with the 3 tablespoons (38 g) granulated sugar until smooth.
Add the 1 large egg yolk and 1/2 teaspoon (2.5 ml) vanilla extract. Mix until creamy and free of visible lumps.
The mixture should be thick enough to sit in soft dollops on the brownie batter. If the cream cheese is lumpy, continue mixing until smooth.
6. Fill the Baking Pan
Transfer the red velvet brownie batter to the prepared pan, reserving about 1/4 cup of batter for the decorative swirl.
Spread the remaining batter evenly into the corners using a rubber spatula.
The layer should be relatively level so the brownies bake evenly.

7. Add and Swirl the Cream Cheese Topping
Spoon the cream cheese mixture in small dollops over the brownie batter.
Add small spoonfuls of the reserved red velvet batter between the cream cheese dollops.
Use a butter knife or wooden skewer to make a few gentle figure-eight motions through the surface.
Stop once distinct red and white ribbons appear. Too much swirling will blend the layers and reduce the marbled appearance.

8. Bake the Brownies
Place the pan on the center oven rack and bake at 350°F (175°C) for 30–35 minutes.
The brownies are ready when the edges look set, the cream cheese surface no longer looks wet, and the center has only a slight movement when the pan is gently nudged.
Insert a toothpick into a brownie-only section near the center. It should come out with a few moist crumbs, not liquid batter. Avoid checking through a cream cheese swirl, which can give a misleading result.
If the center still looks wet, bake for another 3–5 minutes and check again.

9. Cool Completely
Remove the pan from the oven and place it on a wire rack.
Allow the brownies to cool in the pan for 1 hour.
Use the parchment overhang to lift them carefully onto the rack or a cutting board. Let them rest for another 10 minutes, or until completely cool and firm enough to slice.
If they still feel warm or soft, allow additional cooling time.
10. Slice and Serve
Using a sharp knife, cut the cooled brownies into 16 equal squares, making four rows in each direction.
Wipe the knife clean between cuts to keep the cream cheese swirl neat.
Serve at room temperature or slightly chilled, depending on your preferred texture.
Storage, Freezing, and Make-Ahead Instructions
Refrigerator Storage: Because these brownies contain a cream cheese and egg topping, store them in the refrigerator rather than leaving them at room temperature for extended periods. Place the cooled brownies in an airtight container, separating stacked layers with parchment paper. Refrigerate for up to 4 days. For a softer texture, let an individual brownie sit at room temperature for about 15–20 minutes before serving. Return any remaining brownies to the refrigerator promptly.
Freezing Instructions: Red Velvet Brownies can be frozen for up to 2 months for good quality. Allow the brownies to cool completely, then cut them into individual squares. Wrap each square tightly in plastic wrap and place the wrapped pieces in a freezer-safe airtight container or freezer bag. Freeze without additional toppings or decorations to preserve the surface.
Thawing Instructions: Transfer frozen brownies to the refrigerator and thaw overnight. Keep them covered during thawing to prevent condensation from collecting directly on the surface. For a softer texture, let thawed brownies sit briefly at room temperature before serving.
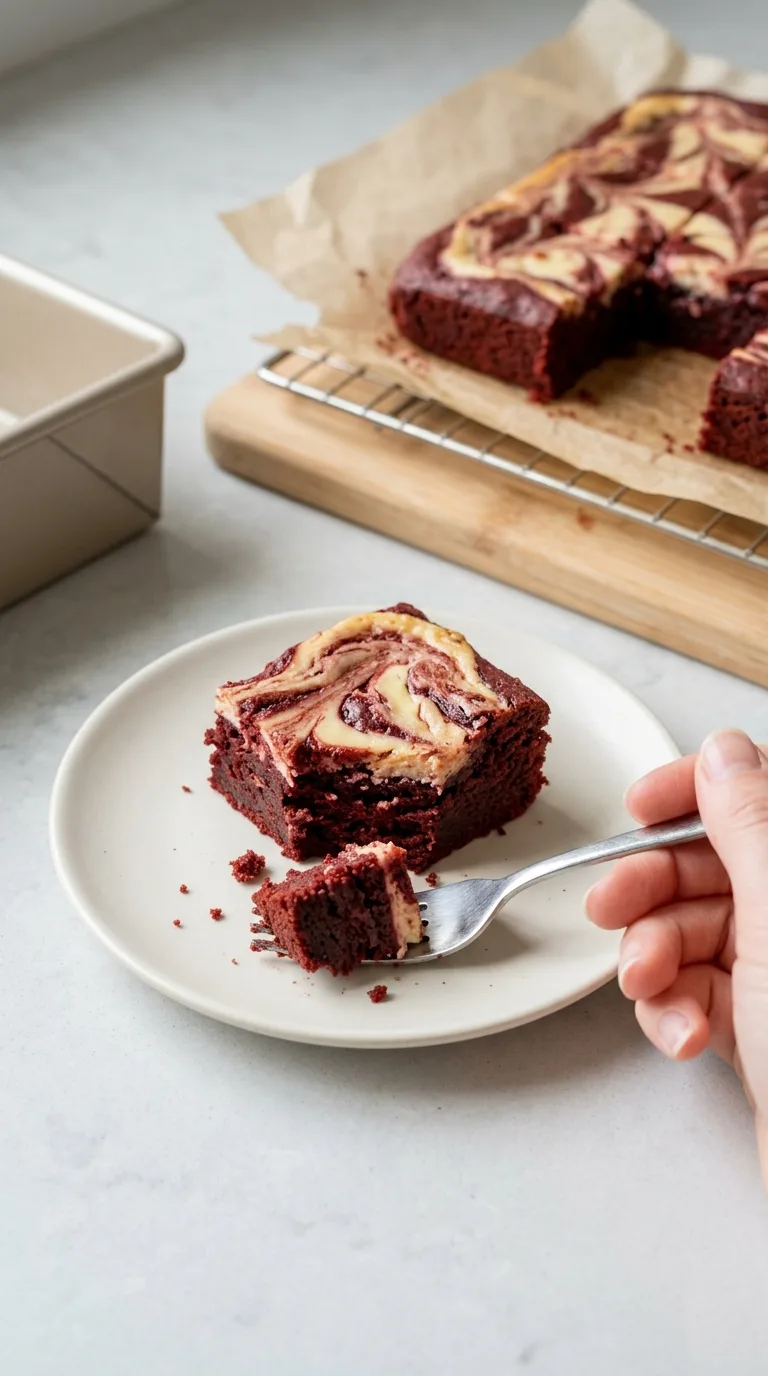
Make-Ahead Instructions: These brownies are convenient to prepare one day before serving. Bake, cool completely, cover, and refrigerate overnight. The cream cheese swirl will become firmer during chilling, making the brownies easier to slice into neat squares. For the most attractive presentation, cut the brownies shortly before serving.
Frequently Asked Questions
Can I make Red Velvet Brownies ahead of time?
Yes. Bake the brownies a day ahead, let them cool completely, and refrigerate them in an airtight container. The cream cheese swirl will firm up overnight, making slicing easier. For a softer brownie texture, let them sit at room temperature briefly before serving.
How do I know when Red Velvet Brownies are done?
Look for set edges, a cream cheese topping that no longer appears wet, and a center that moves only slightly when the pan is gently nudged. A toothpick inserted into a brownie-only section should come out with a few moist crumbs. Wet batter indicates that more baking time is needed.
Why are my Red Velvet Brownies cakey instead of fudgy?
Cakey brownies can result from too much flour, excessive mixing after adding flour, or overbaking. Weighing the flour, folding gently, and removing the pan when moist crumbs remain on a toothpick will help maintain a dense, fudgy texture.
Can I make these brownies without food coloring?
Yes. Omit the red food coloring and follow the remaining recipe as written. The brownies will have a natural cocoa-brown color instead of a red velvet appearance, but the cocoa flavor and cream cheese swirl will remain.
Can I use a 9 x 9-inch baking pan instead?
Yes, although the brownies will be thinner because the batter spreads over a larger surface. Begin checking for doneness around 23–25 minutes, then continue baking as needed. The brownies may have a slightly less fudgy center than those baked in the recommended 8-inch square pan.
Ingredients
Method
- Preheat the oven to 350°F (175°C). Line an 8 x 8-inch (20 x 20 cm) metal baking pan with parchment paper, leaving an overhang on two opposite sides to help lift out the brownies later. Lightly crease the parchment into the corners so it sits flat against the pan.
- Pour the 1/2 cup (113 g) melted, slightly cooled butter into a medium mixing bowl. Add the 1 cup (200 g) granulated sugar and whisk for about 1 minute, until the mixture looks glossy and evenly combined. It may still appear slightly grainy, which is normal.
- Add the 2 large eggs, one at a time, whisking until each is fully incorporated. Mix in the 1 teaspoon (5 ml) vanilla extract, 1 teaspoon (5 ml) white vinegar, and 1 teaspoon (5 ml) red gel food coloring. The batter should become smooth, glossy, and evenly red. If the color looks streaky, continue mixing gently until no streaks remain.
- Add the 3/4 cup (90 g) all-purpose flour, 2 tablespoons (10 g) sifted natural cocoa powder, and 1/4 teaspoon (1.5 g) fine salt. Fold gently with a rubber spatula until no dry flour remains. The finished batter should be thick, smooth, and spreadable rather than runny. Avoid vigorous mixing once the flour is added, which can make the brownies tough.
- In a separate small bowl, beat the 4 ounces (113 g) softened cream cheese with the 3 tablespoons (38 g) granulated sugar until smooth. Add the 1 large egg yolk and 1/2 teaspoon (2.5 ml) vanilla extract. Mix until creamy and free of visible lumps. The mixture should be thick enough to sit in soft dollops on the brownie batter. If the cream cheese is lumpy, continue mixing until smooth.
- Transfer the red velvet brownie batter to the prepared pan, reserving about 1/4 cup of batter for the decorative swirl. Spread the remaining batter evenly into the corners using a rubber spatula. The layer should be relatively level so the brownies bake evenly.
- Spoon the cream cheese mixture in small dollops over the brownie batter. Add small spoonfuls of the reserved red velvet batter between the cream cheese dollops. Use a butter knife or wooden skewer to make a few gentle figure-eight motions through the surface. Stop once distinct red and white ribbons appear. Too much swirling will blend the layers and reduce the marbled appearance.
- Place the pan on the center oven rack and bake at 350°F (175°C) for 30–35 minutes. The brownies are ready when the edges look set, the cream cheese surface no longer looks wet, and the center has only a slight movement when the pan is gently nudged. Insert a toothpick into a brownie-only section near the center. It should come out with a few moist crumbs, not liquid batter. Avoid checking through a cream cheese swirl, which can give a misleading result. If the center still looks wet, bake for another 3–5 minutes and check again.
- Remove the pan from the oven and place it on a wire rack. Allow the brownies to cool in the pan for 1 hour. Use the parchment overhang to lift them carefully onto the rack or a cutting board. Let them rest for another 10 minutes, or until completely cool and firm enough to slice. If they still feel warm or soft, allow additional cooling time.
- Using a sharp knife, cut the cooled brownies into 16 equal squares, making four rows in each direction. Wipe the knife clean between cuts to keep the cream cheese swirl neat. Serve at room temperature or slightly chilled, depending on your preferred texture.

Kate Handsom
Home cook and recipe creator behind Hibord in Austin, Texas—sharing cozy comfort food, crowd-pleasing party dips, and dependable weeknight dinners built with everyday ingredients.