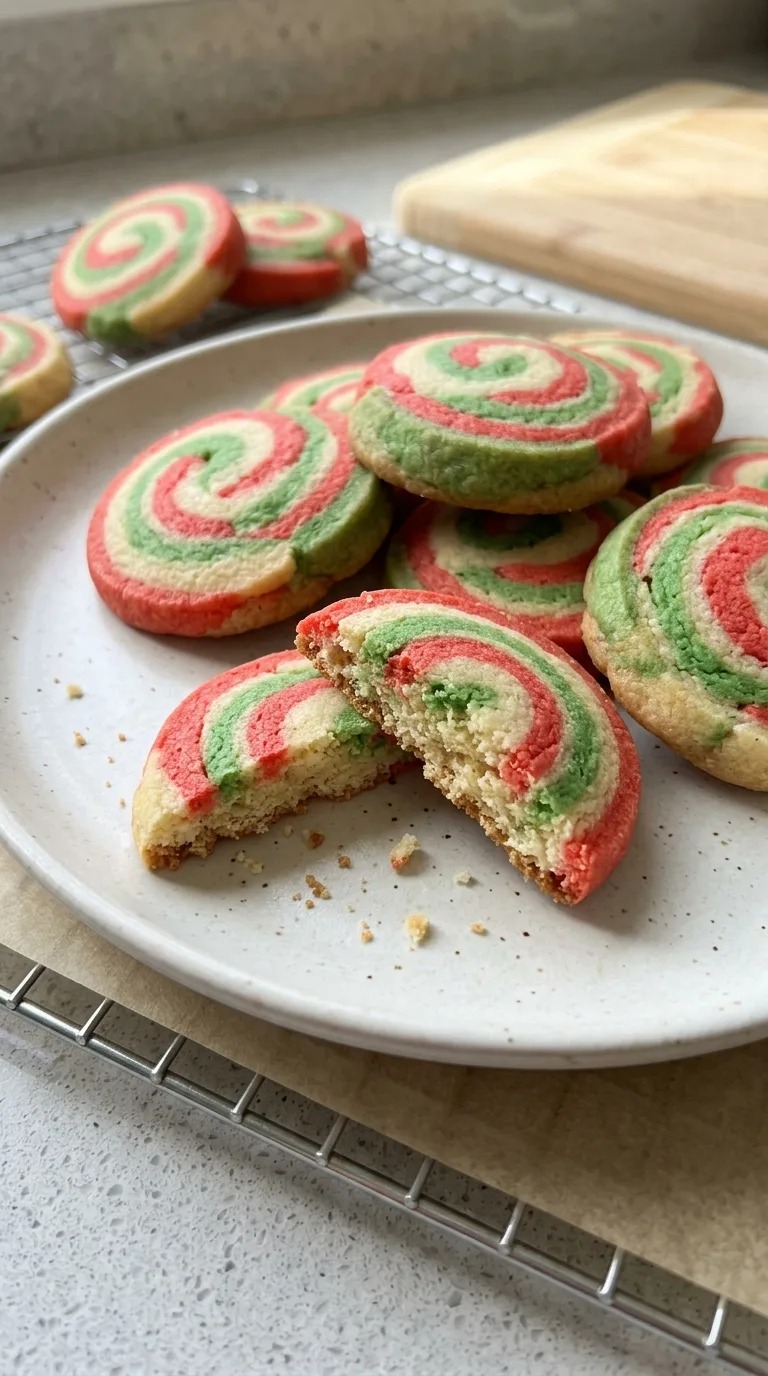
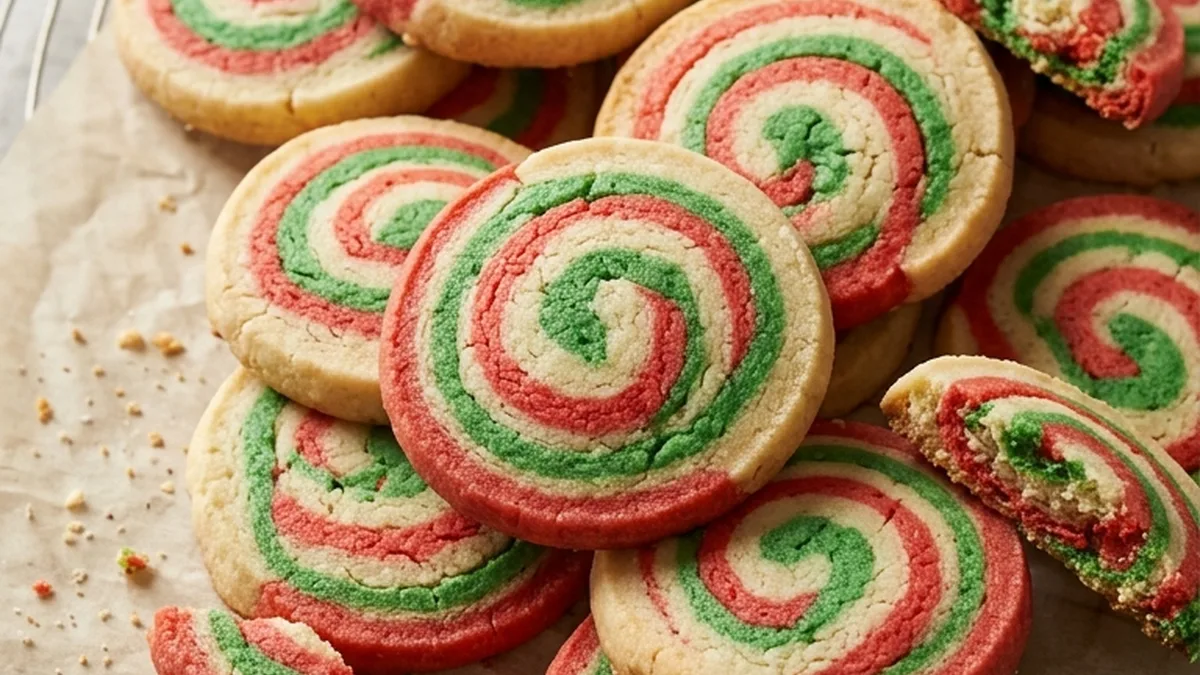
Delicious Christmas Swirl Butter Cookies are festive slice-and-bake cookies featuring beautiful red, green, and buttery vanilla-colored spirals. Made with a rich butter cookie dough, they have lightly crisp edges, tender centers, and a delicate vanilla flavor. Their colorful pinwheel design makes them a cheerful addition to Christmas cookie platters, holiday dessert tables, and homemade cookie gift boxes.
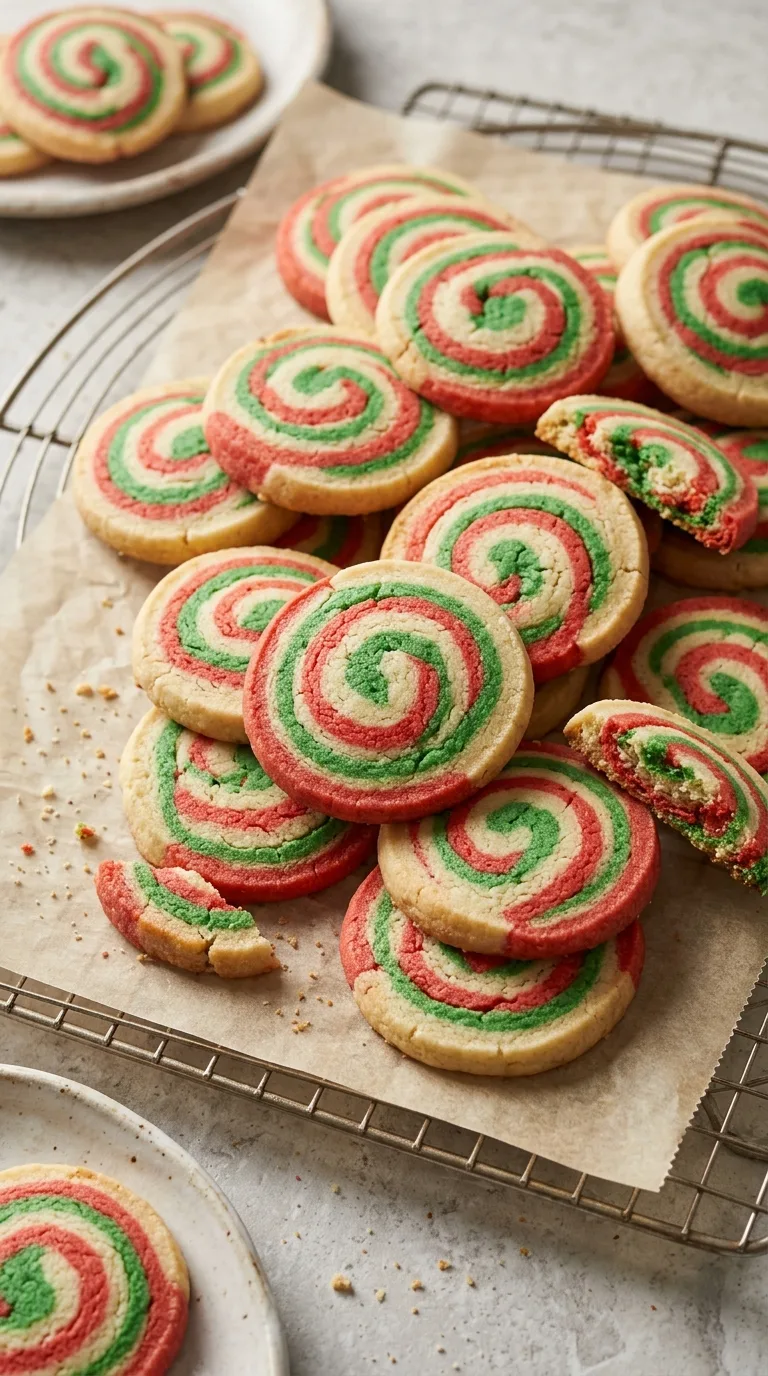
The secret to their defined swirls is working with dough that is soft enough to roll but firm enough to hold its shape. This recipe uses one simple butter cookie dough divided into three portions, with red and green coloring added to create the holiday pattern. Chilling the rolled dough before slicing helps keep the spirals neat and prevents excessive spreading during baking.
Why This Recipe Works
- Butter creates a tender, rich cookie. Its fat content gives the cookies their delicate texture and helps the edges become lightly crisp without requiring a complicated dough.
- Powdered sugar produces a fine crumb. Unlike granulated sugar, it blends smoothly into the butter and contributes to a more delicate, shortbread-like texture.
- Three dough colors create a clear holiday swirl. Layering the natural vanilla dough with red and green portions gives every sliced cookie a distinctive spiral pattern.
- Chilling helps maintain the design. Firm dough slices more cleanly and spreads less in the oven, keeping the colored layers recognizable.
- The slice-and-bake method makes portioning easier. Once the dough is rolled into a log, the cookies can be cut into evenly sized rounds for more consistent baking.
Equipment Needed
- Stand mixer with paddle attachment or electric hand mixer
- Large mixing bowl
- Digital kitchen scale or measuring cups and spoons
- Three small bowls for dividing the dough
- Rolling pin
- Parchment paper
- Plastic wrap
- Sharp, thin-bladed knife
- Two large rimmed baking sheets, approximately 13 × 18 inches (33 × 46 cm)
- Wire cooling rack
Ingredients You'll Need
For the Butter Cookie Dough:
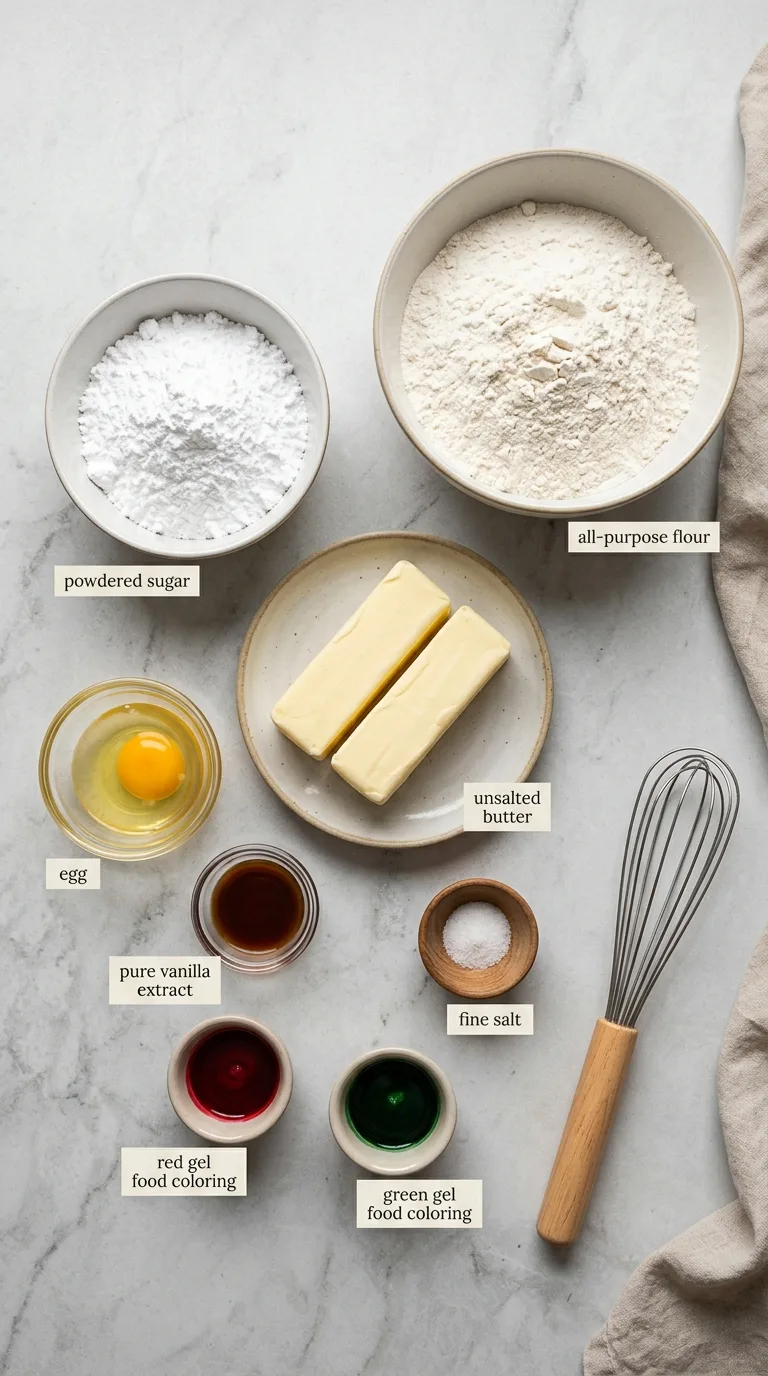
- 1 cup (226 g) unsalted butter, softened to room temperature, not melted
- 1 cup (120 g) powdered sugar, sifted if lumpy
- 1 large egg (about 50 g without shell), room temperature
- 2 teaspoons (10 ml) pure vanilla extract, for flavoring
- 2 3/4 cups (330 g) all-purpose flour, spooned and leveled, or weighed
- 1/2 teaspoon (about 3 g) fine salt, for balancing sweetness
- 1/4 teaspoon (about 1 ml) red gel food coloring, for the red dough portion
- 1/4 teaspoon (about 1 ml) green gel food coloring, for the green dough portion
- Gel coloring is recommended because it creates stronger colors without adding as much moisture as liquid food coloring.
Ingredient Notes and Substitutions
Unsalted Butter
Butter is the main source of richness and tenderness in these cookies. Use softened butter that yields slightly when pressed but still holds its shape.
Salted butter can replace unsalted butter, but the finished cookies may taste noticeably saltier. If using salted butter, omit the listed fine salt. Avoid replacing butter with oil because liquid fat will not provide the same dough structure or slice-and-bake texture.
Powdered Sugar
Powdered sugar dissolves readily into the butter, helping produce a smooth dough and delicate crumb.
Granulated sugar is not a direct texture-equivalent substitute. It generally creates a slightly coarser cookie with more noticeable crispness and may affect spreading. For the intended tender texture, powdered sugar is preferable.
All-Purpose Flour
All-purpose flour provides enough structure for the dough to be rolled, layered, sliced, and baked without losing its shape.
A commercial gluten-free all-purpose flour blend formulated for direct substitution may work, particularly one containing a binder. However, the dough may be more fragile, and the finished cookies can have a sandier texture. The substitution would need separate verification.
Vanilla Extract
Vanilla adds a warm, familiar flavor that complements the butter without overpowering the cookies.
Almond extract can be used for a different flavor profile, but it is considerably stronger. A direct equal-volume substitution is not recommended. For the intended classic butter cookie flavor, keep the vanilla extract.
Red and Green Gel Food Coloring
Gel coloring provides concentrated color while minimizing added liquid. This matters because excess moisture can soften the dough and blur the boundaries between the colored layers.
Liquid food coloring can be used, but it may require more product to reach a similar shade and can make the dough sticky. Concentrated gel coloring is the more reliable choice for distinct pinwheel cookies.
How to Make Delicious Christmas Swirl Butter Cookies
Beat the butter and sugar until smooth
Place the 1 cup (226 g) softened unsalted butter and 1 cup (120 g) powdered sugar in a large mixing bowl.
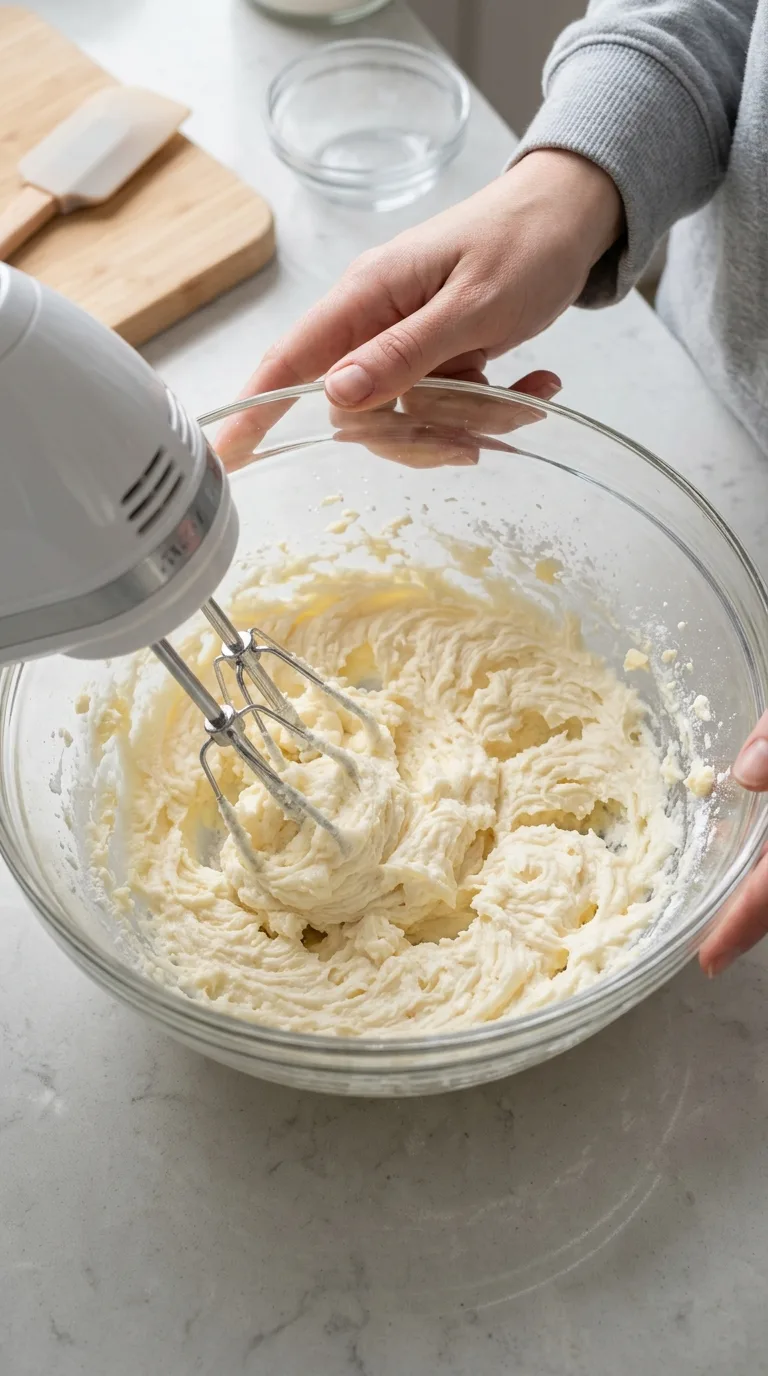
Beat with an electric mixer on medium speed for about 2–3 minutes, until the mixture looks smooth, creamy, and slightly lighter in color.
Avoid excessive whipping. Too much incorporated air can encourage the cookies to puff and distort their spiral shape.
Add the egg and vanilla
Add the 1 large egg (about 50 g without shell) and 2 teaspoons (10 ml) pure vanilla extract.
Mix on low to medium speed until incorporated, scraping down the sides of the bowl as needed.
The mixture should look creamy and mostly uniform. A slightly curdled appearance at this stage is not necessarily a problem; it should come together when the flour is added.
Incorporate the dry ingredients
Add the 2 3/4 cups (330 g) all-purpose flour and 1/2 teaspoon (about 3 g) fine salt.
Mix on low speed just until the flour disappears and a soft dough forms.
The dough should feel pliable and slightly firm rather than wet or sticky. If it looks crumbly, gently press a small amount together with your fingers. It should hold its shape without falling apart.
Avoid prolonged mixing, which can make the cookies tougher.
Divide and color the dough
Divide the dough into three equal portions.
Leave one portion uncolored to create the natural vanilla layer.
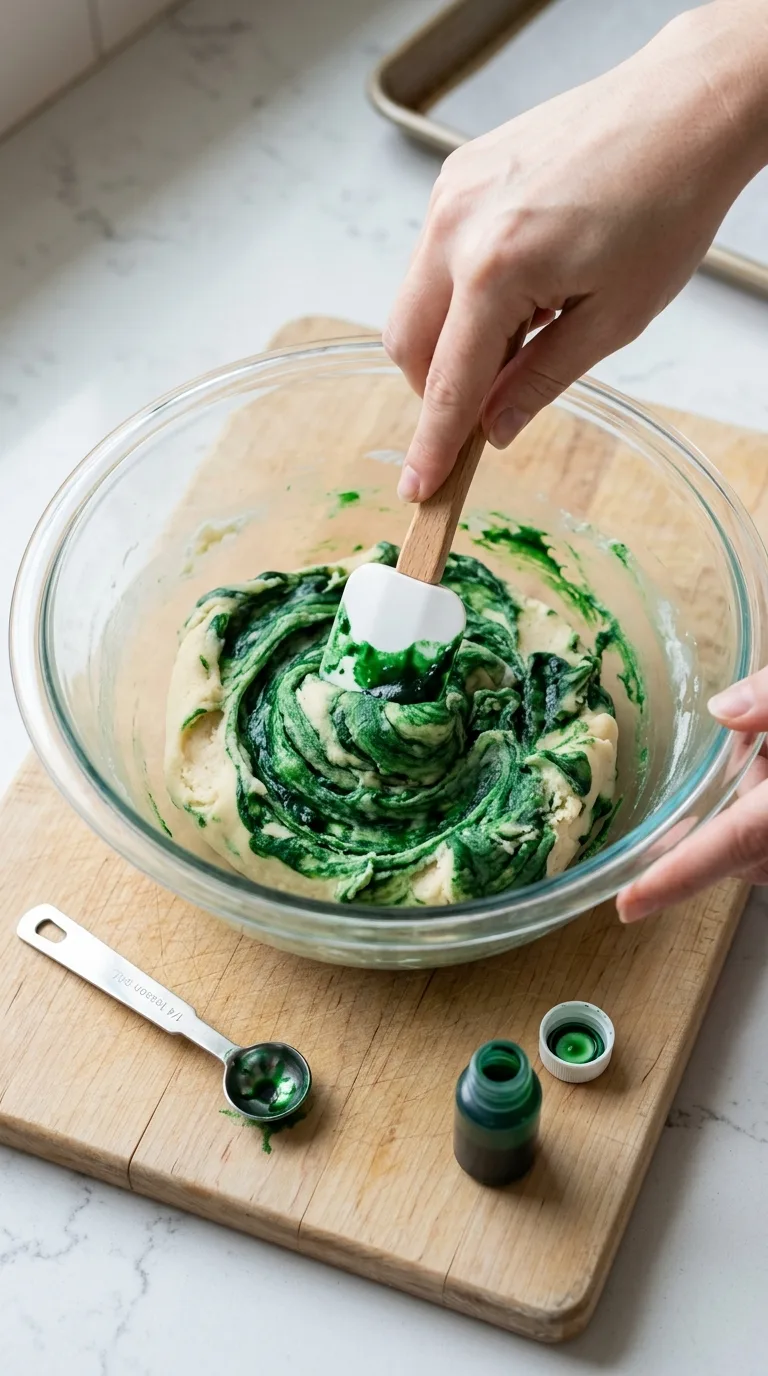
Place the second portion in a separate bowl and work in 1/4 teaspoon (about 1 ml) red gel food coloring until the color is evenly distributed.
Add 1/4 teaspoon (about 1 ml) green gel food coloring to the third portion and mix until uniform.
Use gentle folding and pressing motions rather than vigorous kneading. The dough should remain smooth and cohesive without becoming greasy.
Roll out the three dough layers
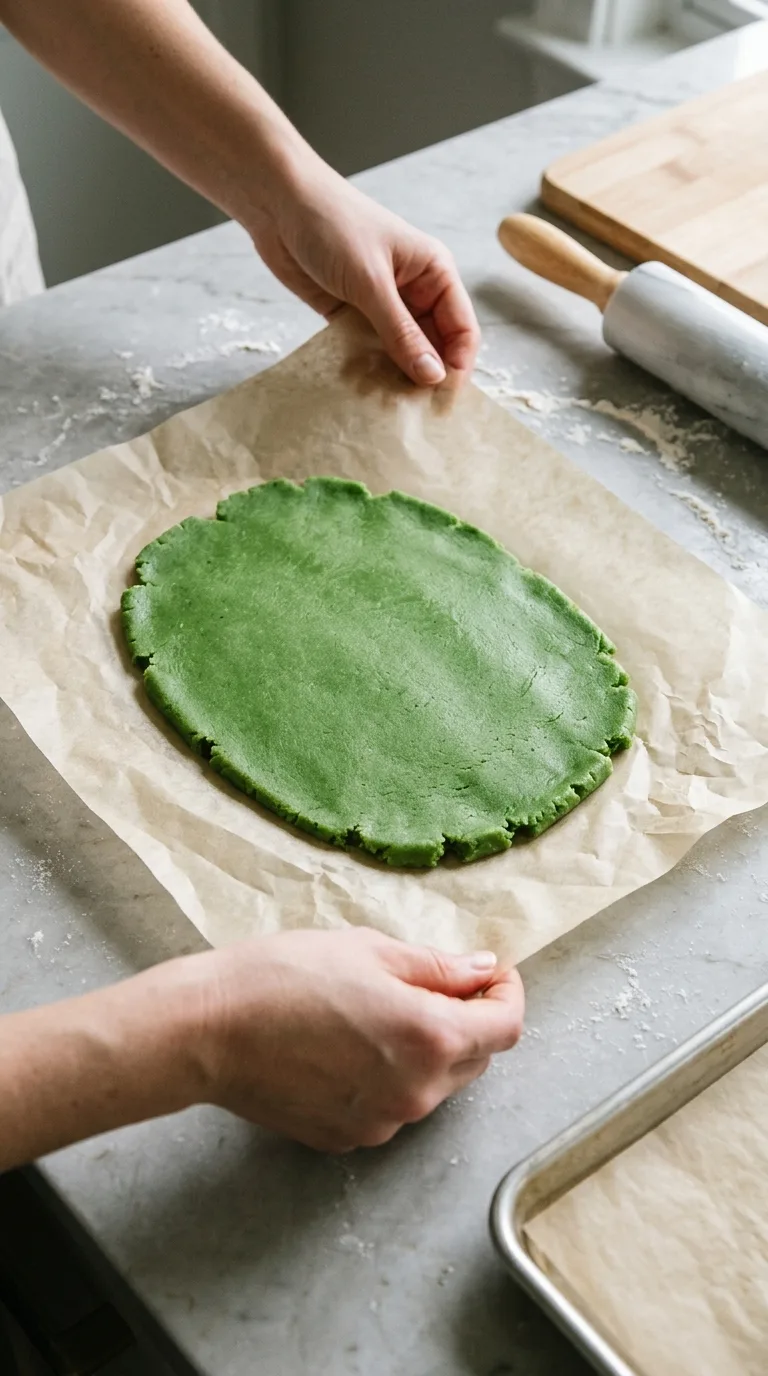
Place the uncolored dough between sheets of parchment paper and roll it into a rectangle approximately 8 × 10 inches (20 × 25 cm).
Aim for an even thickness of about 1/8 inch (3 mm).
Repeat with the red and green dough portions, creating rectangles of similar dimensions.
If the dough becomes too soft to lift or begins sticking to the parchment, refrigerate it briefly until it firms up.
Stack the colored layers
Remove the upper sheet of parchment from each dough rectangle.
Place the green dough on the work surface with its parchment underneath. Carefully invert the uncolored dough over the green layer, then peel away its parchment.
Position the red dough on top and remove its parchment.
Gently roll over the stacked layers with the rolling pin to help them adhere.
The layers should look flat and even, with minimal air trapped between them.
Roll the dough into a spiral
Starting from one of the 8-inch (20 cm) sides, roll the stacked dough into a tight log, using the bottom parchment sheet to help lift and guide the dough.
Keep the roll snug without squeezing so hard that the colored layers smear together.
If small cracks appear along the outside, gently press them closed as you roll.
The finished log should be approximately 8 inches (20 cm) long, with a clearly visible red, green, and vanilla spiral at each end.
Chill the cookie dough
Wrap the log tightly in plastic wrap and refrigerate for 2 hours, or until firm enough to slice without flattening.
For a rounder shape, gently rotate the wrapped log occasionally during the early part of chilling.
The dough should feel firm when pressed but not frozen solid.
Preheat the oven and prepare the baking sheets
Preheat the oven to 350°F (175°C).
Line two 13 × 18-inch (33 × 46 cm) rimmed baking sheets with parchment paper.
Position an oven rack in the center of the oven. Baking one sheet at a time helps promote even browning.
Slice the swirl cookies
Unwrap the chilled dough and place it on a cutting board.
Using a sharp, thin-bladed knife, cut the log into approximately 1/4-inch (6 mm) thick slices.
Arrange the slices on the prepared baking sheets, leaving approximately 1 1/2 inches (4 cm) between cookies.
The batch should yield approximately 30 cookies, depending on the final log dimensions and slice thickness.
If a slice becomes slightly oval, gently reshape it with your fingers. If the dough starts to smear or flatten while slicing, return the log to the refrigerator until firm.
Bake until the edges are lightly golden
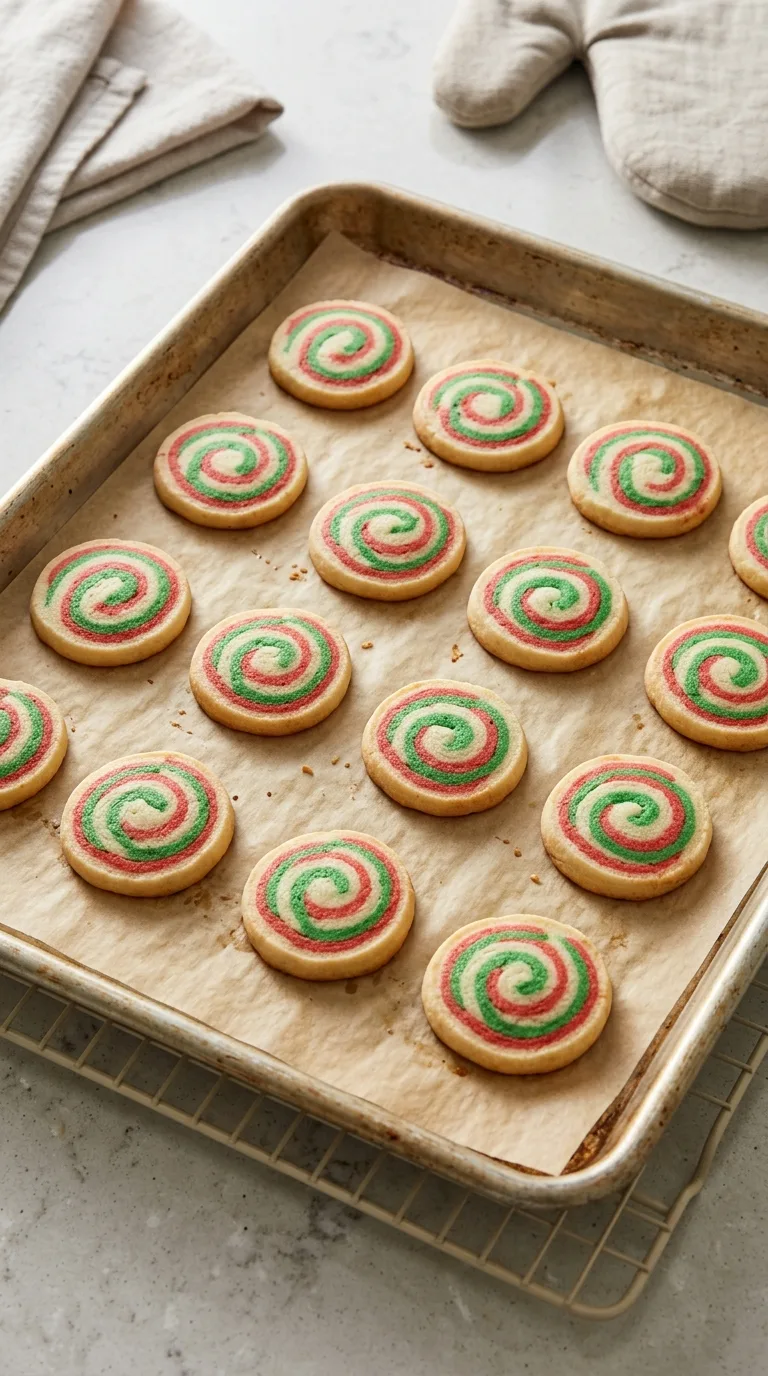
Bake at 350°F (175°C) for approximately 12 minutes per batch, until the cookies look set and the bottom edges are just beginning to turn pale golden.
The tops should remain mostly light in color, and the red and green spirals should still look distinct.
Avoid waiting for deep golden tops. Excessive browning can dull the holiday colors and make the cookies dry.
Because ovens vary, watch the visual cues closely toward the end of baking.
Cool before serving
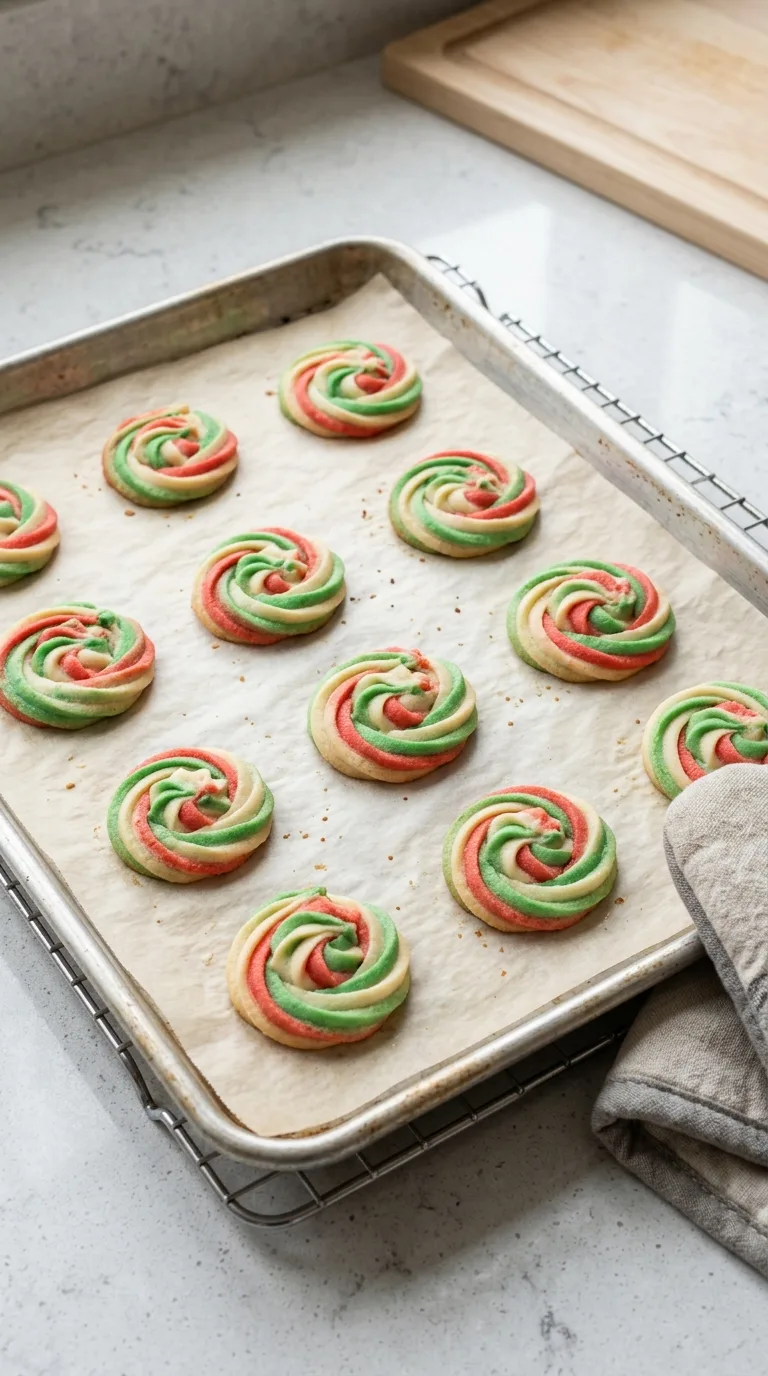
Allow the cookies to rest on their baking sheet for 5 minutes.
Transfer them carefully to a wire rack and let them cool completely for approximately 25 minutes.
The cookies will become firmer as they cool, developing lightly crisp edges while retaining a tender center.
Once completely cooled, arrange them on a Christmas cookie platter or pack them into airtight gift containers.
Tips for Success
- Keep the dough cool during shaping. Warm butter cookie dough can become greasy and difficult to roll. Firm, pliable dough creates cleaner boundaries between the colors. – Use a light touch when stacking the layers. Pressing too hard can stretch the dough unevenly, producing distorted swirls rather than smooth spirals. – Avoid excess flour on the work surface. Rolling between parchment sheets prevents sticking without introducing extra flour that could make the layers dry or prevent them from adhering. – Use a clean, sharp knife. Wipe the blade between cuts if colored dough begins accumulating on it. A dull or dirty blade can drag the colors across the spiral. – Watch the bottoms rather than the tops. Butter cookies may appear pale on top even when fully baked. Light golden edges and a set surface are better doneness indicators. – Cool completely before packaging. Residual warmth creates condensation inside storage containers, which can soften the cookies and reduce their delicate crispness.
Storage, Freezing, and Make-Ahead Instructions
Room-Temperature Storage
Store fully cooled Christmas swirl butter cookies in an airtight container at room temperature for up to 5 days.
Keep the container in a cool, dry location away from direct sunlight and heat. Place parchment paper between layers if stacking the cookies to protect their edges and decorative surfaces.
Refrigeration
Baked cookies do not usually require refrigeration when stored properly.
Refrigeration may introduce moisture and soften their texture, so room-temperature storage is generally preferable for short-term keeping.
Freezing Baked Cookies
Once completely cooled, arrange the cookies in a single layer until firm, then transfer them to a freezer-safe airtight container.
Separate stacked layers with parchment paper to prevent breakage.
Freeze for up to 2 months for best quality.
Thaw the cookies in their closed container at room temperature. Keeping the container sealed during thawing helps reduce condensation directly on the cookies.
Freezing Unbaked Cookie Dough
The shaped cookie dough log can also be frozen before slicing.
Wrap it tightly in plastic wrap, then place it inside a freezer-safe bag or container.
Freeze for up to 2 months.
Thaw the wrapped log overnight in the refrigerator before slicing and baking as directed. The dough should be firm enough to cut cleanly without crumbling.
Make-Ahead Preparation
The dough log can be prepared up to 2 days before baking and stored tightly wrapped in the refrigerator.
This is particularly useful during busy holiday baking periods because the layering and rolling can be completed in advance.
When ready to bake, simply unwrap, slice, and proceed with the baking instructions.
FAQ
Why did my Christmas swirl butter cookies spread during baking?
Excessive spreading usually happens when the butter is too warm, the dough is insufficiently chilled, or the flour was undermeasured. Weighing the flour and chilling the shaped log thoroughly help the cookies retain their round shape. Also avoid placing sliced dough on a warm baking sheet.
How can I keep the red and green colors from blending together?
Use concentrated gel food coloring and avoid overworking the dough after coloring. Keep each layer evenly rolled and cool enough to handle without stretching. When forming the log, roll firmly but gently, and use a sharp knife to prevent smearing during slicing.
Can I make Delicious Christmas Swirl Butter Cookies ahead of time?
Yes. The shaped dough log can be refrigerated for up to 2 days before baking or frozen for up to 2 months. This makes it convenient to prepare the decorative swirl in advance and bake fresh cookies closer to your holiday gathering.
Why are my butter cookies hard instead of tender?
Hard cookies can result from overmixing after the flour is added, using too much flour, or baking too long. Mix the dough only until combined, measure flour carefully, and remove the cookies when the edges are just lightly golden. They will continue to firm up as they cool.
Can I make these cookies without food coloring?
Yes. You can leave the dough uncolored and shape it into a plain butter cookie log. The cookies will have the same basic vanilla flavor, but they will not have the distinctive red and green Christmas swirl design. For a decorative spiral, contrasting dough colors are necessary.
Christmas Swirl Butter Cookies
Ingredients
Method
- Beat the butter and sugar until smooth: Place the 1 cup (226 g) softened unsalted butter and 1 cup (120 g) powdered sugar in a large mixing bowl.
- Beat with an electric mixer on medium speed for about 2–3 minutes, until the mixture looks smooth, creamy, and slightly lighter in color.
- Avoid excessive whipping: Too much incorporated air can encourage the cookies to puff and distort their spiral shape.
- Add the egg and vanilla: Add the 1 large egg (about 50 g without shell) and 2 teaspoons (10 ml) pure vanilla extract.
- Mix on low to medium speed until incorporated, scraping down the sides of the bowl as needed.
- The mixture should look creamy and mostly uniform: A slightly curdled appearance at this stage is not necessarily a problem; it should come together when the flour is added.
- Incorporate the dry ingredients: Add the 2 3/4 cups (330 g) all-purpose flour and 1/2 teaspoon (about 3 g) fine salt.
- Mix on low speed just until the flour disappears and a soft dough forms.
- The dough should feel pliable and slightly firm rather than wet or sticky. If it looks crumbly, gently press a small amount together with your fingers. It should hold its shape without falling apart.
- Avoid prolonged mixing, which can make the cookies tougher.
- Divide and color the dough: Divide the dough into three equal portions.
- Leave one portion uncolored to create the natural vanilla layer.
- Place the second portion in a separate bowl and work in 1/4 teaspoon (about 1 ml) red gel food coloring until the color is evenly distributed.
- Add 1/4 teaspoon (about 1 ml) green gel food coloring to the third portion and mix until uniform.
- Use gentle folding and pressing motions rather than vigorous kneading. The dough should remain smooth and cohesive without becoming greasy.
- Roll out the three dough layers: Place the uncolored dough between sheets of parchment paper and roll it into a rectangle approximately 8 × 10 inches (20 × 25 cm).
- Aim for an even thickness of about 1/8 inch (3 mm).
- Repeat with the red and green dough portions, creating rectangles of similar dimensions.
- If the dough becomes too soft to lift or begins sticking to the parchment, refrigerate it briefly until it firms up.
- Stack the colored layers: Remove the upper sheet of parchment from each dough rectangle.
- Place the green dough on the work surface with its parchment underneath. Carefully invert the uncolored dough over the green layer, then peel away its parchment.
- Position the red dough on top and remove its parchment.
- Gently roll over the stacked layers with the rolling pin to help them adhere.
- The layers should look flat and even, with minimal air trapped between them.
- Roll the dough into a spiral: Starting from one of the 8-inch (20 cm) sides, roll the stacked dough into a tight log, using the bottom parchment sheet to help lift and guide the dough.
- Keep the roll snug without squeezing so hard that the colored layers smear together.
- If small cracks appear along the outside, gently press them closed as you roll.
- The finished log should be approximately 8 inches (20 cm) long, with a clearly visible red, green, and vanilla spiral at each end.
- Chill the cookie dough: Wrap the log tightly in plastic wrap and refrigerate for 2 hours, or until firm enough to slice without flattening.
- For a rounder shape, gently rotate the wrapped log occasionally during the early part of chilling.
- The dough should feel firm when pressed but not frozen solid.
- Preheat the oven and prepare the baking sheets
- Preheat the oven to 350°F (175°C). Line two 13 × 18-inch (33 × 46 cm) rimmed baking sheets with parchment paper.
- Position an oven rack in the center of the oven. Baking one sheet at a time helps promote even browning.
- Slice the swirl cookies: Unwrap the chilled dough and place it on a cutting board.
- Using a sharp, thin-bladed knife, cut the log into approximately 1/4-inch (6 mm) thick slices.
- Arrange the slices on the prepared baking sheets, leaving approximately 1 1/2 inches (4 cm) between cookies.
- The batch should yield approximately 30 cookies, depending on the final log dimensions and slice thickness.
- If a slice becomes slightly oval, gently reshape it with your fingers. If the dough starts to smear or flatten while slicing, return the log to the refrigerator until firm.
- Bake until the edges are lightly golden: Bake at 350°F (175°C) for approximately 12 minutes per batch, until the cookies look set and the bottom edges are just beginning to turn pale golden.
- The tops should remain mostly light in color, and the red and green spirals should still look distinct.
- Avoid waiting for deep golden tops: Excessive browning can dull the holiday colors and make the cookies dry.
- Because ovens vary, watch the visual cues closely toward the end of baking.
- Cool before serving: Allow the cookies to rest on their baking sheet for 5 minutes.
- Transfer them carefully to a wire rack and let them cool completely for approximately 25 minutes.
- The cookies will become firmer as they cool, developing lightly crisp edges while retaining a tender center.
- Once completely cooled, arrange them on a Christmas cookie platter or pack them into airtight gift containers.