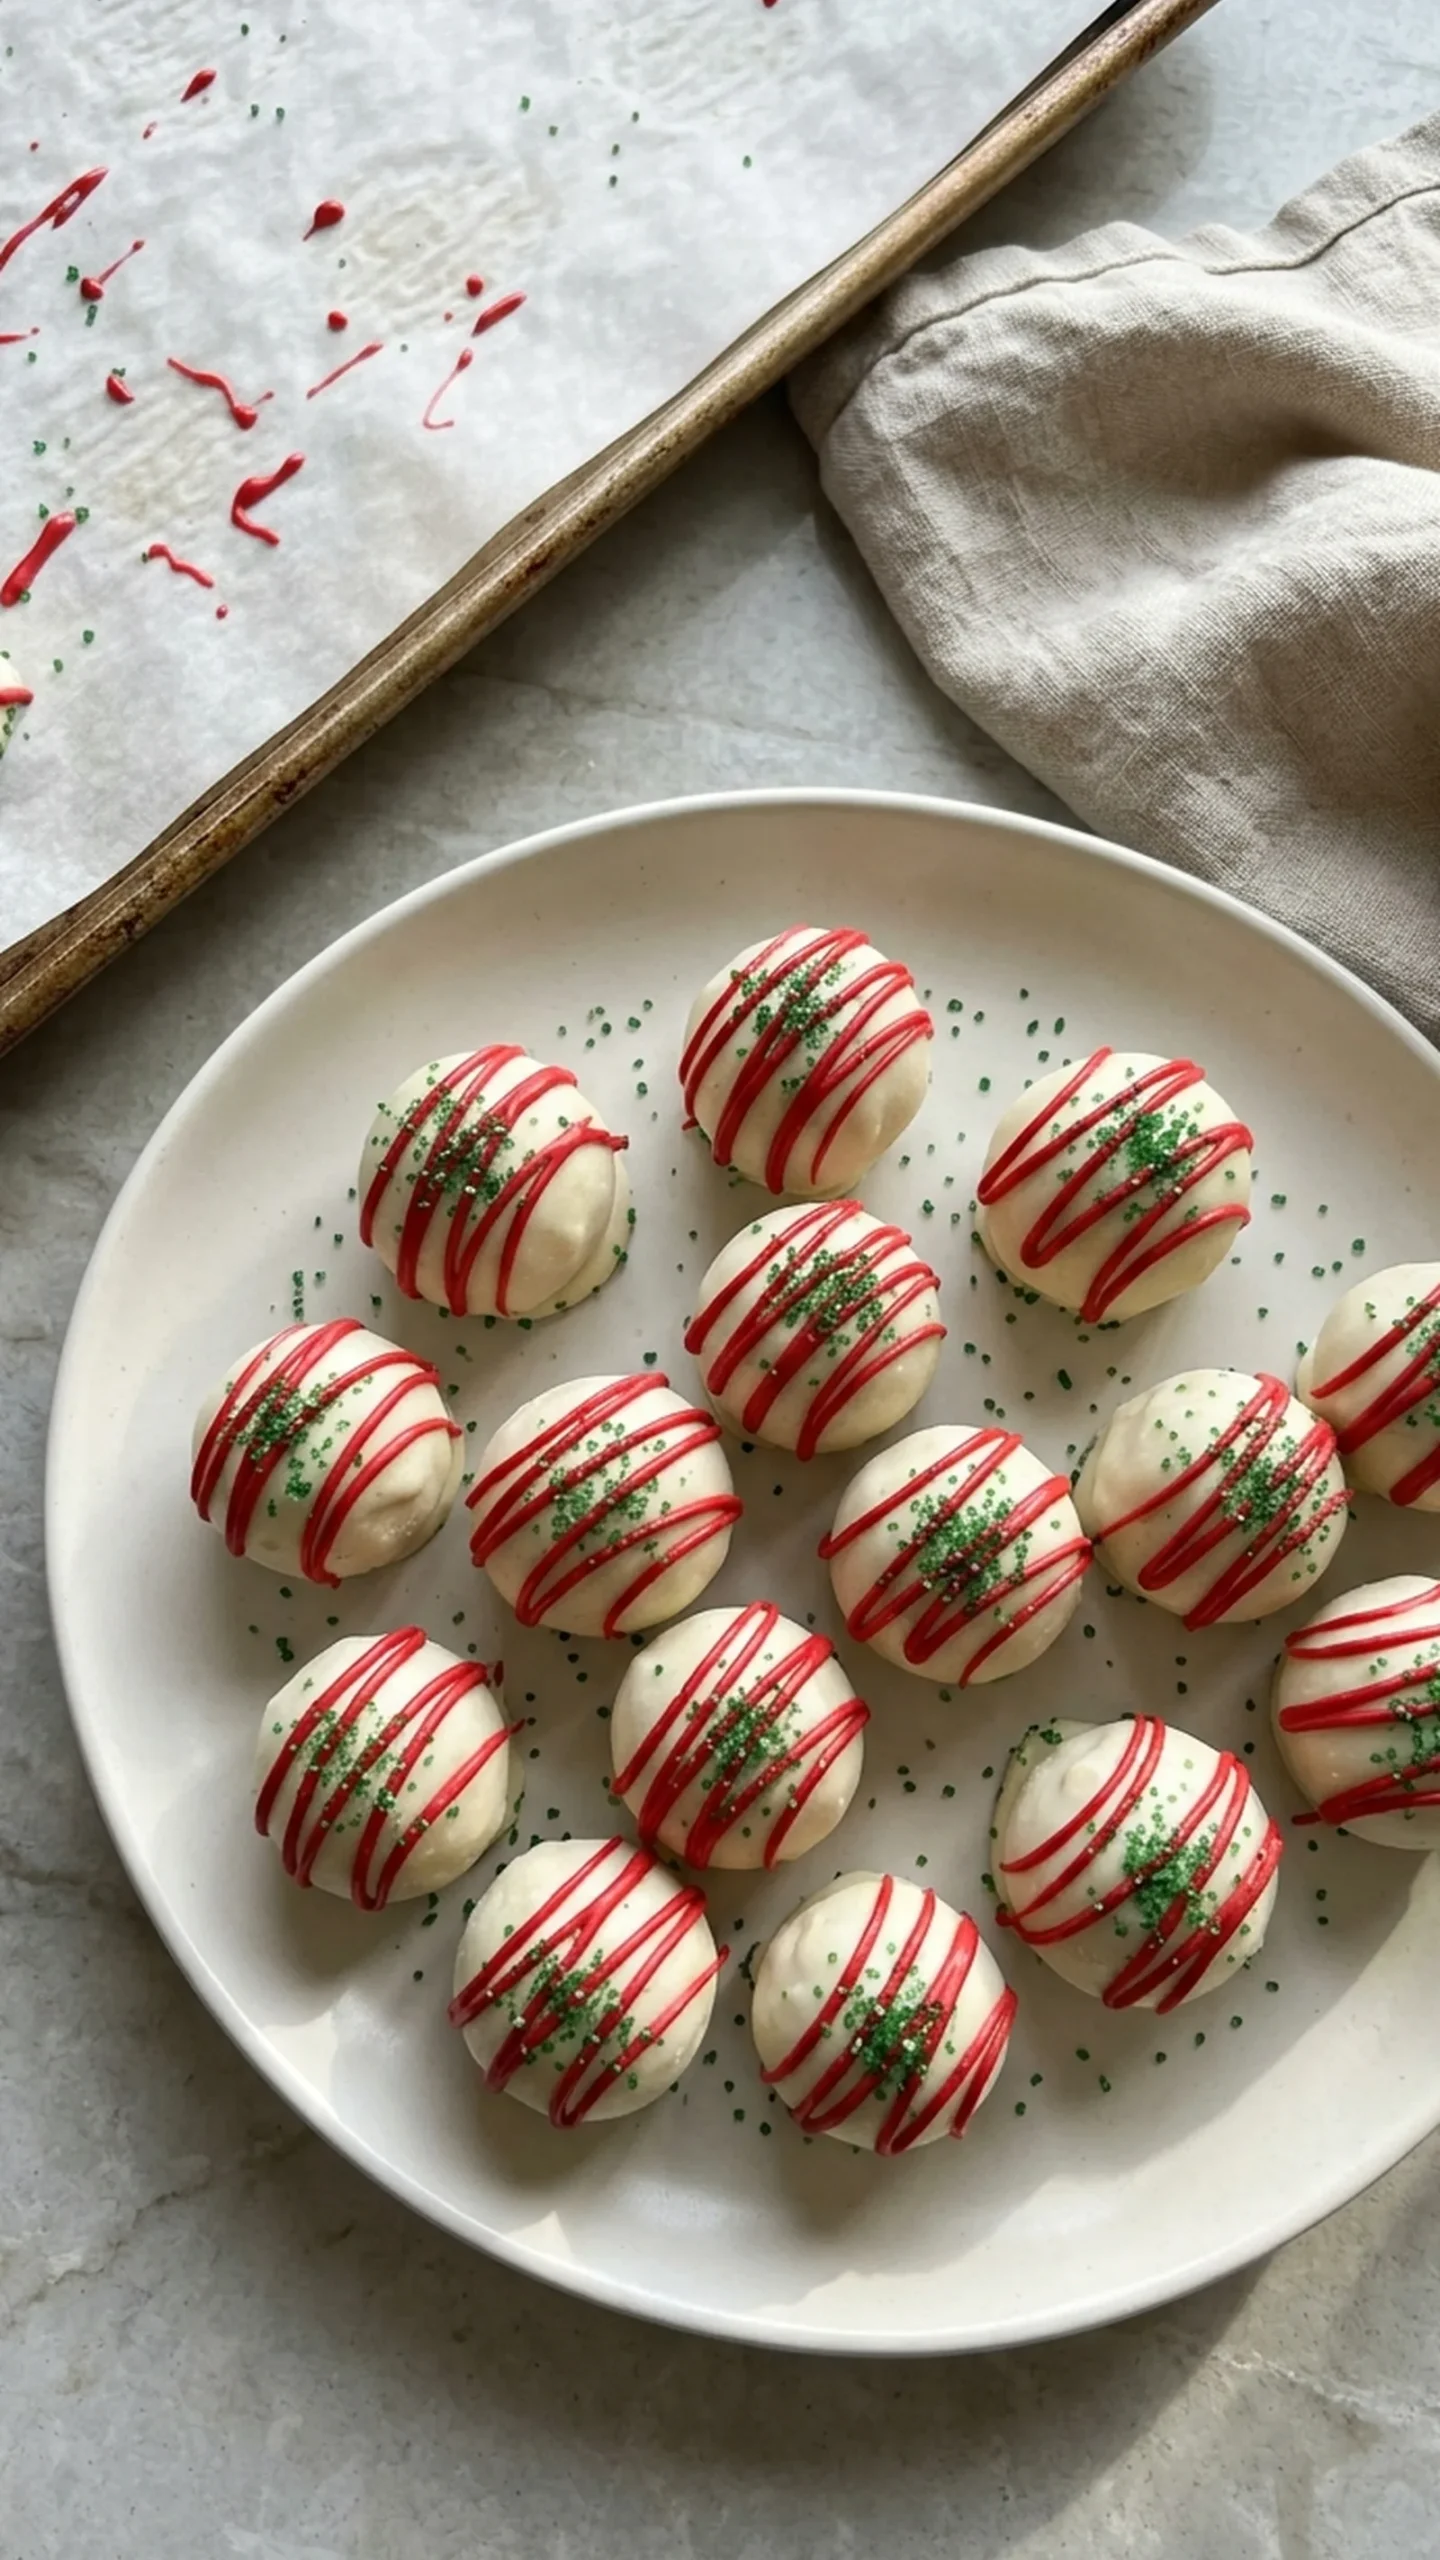
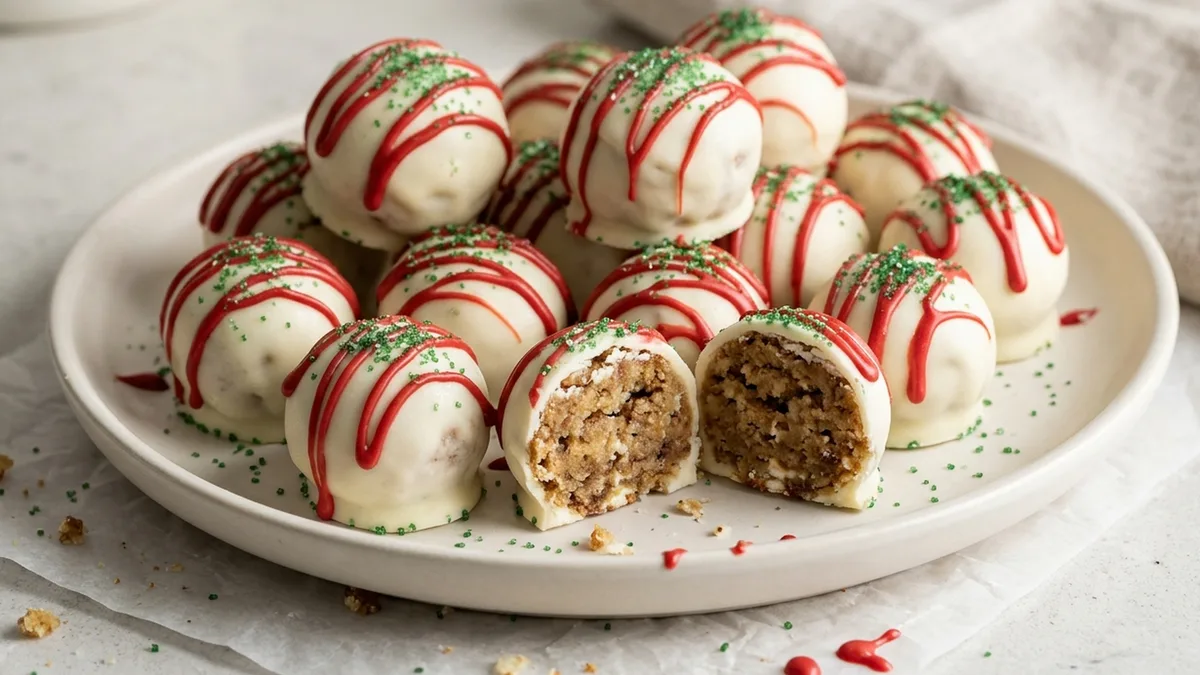
Little Debbie Christmas Tree Cake Truffles turn the familiar holiday snack cakes into bite-sized treats with a soft, creamy center and a smooth white chocolate coating. Made with Little Debbie Christmas Tree Cakes, cream cheese, and white melting wafers, these no-bake truffles capture the sweet vanilla flavor of the original cakes while adding a rich, candy-like shell.
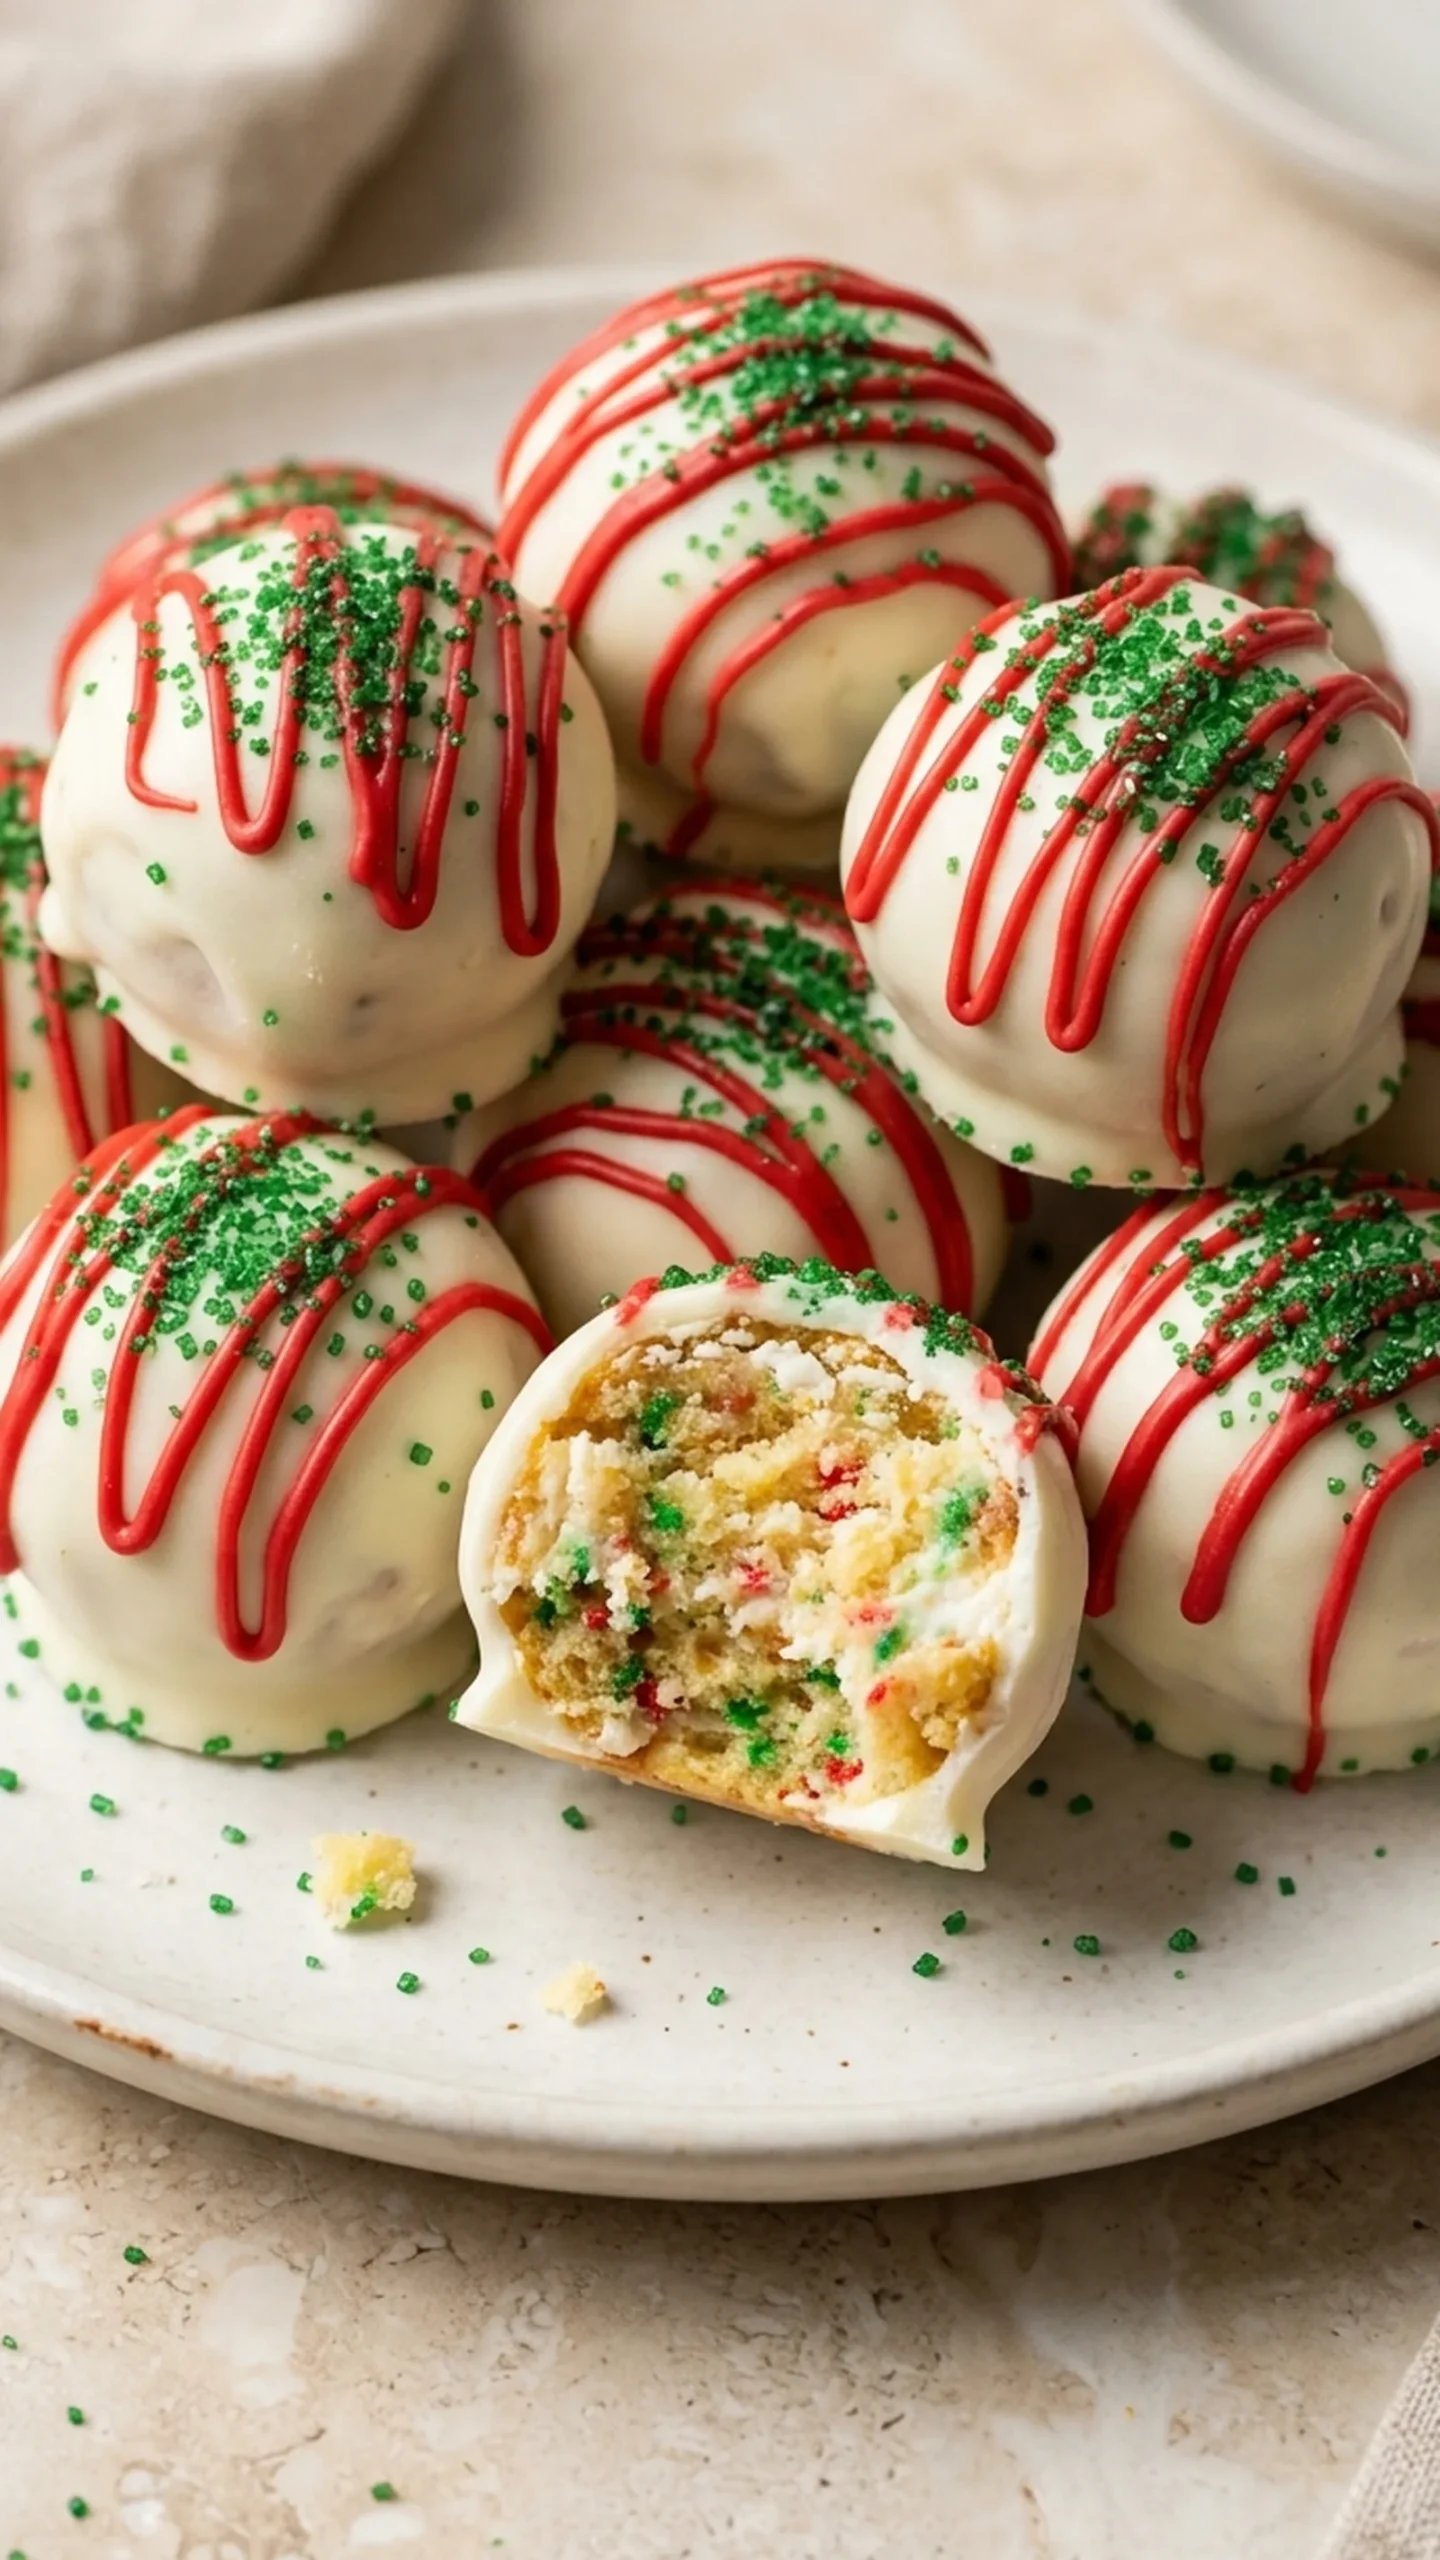
These festive Christmas truffles are simple to prepare at home without an oven. The cake mixture is rolled into balls, chilled until firm, and dipped in melted white chocolate. Red candy drizzle and green sprinkles give each truffle the recognizable Christmas tree cake look, making them a fun addition to holiday dessert trays, Christmas parties, and homemade gift boxes.
Why This Recipe Works
Snack cakes create a ready-made truffle base. Little Debbie Christmas Tree Cakes already contain soft vanilla cake, sweet creme filling, and a thin coating, so there is no need to bake a separate cake or prepare frosting.
Cream cheese binds the crumbs: A small amount of softened cream cheese helps the crumbled cakes form a smooth, scoopable mixture that holds its shape when rolled.
Chilling makes dipping easier: Firming the cake balls in the refrigerator helps prevent them from falling apart or leaving crumbs in the melted coating.
White melting wafers create a neat shell. Candy melting wafers set more easily than ordinary white chocolate chips and give the truffles a smooth coating without tempering.
Simple decorations recreate the holiday look: Red candy drizzle and green sprinkles echo the decorations on the original Christmas tree cakes.
Equipment Needed
- Large mixing bowl
- Electric hand mixer or sturdy silicone spatula
- Small cookie scoop, approximately 1 tablespoon capacity
- 13 x 18-inch (33 x 46 cm) rimmed baking sheet
- Parchment paper
- Microwave-safe bowls for melting candy coatings
- Fork or dipping tool
- Small piping bag or zip-top bag for decorating
Ingredients List
For the Truffle Centers
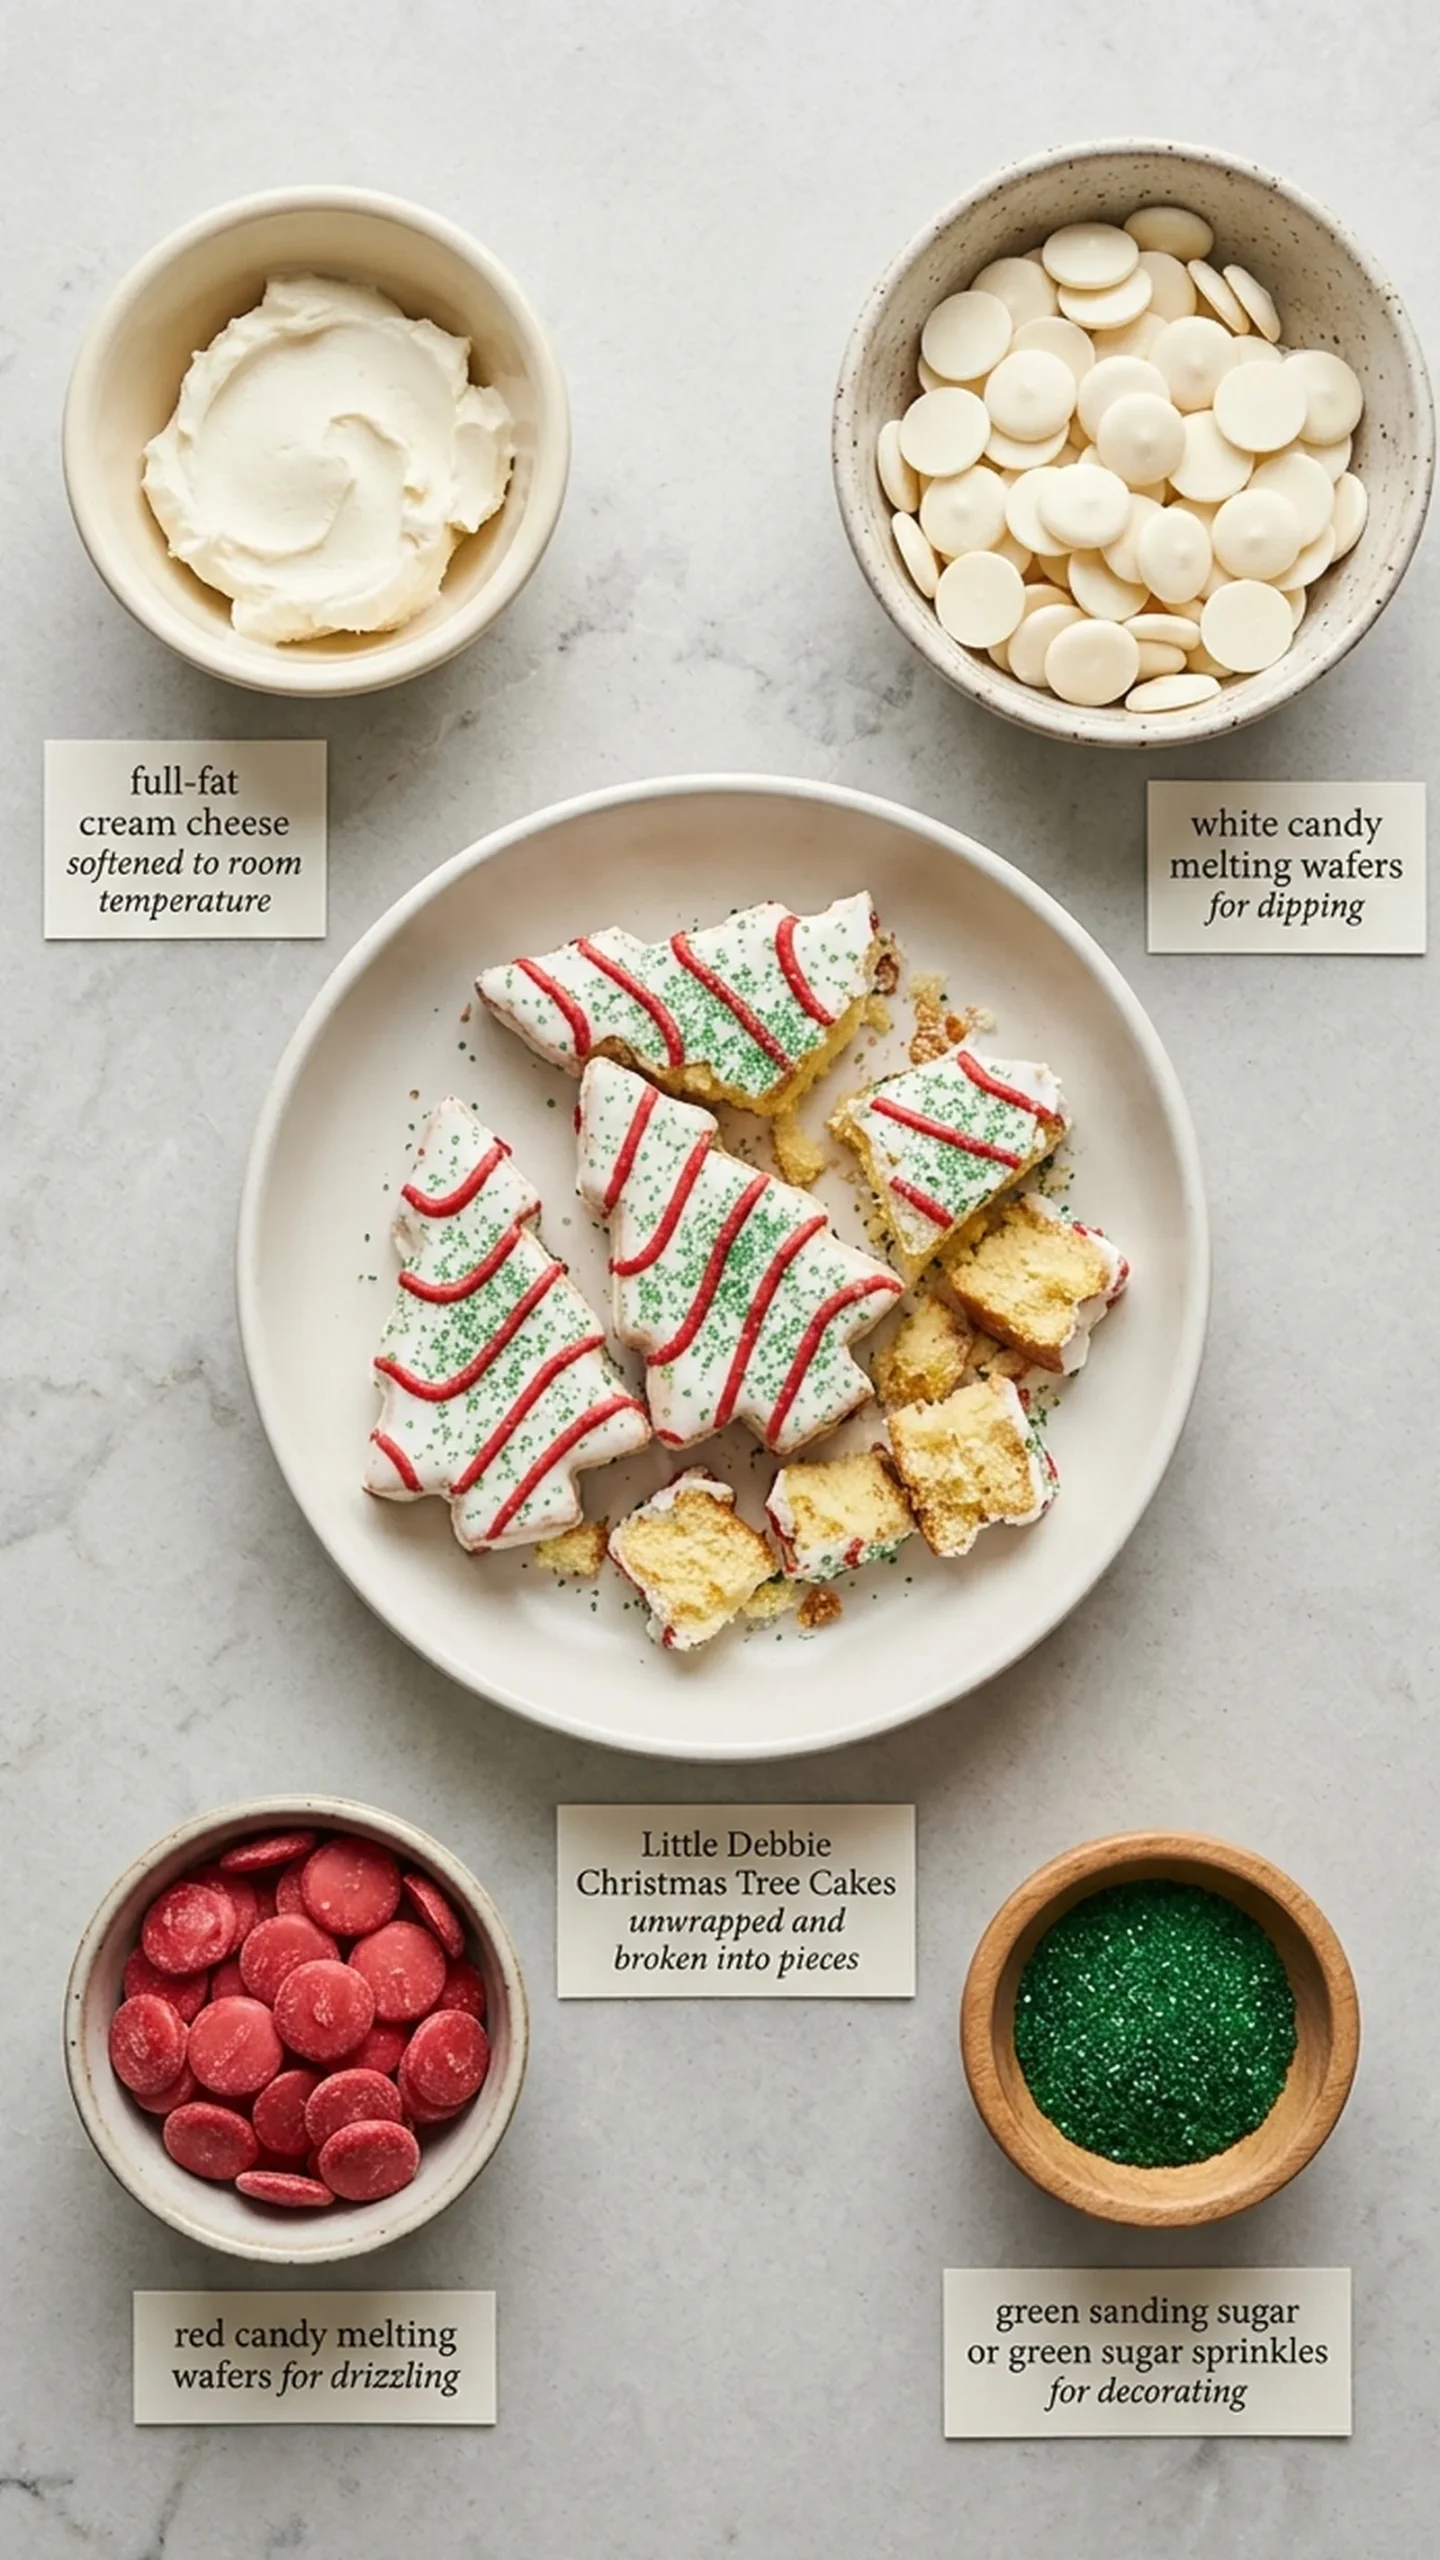
- 5 Little Debbie Christmas Tree Cakes (1 standard 8.62-ounce / 244 g box), unwrapped and broken into pieces
- 2 ounces (57 g) full-fat cream cheese, softened to room temperature
For the White Chocolate Coating
- 12 ounces (340 g) white candy melting wafers, for dipping
For the Christmas Decorations
- 2 ounces (57 g) red candy melting wafers, for drizzling
- 1 tablespoon (about 10 g) green sanding sugar or green sugar sprinkles, for decorating
Ingredient Notes and Substitutions
Little Debbie Christmas Tree Cakes: These seasonal snack cakes provide the main flavor and texture of the truffles. Their vanilla cake layers, creme filling, and sweet outer coating create a moist mixture without requiring homemade cake crumbs or frosting. Use the vanilla Christmas Tree Cakes for the classic flavor. Chocolate Christmas Tree Cakes can also work, but they will produce a chocolate-flavored center rather than the traditional vanilla version. There is no exact homemade substitute that reproduces the flavor and texture of these packaged cakes.
Cream Cheese: Full-fat block cream cheese adds moisture and helps the cake crumbs stick together. Its slight tanginess also balances the sweetness of the snack cakes. Neufchâtel cheese can be substituted in the same quantity, although the mixture may be slightly softer. Avoid whipped cream cheese, which has a different density and may make the centers less predictable.
White Candy Melting Wafers: White candy melting wafers form the outer shell and help the truffles hold their shape after chilling. They melt smoothly and set without the tempering process required for real white chocolate. White chocolate melting wafers made with cocoa butter may be substituted, but they can require more careful temperature control. Regular white chocolate chips are less reliable because they may melt too thickly for smooth dipping.
Red Candy Melting Wafers: Red candy melting wafers provide the decorative drizzle that resembles the red icing on Little Debbie Christmas Tree Cakes. Red-colored white chocolate can be used instead, provided the coloring is suitable for chocolate. Water-based food coloring can cause melted chocolate to seize.
Green Sanding Sugar: Green sanding sugar adds a little sparkle and a slight crunch while recreating the green decorations on the original cakes. Green sugar sprinkles are a suitable substitute. Larger sprinkles will create a more textured finish, while fine sanding sugar gives a more delicate appearance.
Step-by-Step Instructions
1. Crumble the Christmas Tree Cakes
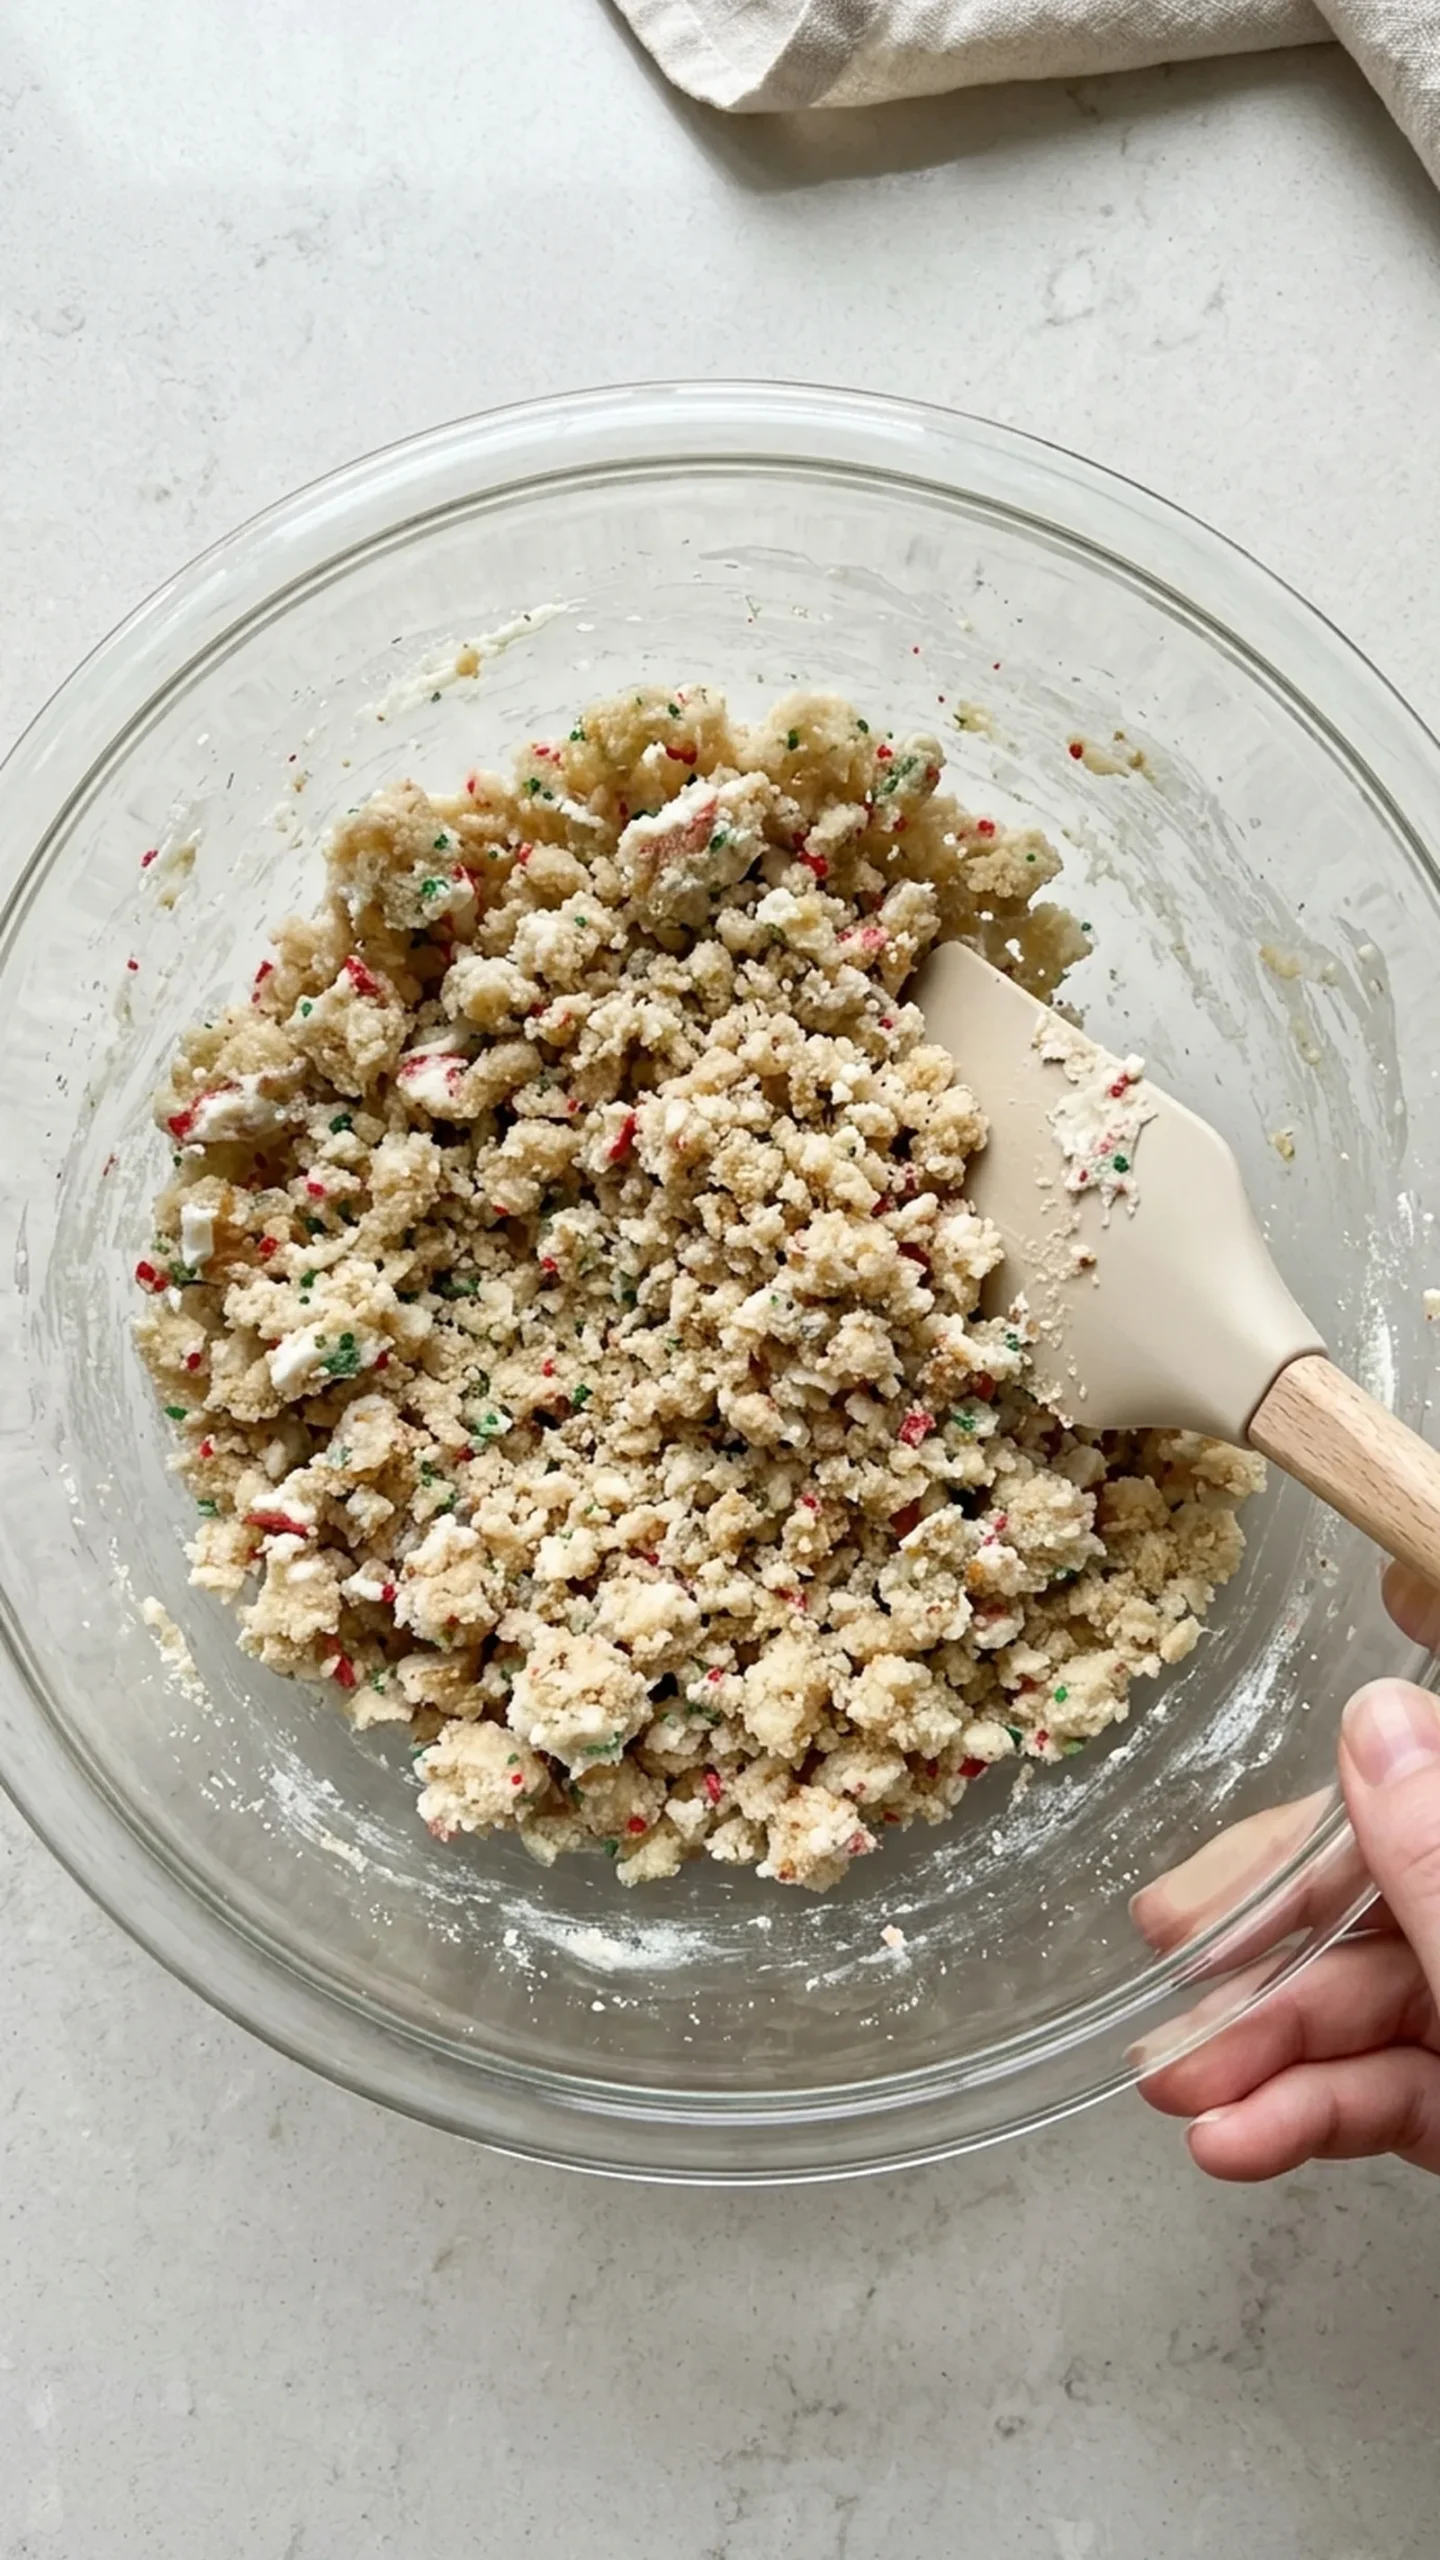
Unwrap all 5 Little Debbie Christmas Tree Cakes and break them into small pieces directly into a large mixing bowl.
Use your hands, a sturdy spatula, or an electric hand mixer on low speed to crumble the cakes.
Continue until the cake, creme filling, and outer coating are evenly distributed. The mixture should look moist and crumbly, with no large chunks of cake remaining.
2. Mix the Truffle Filling
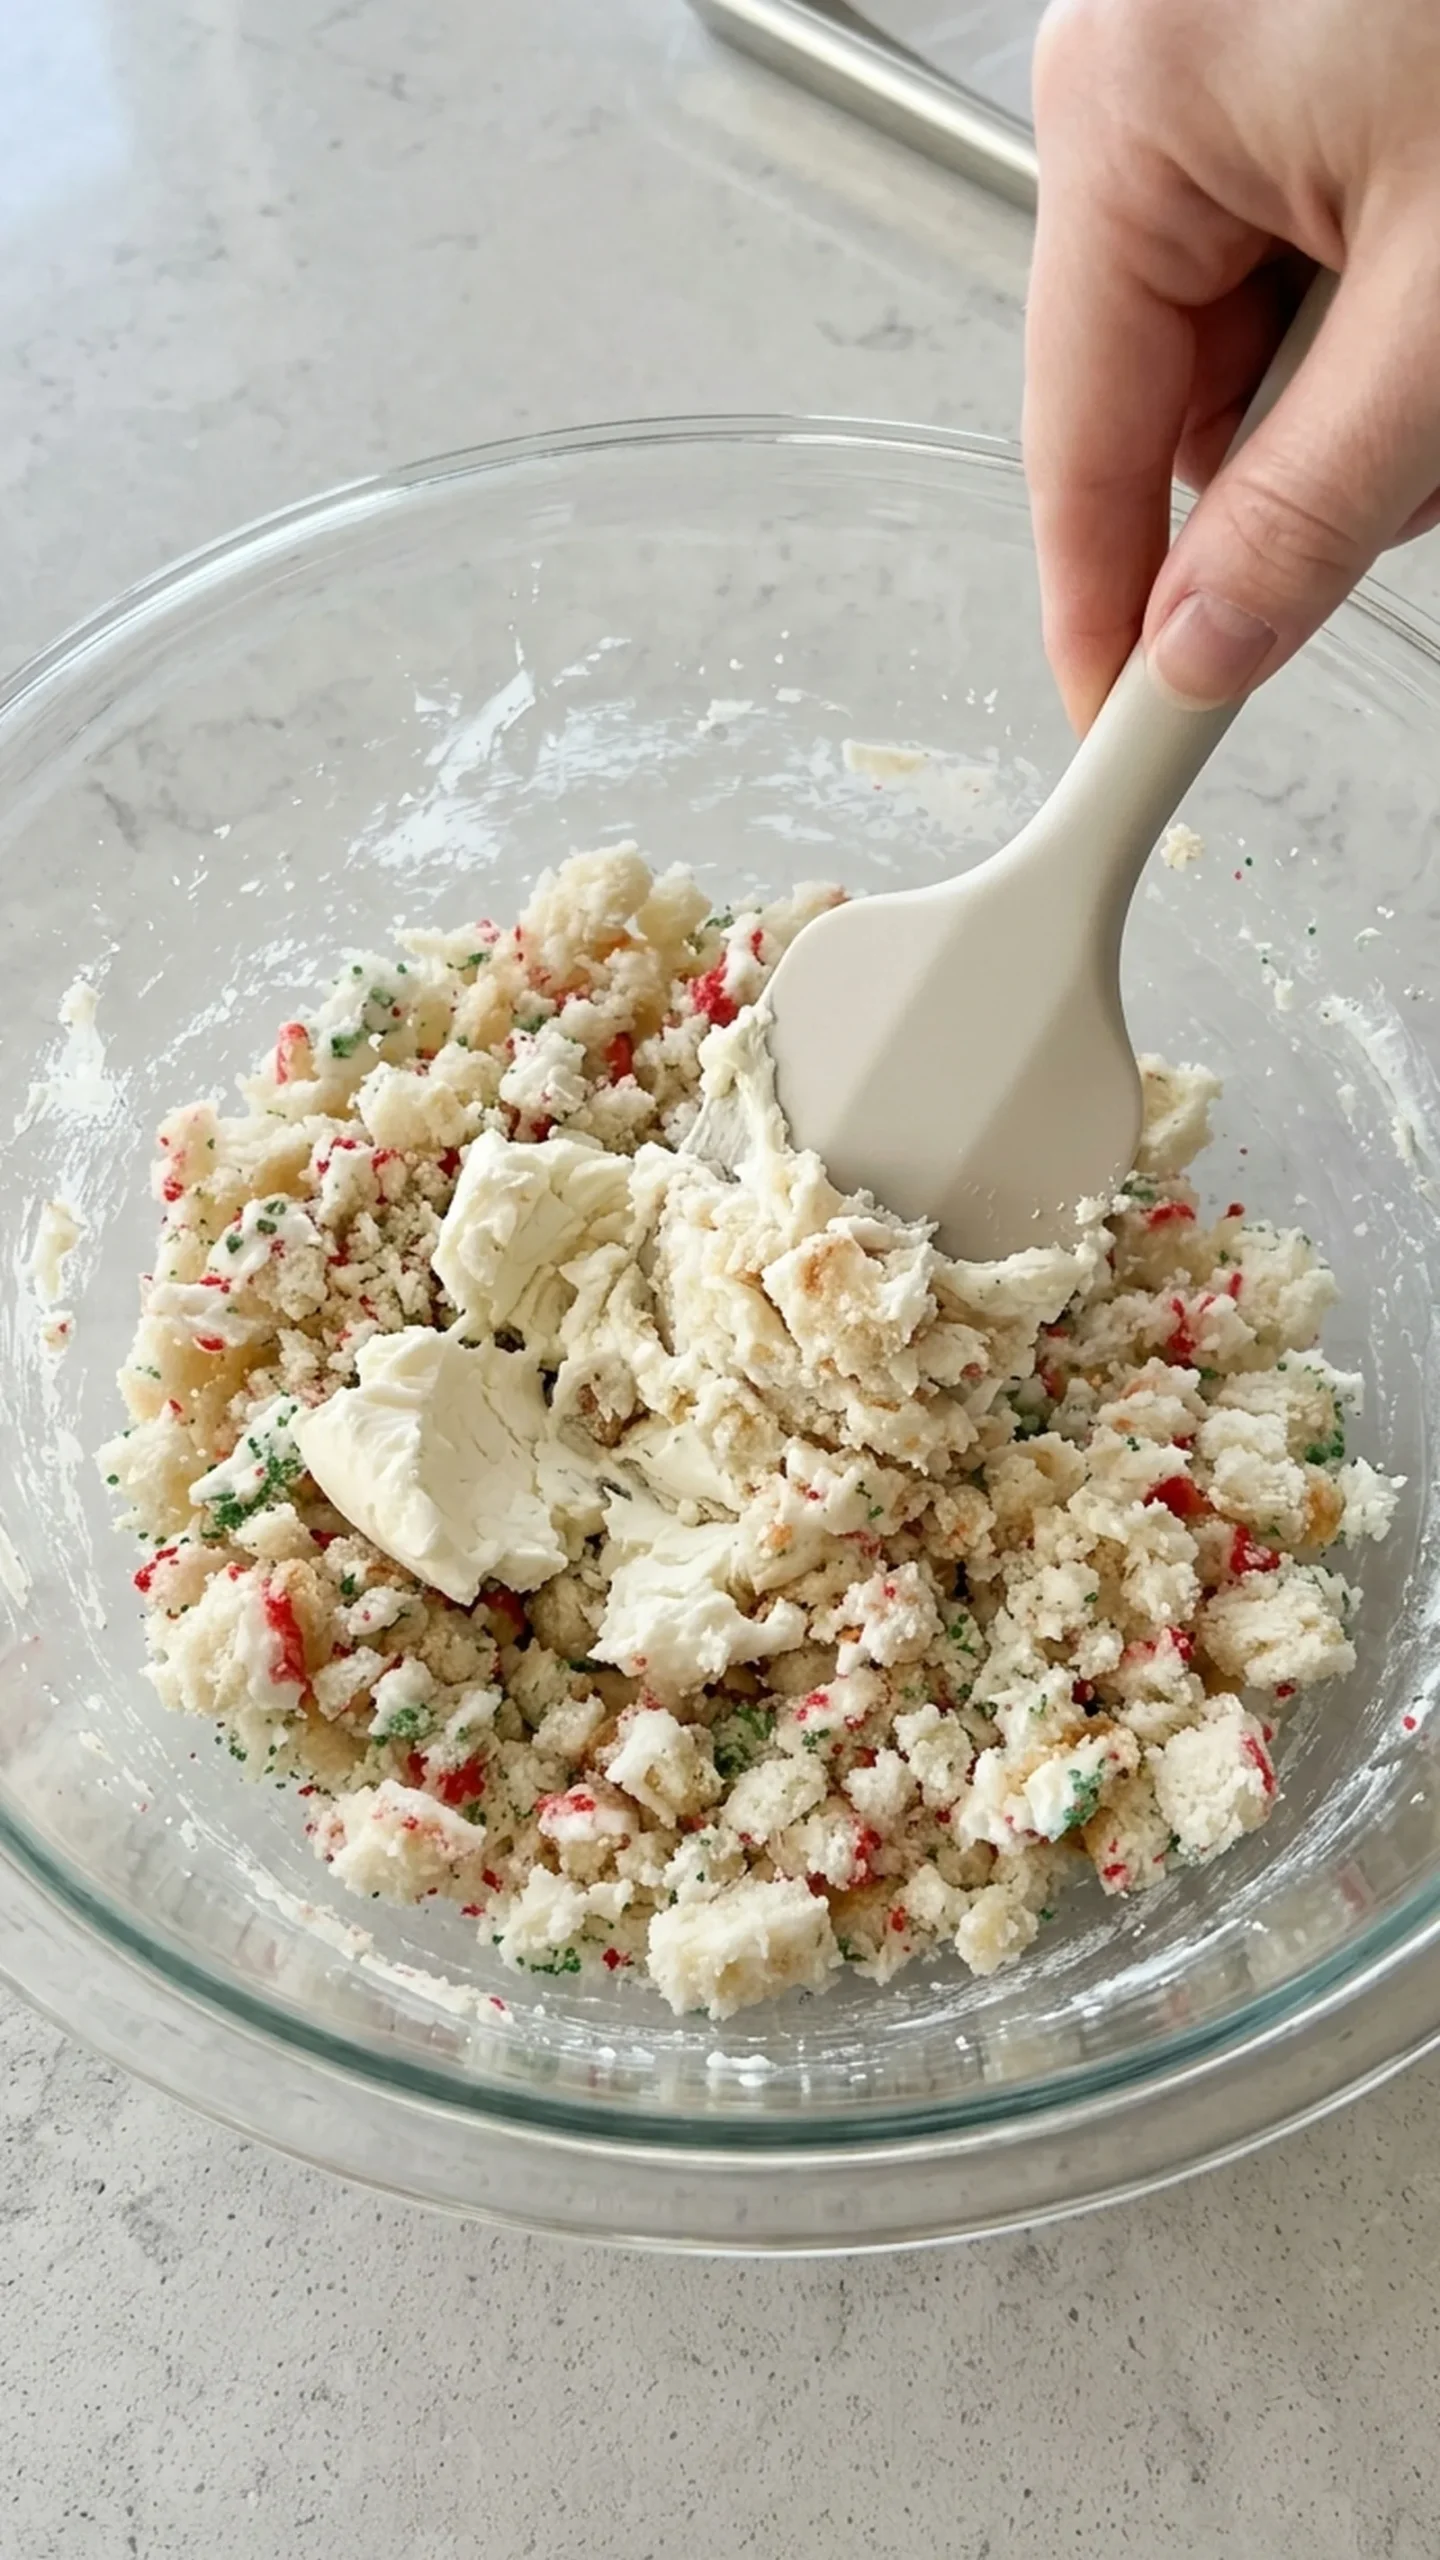
Add the 2 ounces (57 g) of softened cream cheese to the crumbled cakes.
Mix on low speed or work the mixture together with a sturdy spatula until it becomes thick, cohesive, and slightly sticky.
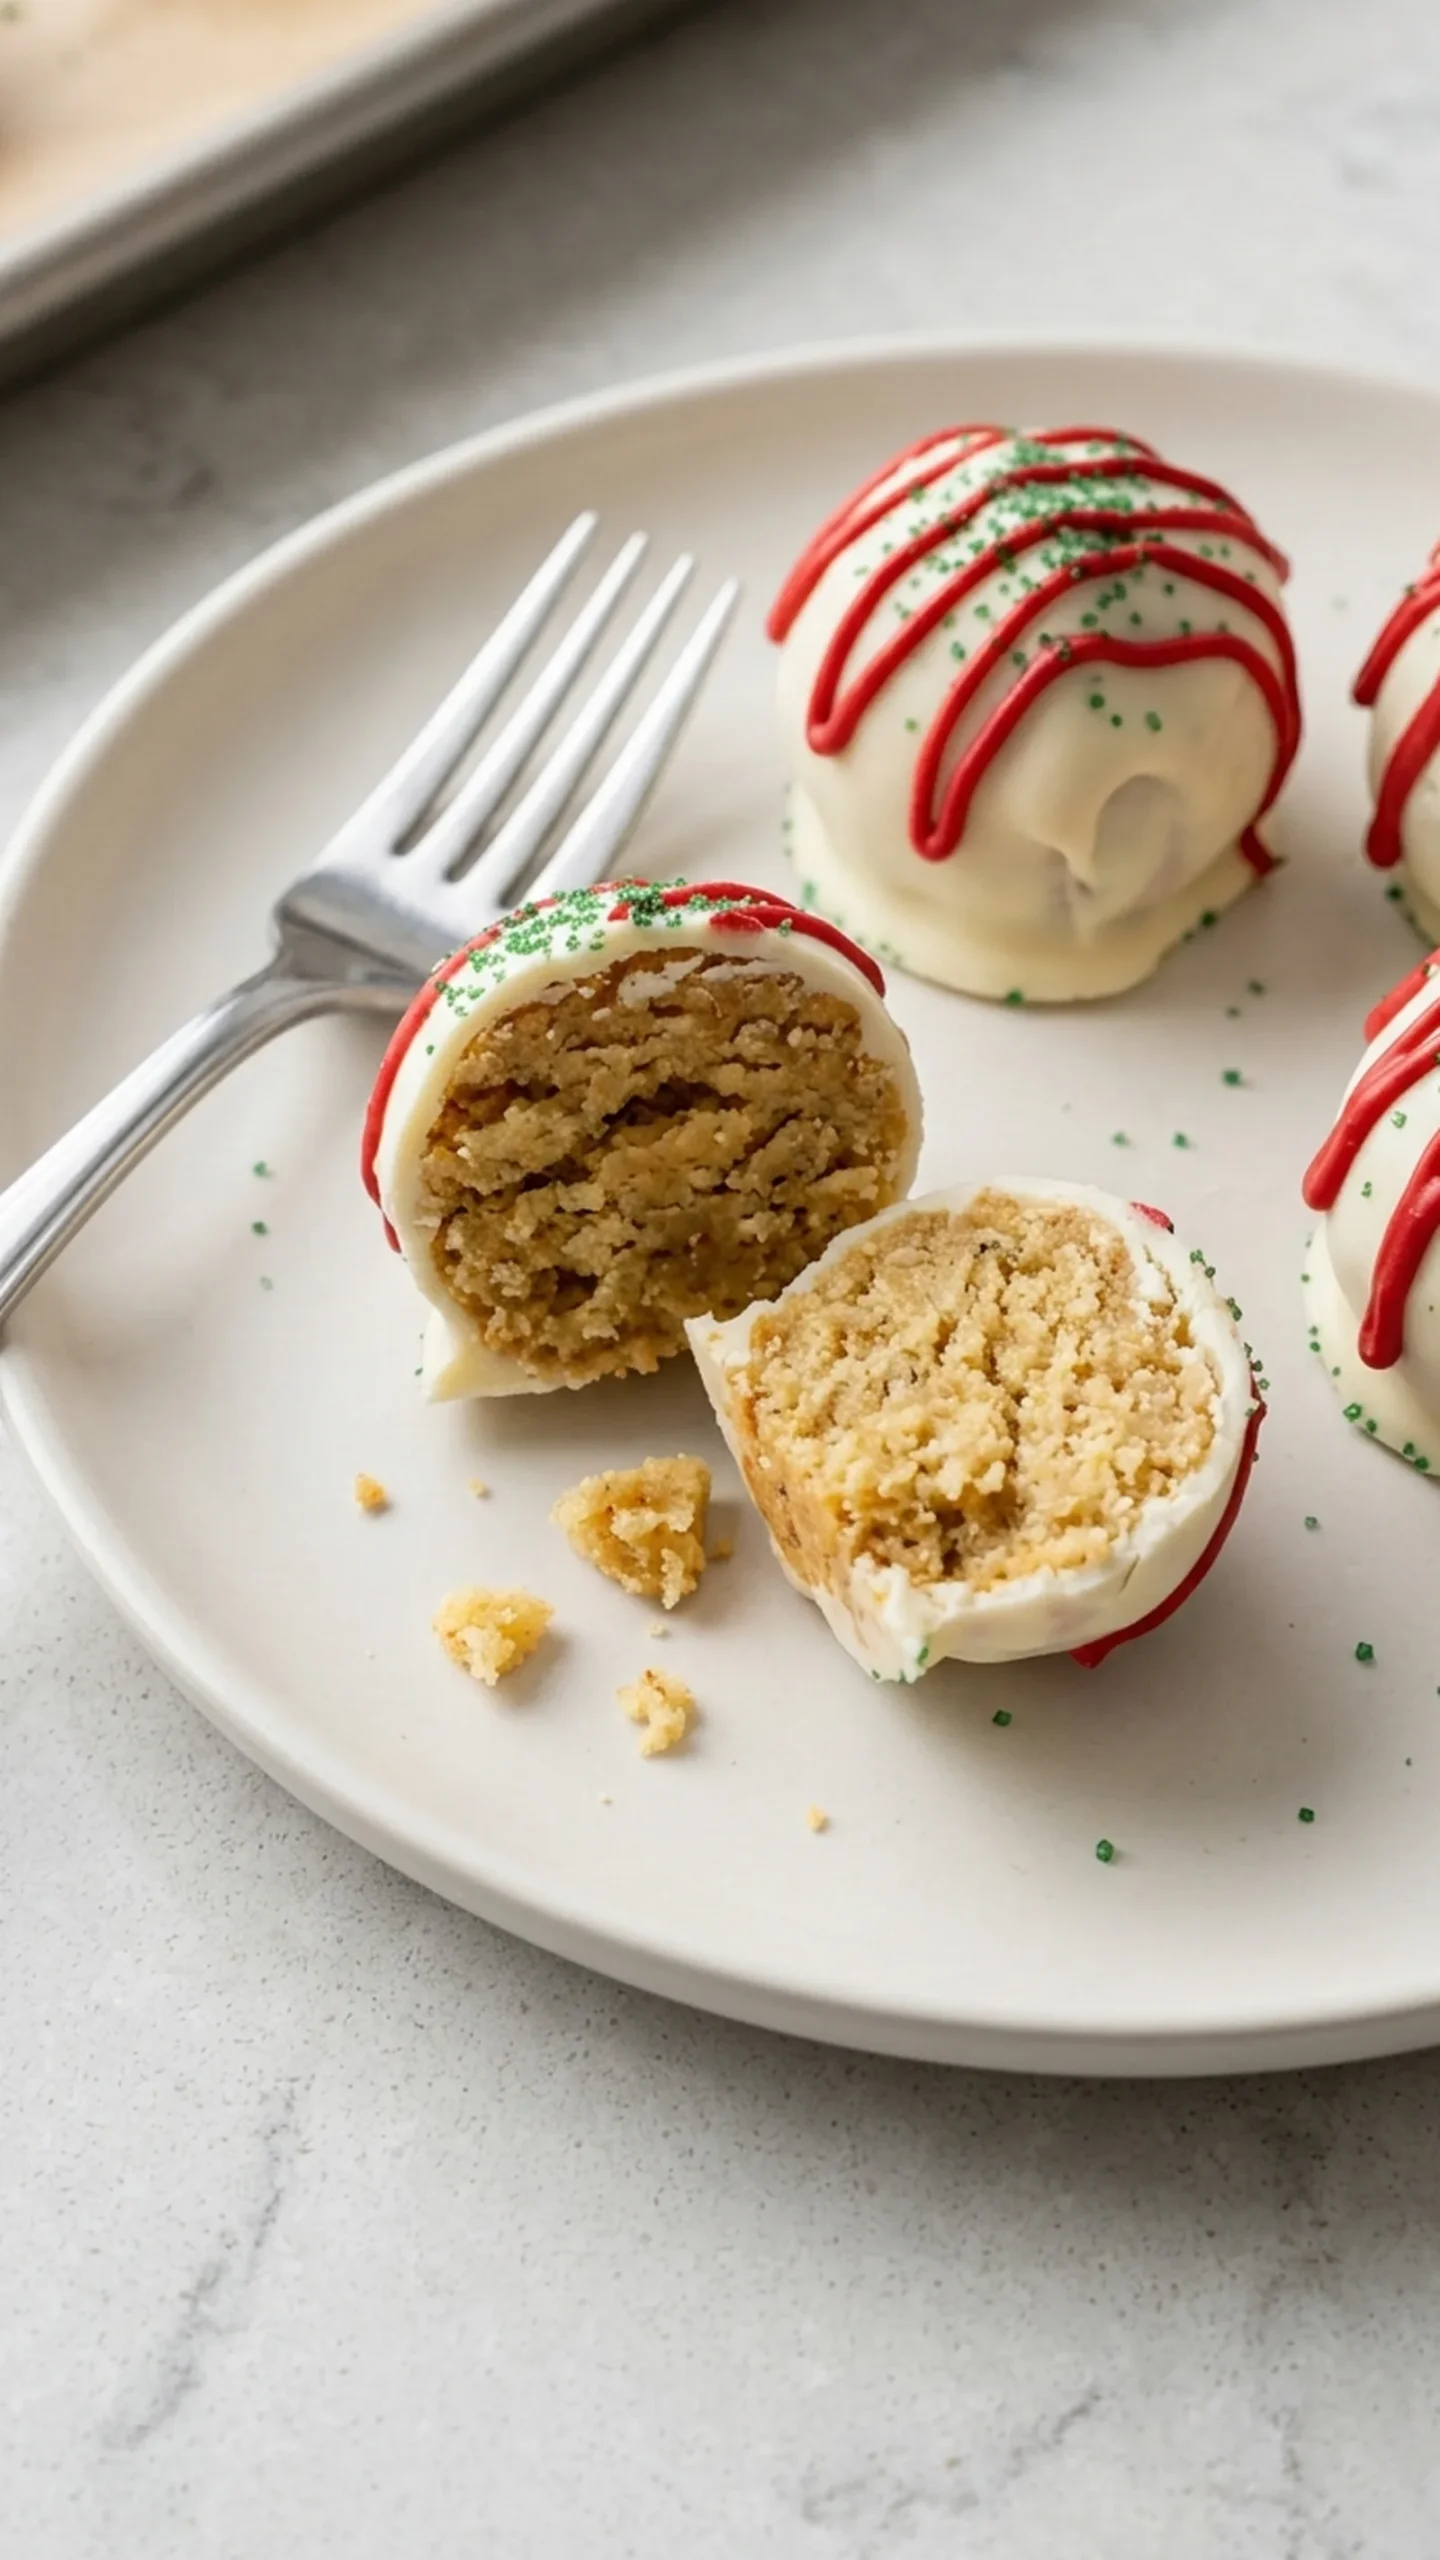
The finished mixture should resemble a soft cake-pop filling. When pressed between your fingers, it should hold together without crumbling.
If the mixture feels very soft, allow it to firm briefly in the refrigerator before shaping.
3. Shape the Cake Balls
Line a 13 x 18-inch (33 x 46 cm) rimmed baking sheet with parchment paper.
Divide the cake mixture into 18 equal portions, using a small cookie scoop to help keep the portions consistent.
Roll each portion gently between your palms to form a smooth ball.
Arrange the balls on the prepared baking sheet, leaving a little space between them.
The balls should feel compact and hold their round shape without flattening.
4. Chill Until Firm
Place the baking sheet in the refrigerator and chill the cake balls for 30 minutes.
They should feel firm enough to lift without changing shape but should not be frozen solid.
This chilling stage helps the centers stay intact when dipped into the warm candy coating.
If a ball develops a small crack, gently roll it again to smooth the surface before dipping.
5. Melt the White Candy Coating
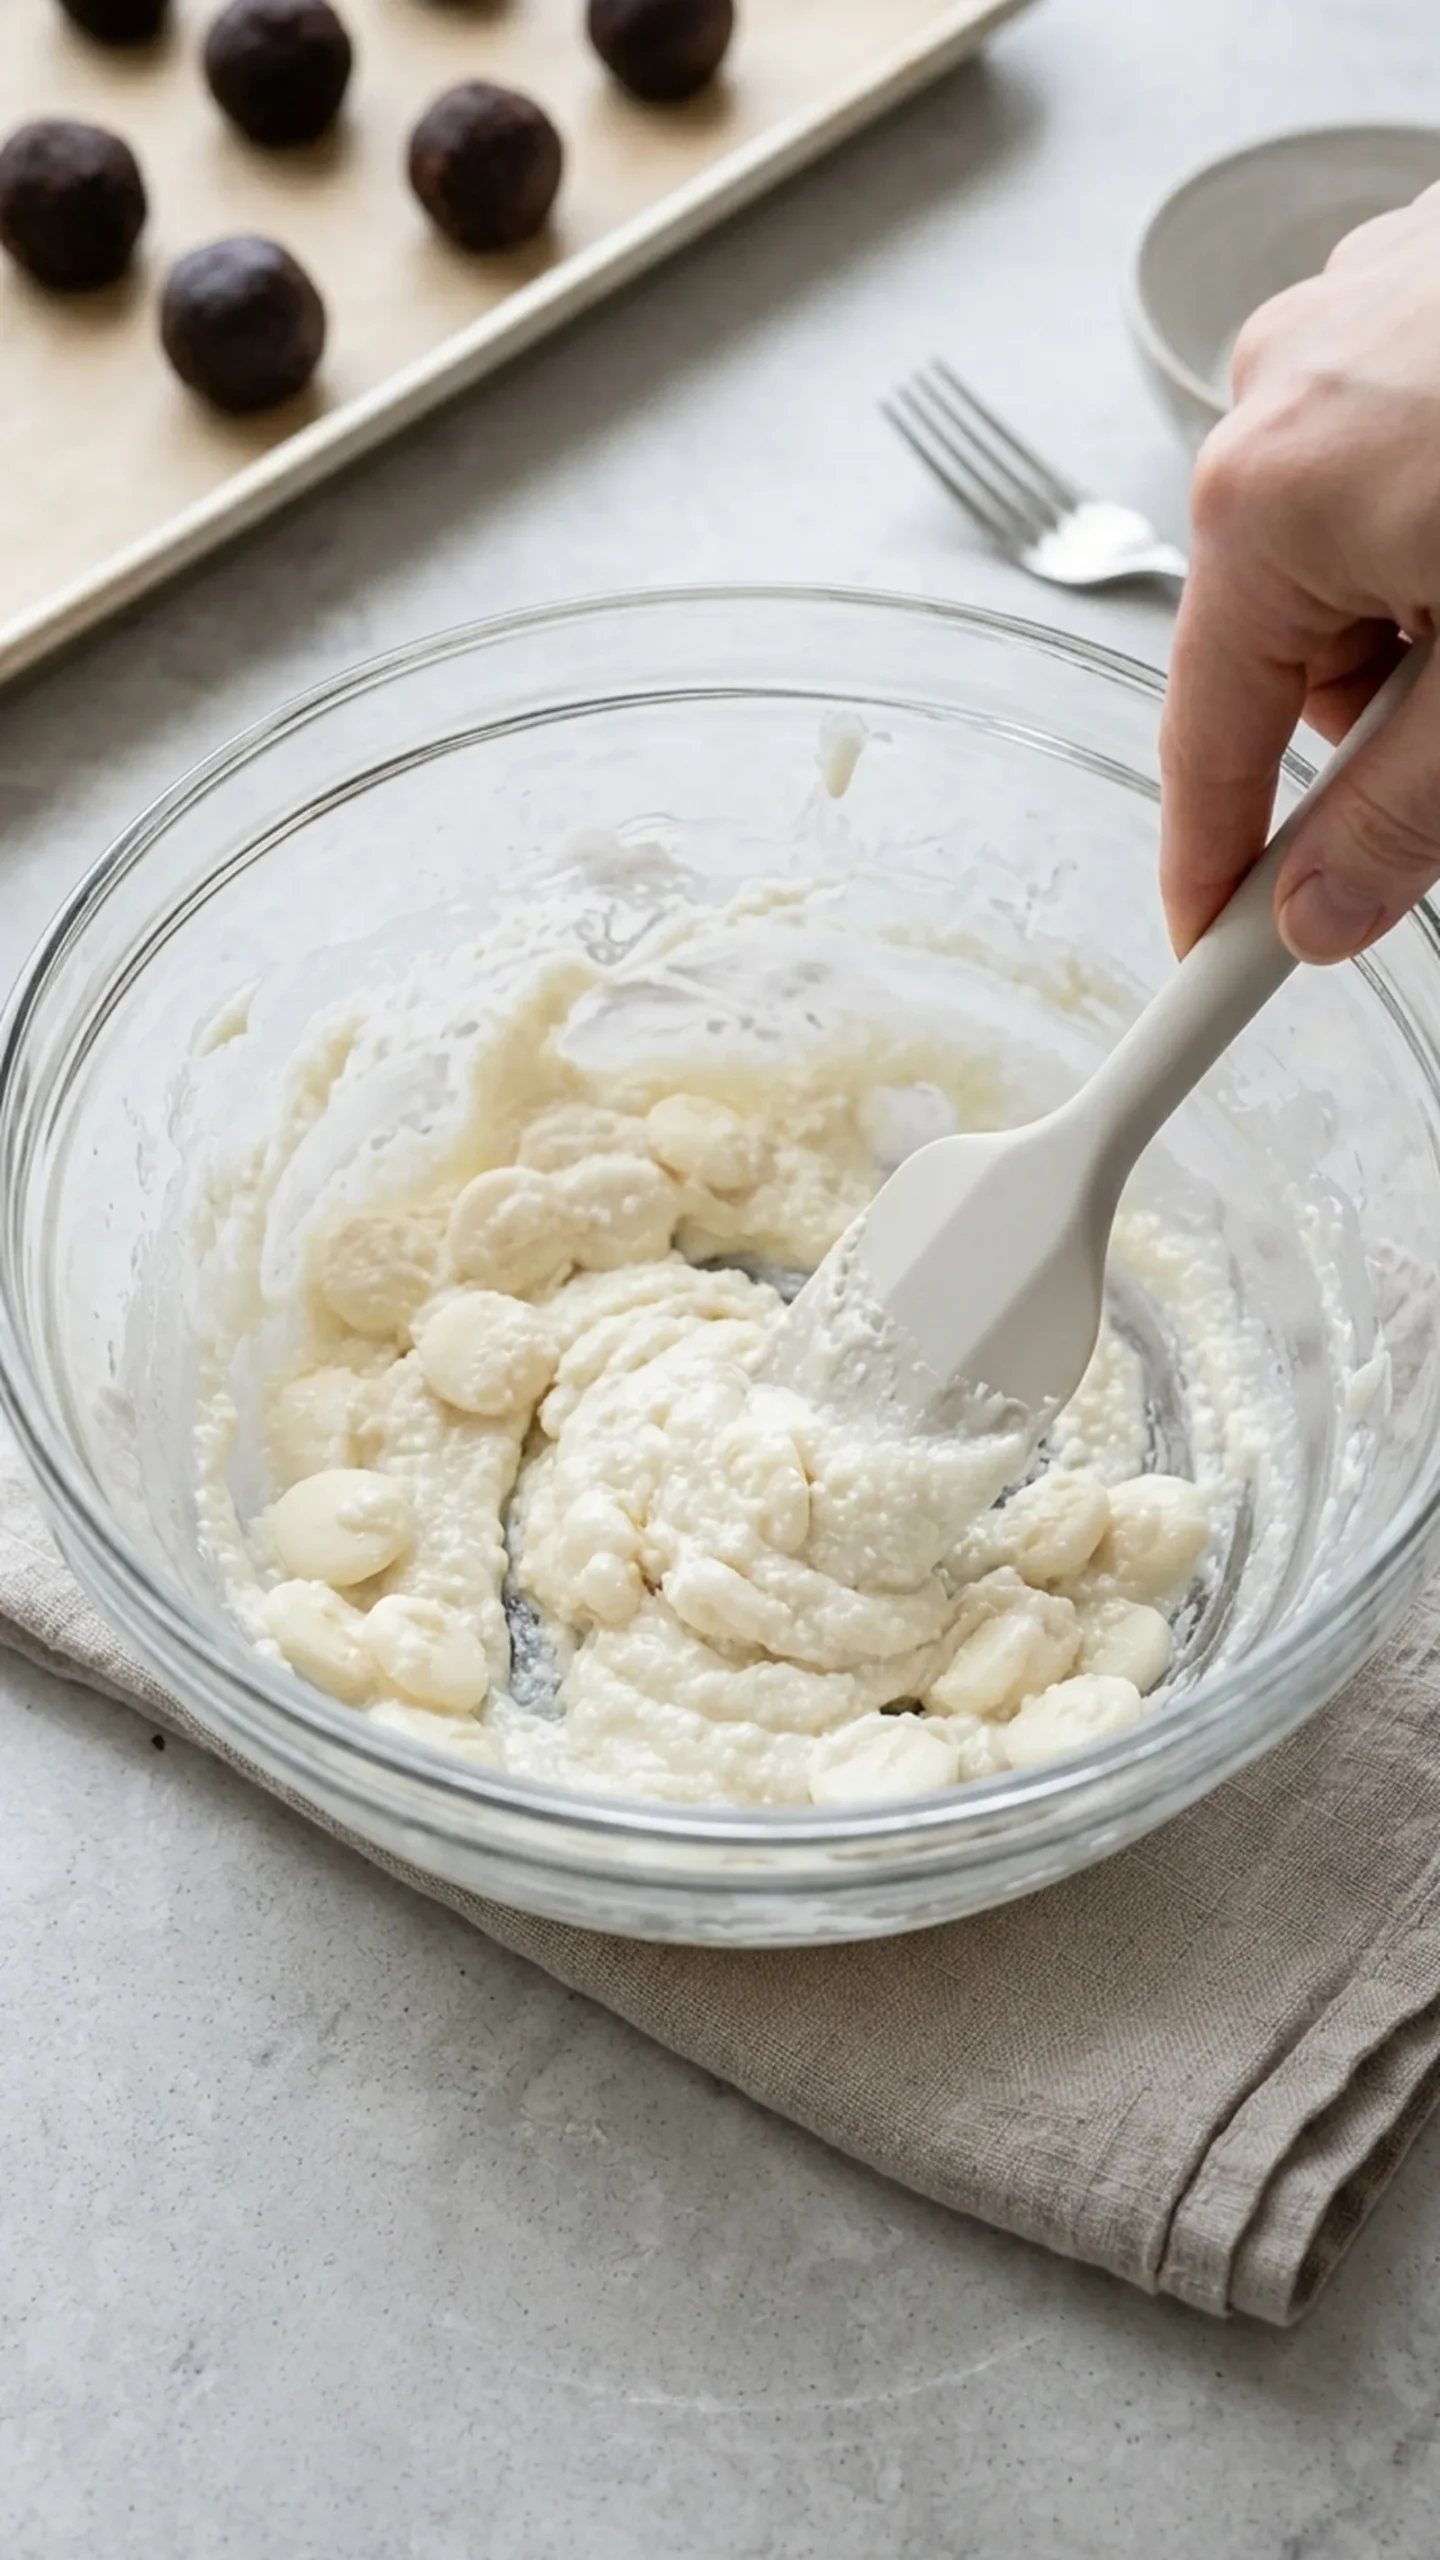
Place the 12 ounces (340 g) of white candy melting wafers in a microwave-safe bowl.
Microwave at 50% power in 20-second intervals, stirring thoroughly after each interval, until the wafers are melted.
The melting process should take approximately 3 to 4 minutes in total, depending on the microwave and the type of wafers.
The coating should look smooth and glossy and flow easily from a spoon.
Avoid overheating. If the wafers become thick or grainy, stop heating and stir to distribute the remaining warmth.
6. Dip the Truffles
Remove the chilled cake balls from the refrigerator.
Working with one ball at a time, lower it into the melted white coating using a fork or dipping tool.
Turn gently until the entire surface is covered.
Lift the truffle out and allow the excess coating to drip back into the bowl. Lightly tap the fork against the edge of the bowl to remove extra coating.
Return the coated truffle to the parchment-lined baking sheet.
Continue until all 18 truffles are coated.
For a cleaner finish, work steadily while the coating remains fluid. If it begins to thicken, warm it briefly according to the package directions.
7. Melt the Red Candy Wafers
Place the 2 ounces (57 g) of red candy melting wafers in a separate microwave-safe bowl.
Microwave at 50% power in 15-second intervals, stirring between intervals, until smooth.
This should take approximately 1 to 2 minutes.
Transfer the melted red coating to a small piping bag or zip-top bag. Snip a very small opening in one corner.
The coating should be fluid enough to pipe thin lines without forming heavy blobs.
8. Decorate the Christmas Truffles
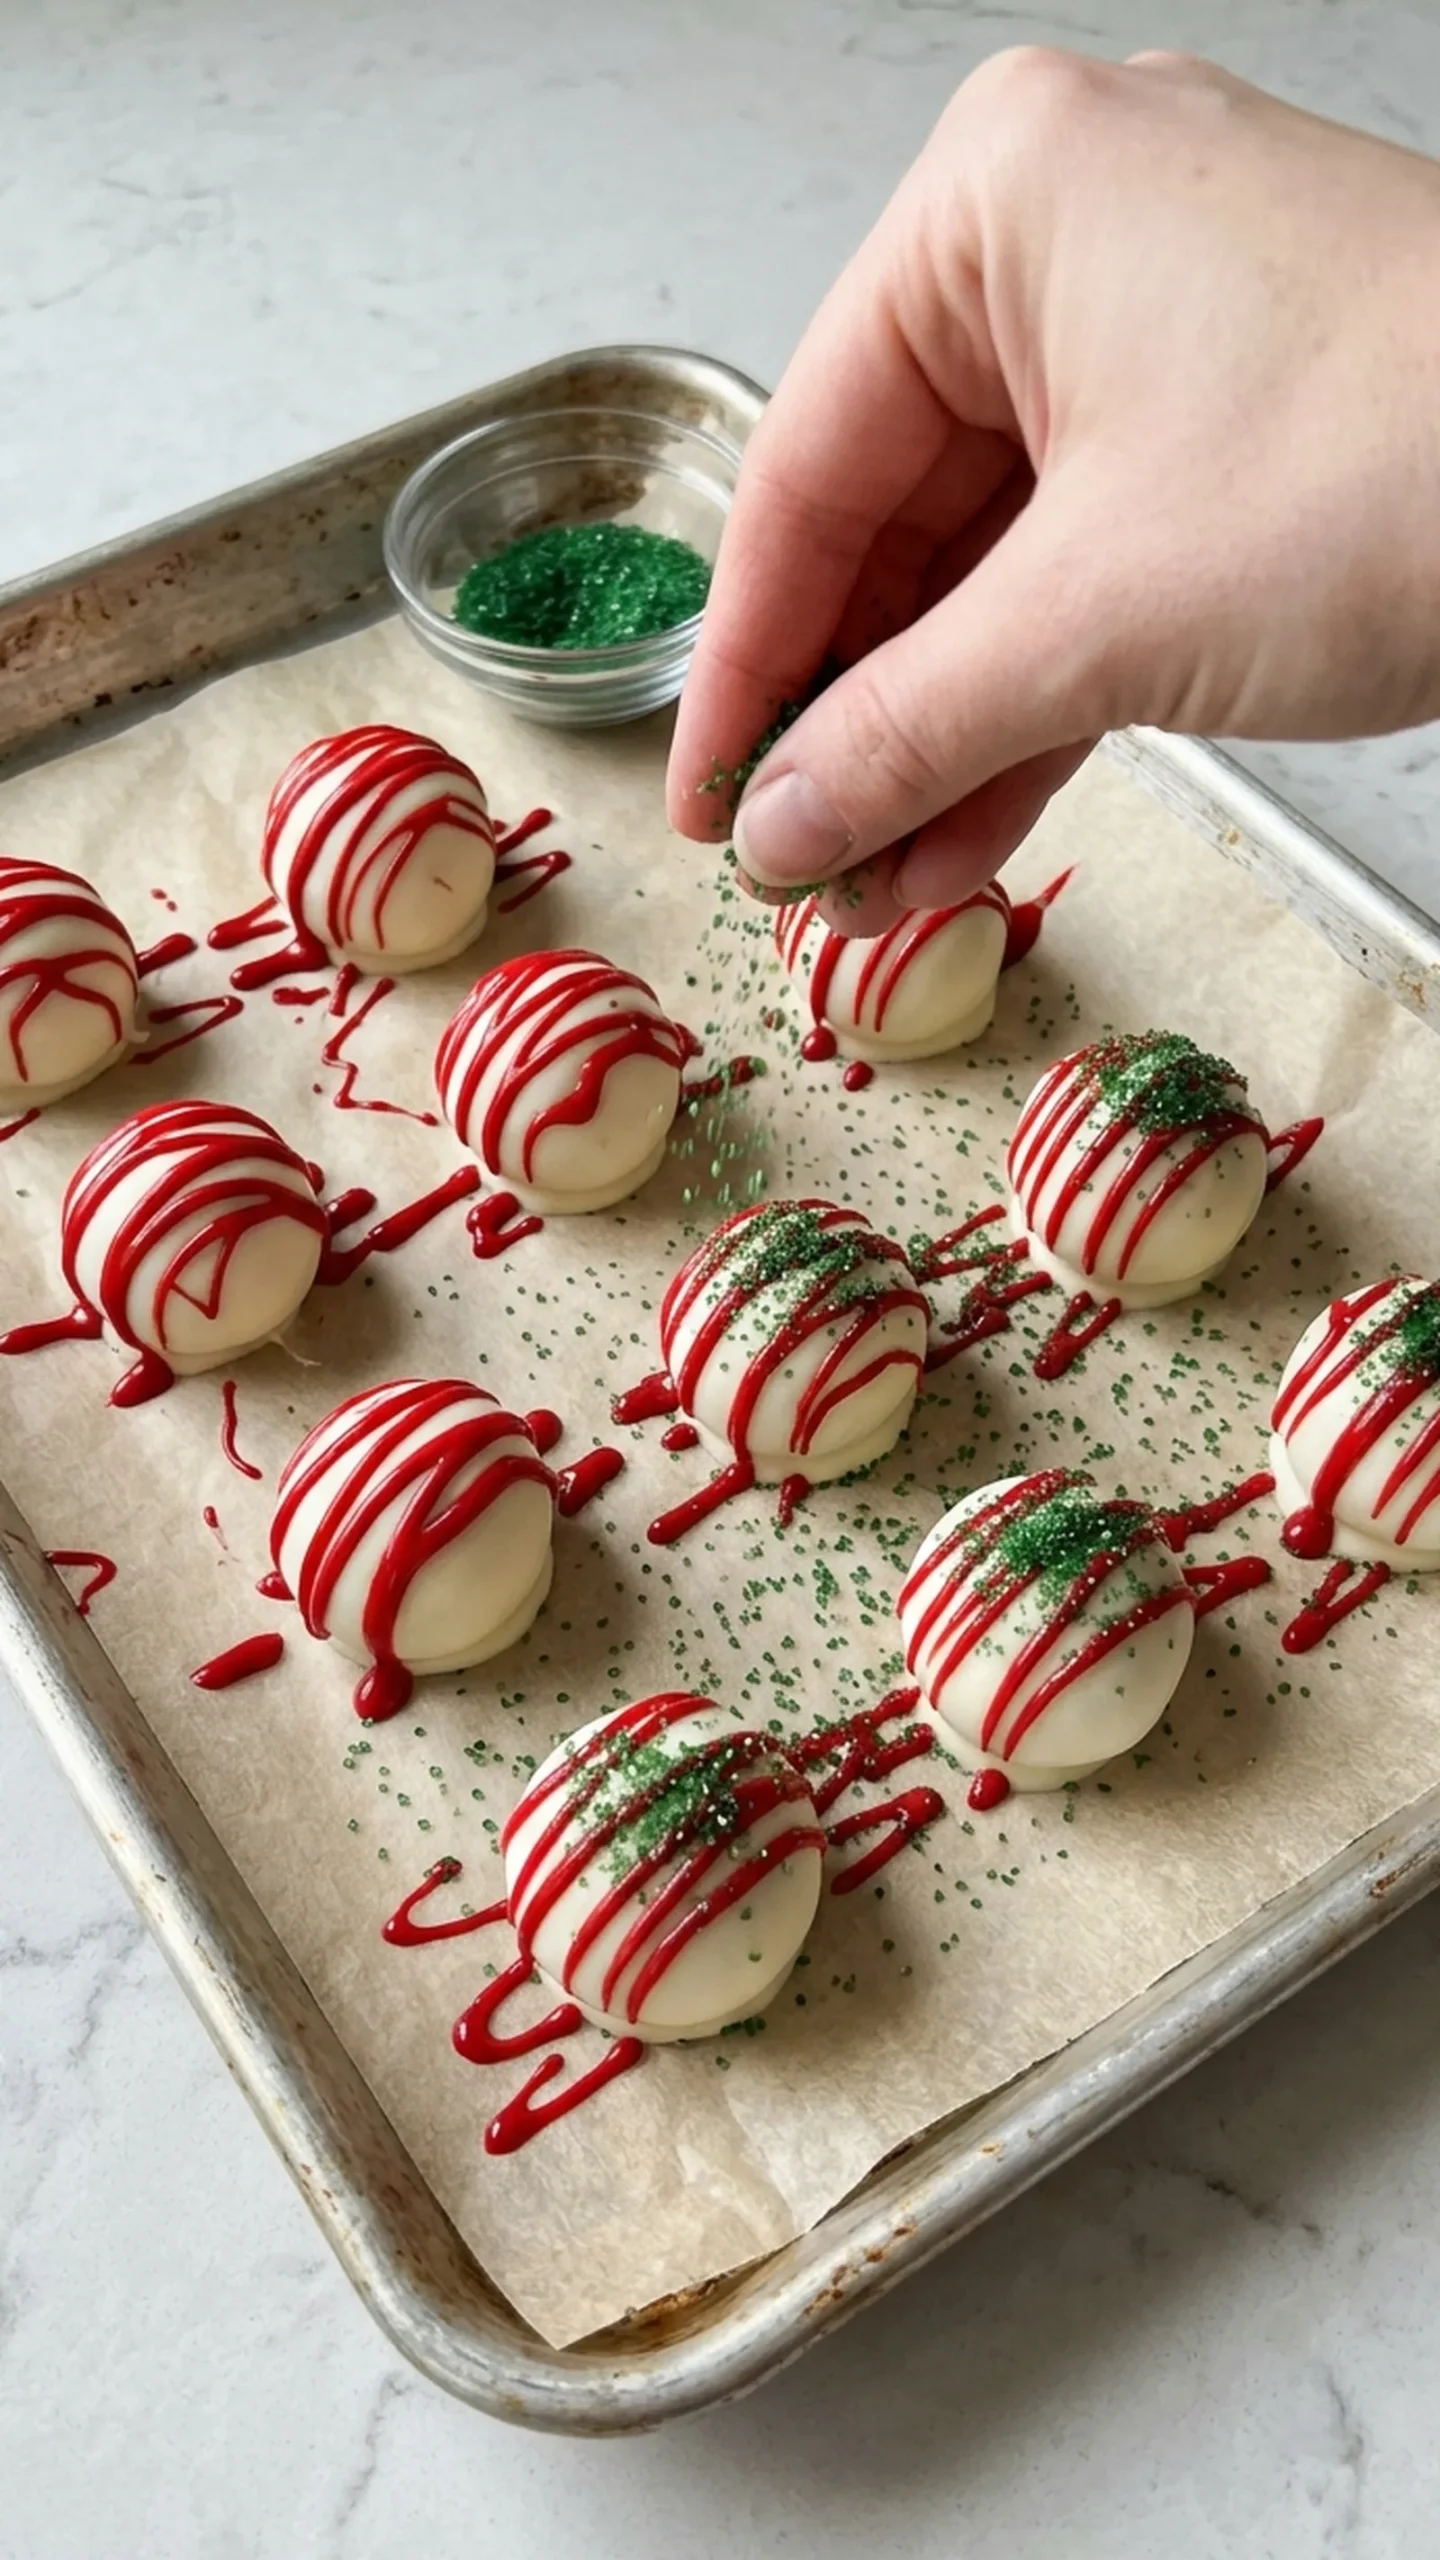
Pipe thin red lines back and forth across the tops of the white-coated truffles.
While the red coating is still soft, sprinkle the 1 tablespoon (about 10 g) of green sanding sugar or green sugar sprinkles over the truffles, distributing it evenly across the batch.
The red drizzle should create a simple zigzag pattern, with green sugar adding color and texture.
Avoid handling the coated truffles directly while the decorations are setting, as fingerprints can mark the surface.
9. Chill Until Set
Return the decorated truffles to the refrigerator for 30 minutes, or until the candy coating is completely firm.
The finished truffles should have a solid outer shell and a soft, dense center.
Once set, carefully lift them from the parchment paper and arrange them on a serving platter or transfer them to a storage container.
Serve chilled or allow them to sit briefly at room temperature for a slightly softer center.
Storage, Freezing, and Make-Ahead Instructions
Refrigerator Storage: Because these truffles contain cream cheese, store them in the refrigerator rather than leaving them at room temperature for extended periods. Place the finished truffles in an airtight container, separating layers with parchment paper to protect the decorations. Refrigerate for up to 5 days. For a softer center, remove the truffles from the refrigerator shortly before serving. Avoid leaving them unrefrigerated for more than 2 hours.
Freezing Instructions: Little Debbie Christmas Tree Cake Truffles can be frozen for longer storage. For the neatest appearance, freeze the shaped, uncoated cake balls and add the candy coating and decorations after thawing. Arrange the uncoated balls in a single layer on a parchment-lined baking sheet and freeze until firm. Transfer them to a freezer-safe airtight container or freezer bag. Freeze for up to 2 months for the best texture. Fully decorated truffles can also be frozen, although condensation during thawing may dull the coating or cause the colored decorations to bleed slightly.
How to Thaw: Transfer frozen truffles to the refrigerator and allow them to thaw overnight. Keep decorated truffles inside their closed storage container while thawing to reduce condensation on the candy coating. Do not microwave or heat the finished truffles.
Make-Ahead Instructions: The truffle centers can be prepared up to 2 days ahead. Shape the cake balls, arrange them in an airtight container with parchment between layers, and refrigerate until ready to dip. For the freshest-looking decorations, coat and decorate the truffles closer to serving time. Fully assembled truffles can also be prepared the day before a Christmas party or holiday gathering.
FAQ
Can I make Little Debbie Christmas Tree Cake Truffles ahead of time?
Yes. These truffles are well suited to advance preparation because the centers need refrigeration before dipping. You can shape the cake balls ahead of time and keep them refrigerated, or prepare the entire batch the day before serving. Store the finished truffles in an airtight container in the refrigerator to keep the coating firm and the centers fresh.
Why is my truffle mixture too sticky to roll?
The mixture may be too warm, or the cream cheese may have become overly soft. Refrigerate the mixture until it firms enough to handle. The filling should feel moist and cohesive but should not spread or flatten when shaped. Avoid adding extra cream cheese, since the packaged snack cakes already contain moisture and filling.
Can I use white chocolate chips instead of candy melting wafers?
You can, but white chocolate chips are not the most reliable option for dipping. They often melt into a thicker mixture and may not form an evenly coated shell. White candy melting wafers are easier to work with because they are designed for melting, dipping, and setting without tempering.
How do I prevent the coating from cracking?
Avoid extreme temperature differences between the cake centers and the melted coating. Refrigerated cake balls are preferable to frozen-solid centers because very cold filling can expand slightly as it warms, sometimes cracking the shell. Also, keep the candy coating warm enough to flow smoothly without overheating it.
Can I make these truffles without cream cheese?
The snack cakes contain enough creme filling that they may hold together without additional cream cheese. However, removing it will change the texture and binding strength of the mixture. Start by thoroughly crumbling and pressing the cakes together. If they form cohesive balls, you may not need a binder. The finished centers may be slightly sweeter and less creamy than the cream cheese version.
Ingredients
Method
- Unwrap all 5 Little Debbie Christmas Tree Cakes and break them into small pieces directly into a large mixing bowl. Use your hands, a sturdy spatula, or an electric hand mixer on low speed to crumble the cakes. Continue until the cake, creme filling, and outer coating are evenly distributed. The mixture should look moist and crumbly, with no large chunks of cake remaining.
- Add the 2 ounces (57 g) of softened cream cheese to the crumbled cakes. Mix on low speed or work the mixture together with a sturdy spatula until it becomes thick, cohesive, and slightly sticky. The finished mixture should resemble a soft cake-pop filling. When pressed between your fingers, it should hold together without crumbling. If the mixture feels very soft, allow it to firm briefly in the refrigerator before shaping.
- Line a 13 x 18-inch (33 x 46 cm) rimmed baking sheet with parchment paper. Divide the cake mixture into 18 equal portions, using a small cookie scoop to help keep the portions consistent. Roll each portion gently between your palms to form a smooth ball. Arrange the balls on the prepared baking sheet, leaving a little space between them. The balls should feel compact and hold their round shape without flattening.
- Place the baking sheet in the refrigerator and chill the cake balls for 30 minutes. They should feel firm enough to lift without changing shape but should not be frozen solid. This chilling stage helps the centers stay intact when dipped into the warm candy coating. If a ball develops a small crack, gently roll it again to smooth the surface before dipping.
- Place the 12 ounces (340 g) of white candy melting wafers in a microwave-safe bowl. Microwave at 50% power in 20-second intervals, stirring thoroughly after each interval, until the wafers are melted. The melting process should take approximately 3 to 4 minutes in total, depending on the microwave and the type of wafers. The coating should look smooth and glossy and flow easily from a spoon. Avoid overheating. If the wafers become thick or grainy, stop heating and stir to distribute the remaining warmth.
- Remove the chilled cake balls from the refrigerator: Working with one ball at a time, lower it into the melted white coating using a fork or dipping tool. Turn gently until the entire surface is covered. Lift the truffle out and allow the excess coating to drip back into the bowl. Lightly tap the fork against the edge of the bowl to remove extra coating. Return the coated truffle to the parchment-lined baking sheet. Continue until all 18 truffles are coated. For a cleaner finish, work steadily while the coating remains fluid. If it begins to thicken, warm it briefly according to the package directions.
- Place the 2 ounces (57 g) of red candy melting wafers in a separate microwave-safe bowl. Microwave at 50% power in 15-second intervals, stirring between intervals, until smooth. This should take approximately 1 to 2 minutes. Transfer the melted red coating to a small piping bag or zip-top bag. Snip a very small opening in one corner. The coating should be fluid enough to pipe thin lines without forming heavy blobs.
- Pipe thin red lines back and forth across the tops of the white-coated truffles. While the red coating is still soft, sprinkle the 1 tablespoon (about 10 g) of green sanding sugar or green sugar sprinkles over the truffles, distributing it evenly across the batch. The red drizzle should create a simple zigzag pattern, with green sugar adding color and texture. Avoid handling the coated truffles directly while the decorations are setting, as fingerprints can mark the surface.
- Return the decorated truffles to the refrigerator for 30 minutes, or until the candy coating is completely firm. The finished truffles should have a solid outer shell and a soft, dense center. Once set, carefully lift them from the parchment paper and arrange them on a serving platter or transfer them to a storage container. Serve chilled or allow them to sit briefly at room temperature for a slightly softer center.

Kate Handsom
Home cook and recipe creator behind Hibord in Austin, Texas—sharing cozy comfort food, crowd-pleasing party dips, and dependable weeknight dinners built with everyday ingredients.