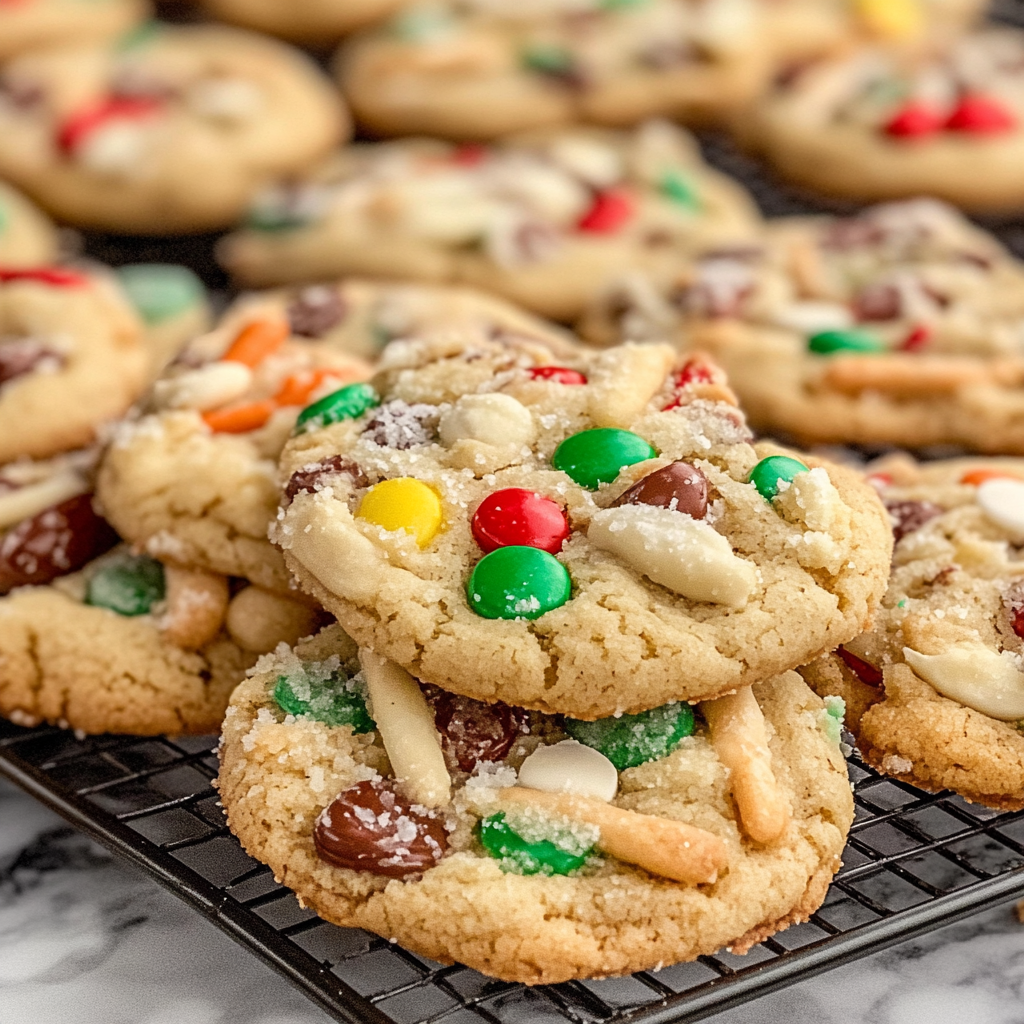
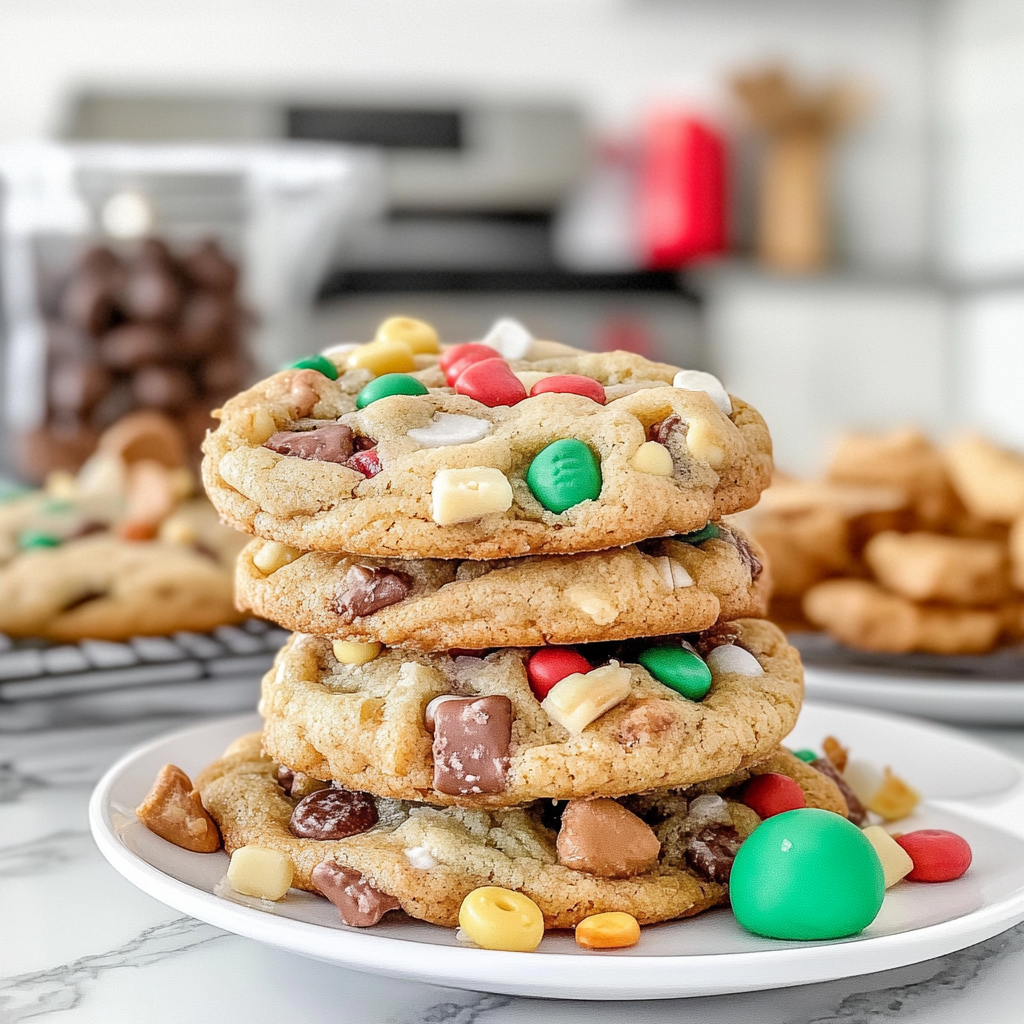
The holiday season is upon us, and that means it’s time to whip out the mixing bowls and indulge in some delightful baking. Imagine the aroma of warm cookies wafting through your home like a cozy hug from a loved one. This is what Christmas Kitchen Sink Cookies bring to the table—a glorious melange of flavors and textures that will make your taste buds dance with joy.

Baking these cookies feels like a festive celebration all on its own, reminding us of those cherished moments spent with family, decorating the tree while sneaking bites of dough when no one was looking. You’ll want to save this recipe for every holiday gathering because trust me, they are not just cookies; they’re small bites of happiness!
Why You'll Love This Christmas Kitchen Sink Cookies
- These incredible Christmas Kitchen Sink Cookies transform simple everyday ingredients into restaurant-quality flavors that will blow your mind completely.
- Foolproof recipe techniques guarantee perfect results every single time, making even novice cooks feel like professional chefs instantly.
- Stunning visual appeal with gorgeous colors and mouthwatering aromas creates the ultimate Instagram-worthy dish for any special occasion.
- Endlessly adaptable for different dietary needs while working beautifully for meal prep, date nights, or entertaining large groups effortlessly.
What You’ll Need
Here’s what you’ll need to make this delicious Christmas Kitchen Sink Cookies:
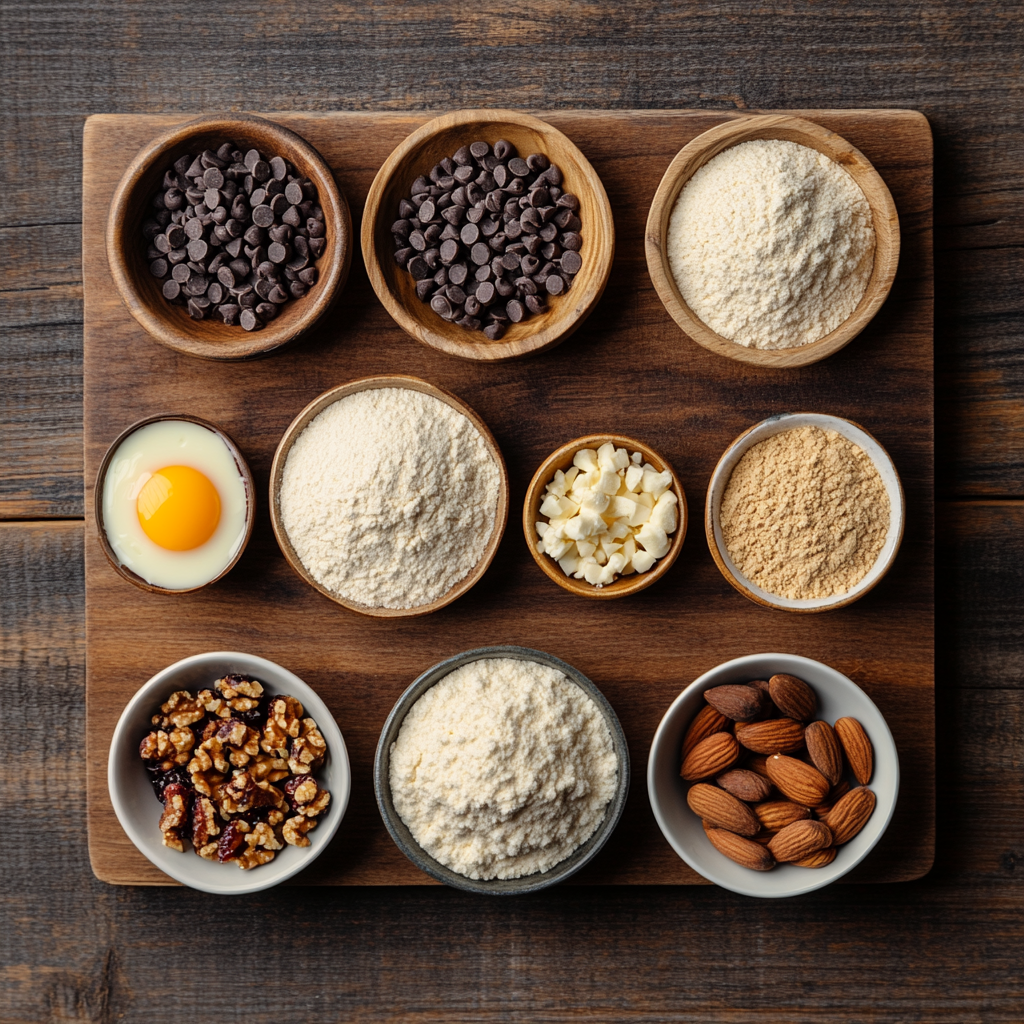
- All-Purpose Flour: The backbone of any cookie, use unbleached flour for a richer flavor.
- Granulated Sugar: Sweetness that balances nicely with other flavors; it’s essential for that chewy texture.
- Brown Sugar: Adds depth and moisture; don’t skip this ingredient unless you want dry cookies.
- Baking Soda: Helps the cookies rise beautifully; make sure it’s fresh for best results.
- Salt: A pinch here enhances all the sweet flavors; think of it as cookie magic!
- Unsalted Butter: Softened for easy mixing; gives those cookies a rich flavor and tender crumb.
- Eggs: Provides structure and richness; use room temperature eggs for better mixing.
- Vanilla Extract: A must-have flavor enhancer; use pure vanilla extract if possible for that extra oomph.
For the Fun Add-Ins:
- Chocolate Chips: Go dark or milk chocolate—it’s your call! They add gooey goodness in every bite.
- Dried Fruit: Think cranberries or cherries for a pop of tartness that complements the sweetness perfectly.
- Nuts: Walnuts or pecans give a lovely crunch and nutty flavor—totally optional if you’re nut-averse!
The full ingredients list, including measurements, is provided in the recipe card directly below.
Cooking Instructions
Follow these simple steps to prepare this delicious Christmas Kitchen Sink Cookies:
Step 1: Preheat Your Oven
Preheat your oven to 350°F (175°C). While it warms up, grab two baking sheets and line them with parchment paper—because nobody wants sticky cookies stuck to their baking sheets!
Step 2: Mix Dry Ingredients
In a large bowl, whisk together all-purpose flour, baking soda, and salt. This step ensures everything mixes evenly without clumps.
Step 3: Cream Butter and Sugars
In another bowl, cream together softened butter, granulated sugar, and brown sugar until fluffy. It’s like giving your mixer a mini workout—just wait until you see how light and airy it becomes!
Step 4: Add Eggs and Vanilla
Beat in eggs one at a time followed by vanilla extract. As you mix, imagine all those delicious flavors swirling together in pure cookie harmony.
Step 5: Combine Mixtures
Gradually add your dry mixture into the wet mixture. Stir until just combined—don’t overdo it! We want soft cookies, not tough ones.
Step 6: Fold in Add-Ins
Now comes the fun part! Gently fold in chocolate chips, dried fruits, or nuts—whatever floats your boat!
Step 7: Scoop & Bake
Using a scoop or spoon (or just your hands if you’re feeling adventurous), drop dough balls onto prepared baking sheets about two inches apart. Bake them in the preheated oven for about ten to twelve minutes until golden around the edges but still soft in the middle.
Transfer them to wire racks to cool slightly before devouring them warm! And there you have it—Christmas Kitchen Sink Cookies that are not only delicious but also bring everyone together during the festive season.
These little delights are perfect for cookie swaps or simply treating yourself after an exhausting day of shopping or wrapping presents. Enjoy every bite knowing they’re made with love…and maybe a bit of holiday spirit too!
You Must Know About Christmas Kitchen Sink Cookies
- This showstopping Christmas Kitchen Sink Cookies delivers restaurant-quality results using simple ingredients you probably already have at home.
- The perfect balance of textures and flavors creates an unforgettable dining experience that will have everyone asking for seconds.
- Picture-perfect presentation with vibrant colors makes this dish absolutely Instagram-worthy and guaranteed to impress any dinner guest.
- Incredibly versatile recipe that works beautifully for weeknight dinners, meal prep, special occasions, or even outdoor entertaining sessions.
Perfecting Cooking Process
Start by creaming the butter and sugars together until fluffy; this is where the magic begins. Then, mix in the eggs one by one. Combine dry ingredients separately before adding them to the wet mixture. Finally, fold in your favorite add-ins for those Christmas Kitchen Sink Cookies that are truly delightful.
Flavor Your Way
Feel free to get creative with your Christmas Kitchen Sink Cookies! Swap the chocolate chips for butterscotch or white chocolate. Add dried fruits or nuts for extra texture, and don’t forget a pinch of sea salt on top for that sweet-salty kick.
Storing & Reheating
To keep your Christmas Kitchen Sink Cookies fresh, store them in an airtight container at room temperature for up to a week. If you want to enjoy them warm, pop them in the microwave for about 10 seconds or until just heated through.
Chef's Helpful Tips for Christmas Kitchen Sink Cookies
- This professional-quality Christmas Kitchen Sink Cookies relies on precise timing and temperature control to achieve restaurant-standard results consistently.
- Master the art of mise en place by prepping all ingredients beforehand, ensuring smooth execution and preventing any last-minute cooking disasters.
- The secret lies in layering flavors throughout the cooking process rather than seasoning only at the end for maximum depth.
- Pro tip: let the finished dish rest for optimal texture and flavor development before serving to hungry guests waiting eagerly.
Sometimes my friends would joke about my obsession with cookie baking—especially during Christmas! One time, I made a batch of these cookies for a holiday party, and they disappeared faster than Santa down a chimney!
FAQs
What are Christmas Kitchen Sink Cookies?
Christmas Kitchen Sink Cookies are delightful treats that combine various ingredients, making them a fun and versatile dessert. Typically, these cookies include a mix of chocolate chips, nuts, dried fruits, and even holiday-themed candies. The concept behind the name “kitchen sink” is that you can throw in just about anything you have on hand, creating a unique flavor profile with every batch. These cookies are perfect for holiday gatherings, allowing your creativity to shine through as you customize them to your liking.
How do I store Christmas Kitchen Sink Cookies?
To keep your Christmas Kitchen Sink Cookies fresh, store them in an airtight container at room temperature. They can last up to one week without losing their deliciousness. If you want to extend their shelf life, consider freezing them. Simply place the cookies in a freezer-safe bag or container, separating layers with parchment paper to prevent sticking. Thaw them at room temperature when ready to enjoy again, maintaining their chewy texture and rich flavors.
Can I customize my Christmas Kitchen Sink Cookies recipe?
Absolutely! One of the best things about Christmas Kitchen Sink Cookies is their versatility. You can customize the recipe by adding your favorite ingredients, such as peanut butter chips, white chocolate chunks, or even crushed candy canes for a festive touch. Feel free to swap out nuts or dried fruits based on personal preference or dietary restrictions. This flexibility makes these cookies perfect for sharing with friends and family during the holiday season.
What occasions are best for making Christmas Kitchen Sink Cookies?
Christmas Kitchen Sink Cookies are ideal for various occasions beyond just the holidays. They’re perfect for cookie exchanges, holiday parties, or even as a sweet gift for loved ones. Their colorful appearance and unique flavors make them a crowd-pleaser at any gathering. Additionally, you can bake these cookies for family movie nights or simply as a fun baking activity with kids during winter break. The possibilities are endless!
Conclusion
In summary, Christmas Kitchen Sink Cookies offer a fun and delicious way to celebrate the holiday season. With endless customization options and easy storage methods, they make an excellent treat for any occasion. Whether you’re baking for family gatherings or sharing with friends, these cookies are sure to impress everyone with their delightful flavors and textures. Don’t miss out on creating your own batch of Christmas Kitchen Sink Cookies this year!

Christmas Kitchen Sink Cookies
- Total Time: 27 minutes
- Yield: Approximately 24 cookies 1x
Description
Christmas Kitchen Sink Cookies are the ultimate festive treat that blend delightful flavors and textures in every bite. Packed with chocolate chips, dried fruits, and optional nuts, these cookies create an inviting aroma that fills your kitchen with holiday cheer. Ideal for cookie swaps or family gatherings, this recipe encourages creativity, allowing you to customize each batch to suit your taste. Enjoy these sweet bites of happiness that are sure to brighten up your holiday celebrations!
Ingredients
- 2 1/4 cups all-purpose flour
- 1 tsp baking soda
- 1/2 tsp salt
- 3/4 cup unsalted butter (softened)
- 1/2 cup granulated sugar
- 3/4 cup brown sugar (packed)
- 2 large eggs (room temperature)
- 2 tsp vanilla extract
- 1 cup chocolate chips
- 1/2 cup dried cranberries
- 1/2 cup chopped walnuts (optional)
Instructions
- Preheat your oven to 350°F (175°C) and line two baking sheets with parchment paper.
- In a bowl, whisk together the flour, baking soda, and salt.
- In another bowl, cream the softened butter, granulated sugar, and brown sugar until fluffy.
- Beat in the eggs one at a time followed by vanilla extract.
- Gradually add the dry mixture to the wet mixture until just combined.
- Fold in chocolate chips, dried cranberries, and walnuts if using.
- Scoop dough onto prepared sheets about two inches apart and bake for 10-12 minutes until golden around edges but soft in center.
- Prep Time: 15 minutes
- Cook Time: 12 minutes
- Category: Dessert
- Method: Baking
- Cuisine: American
Nutrition
- Serving Size: 1 cookie (30g)
- Calories: 150
- Sugar: 9g
- Sodium: 90mg
- Fat: 7g
- Saturated Fat: 4g
- Unsaturated Fat: 3g
- Trans Fat: 0g
- Carbohydrates: 20g
- Fiber: 1g
- Protein: 2g
- Cholesterol: 20mg