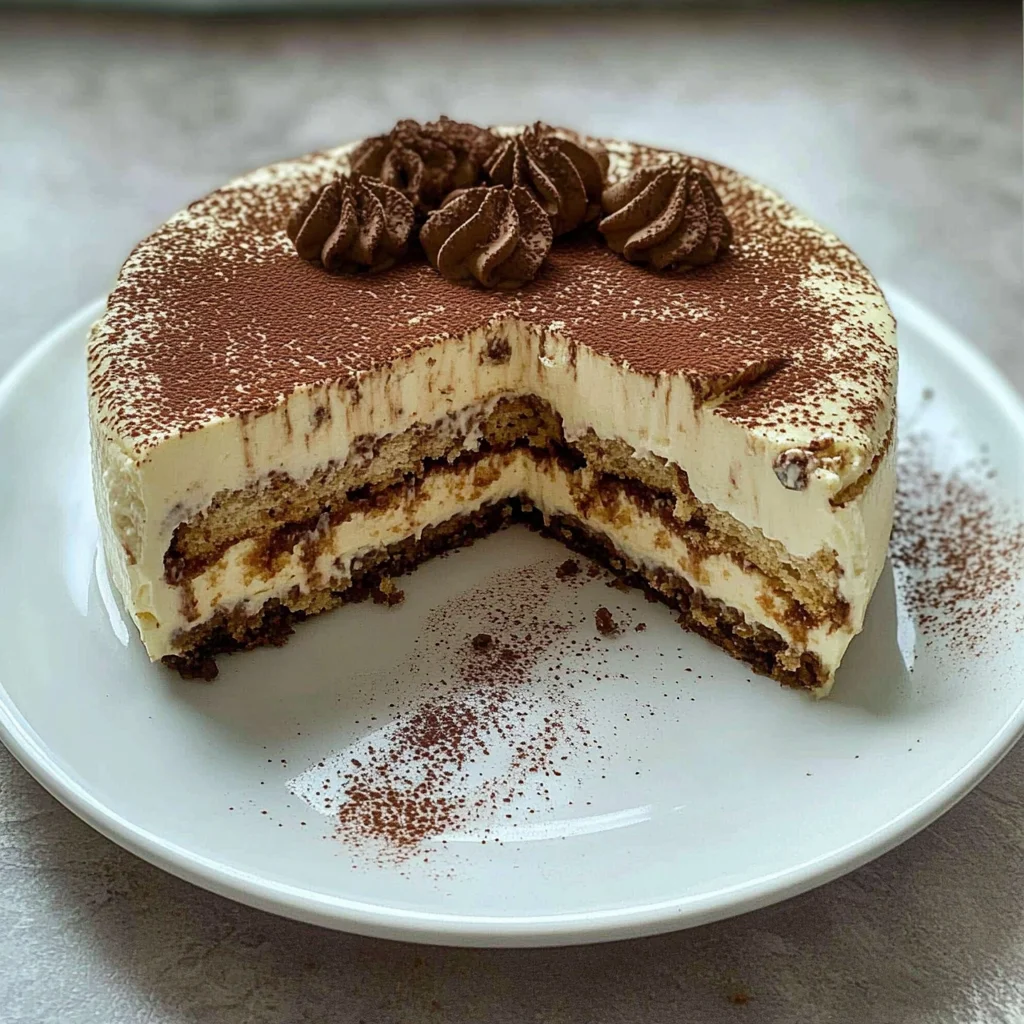
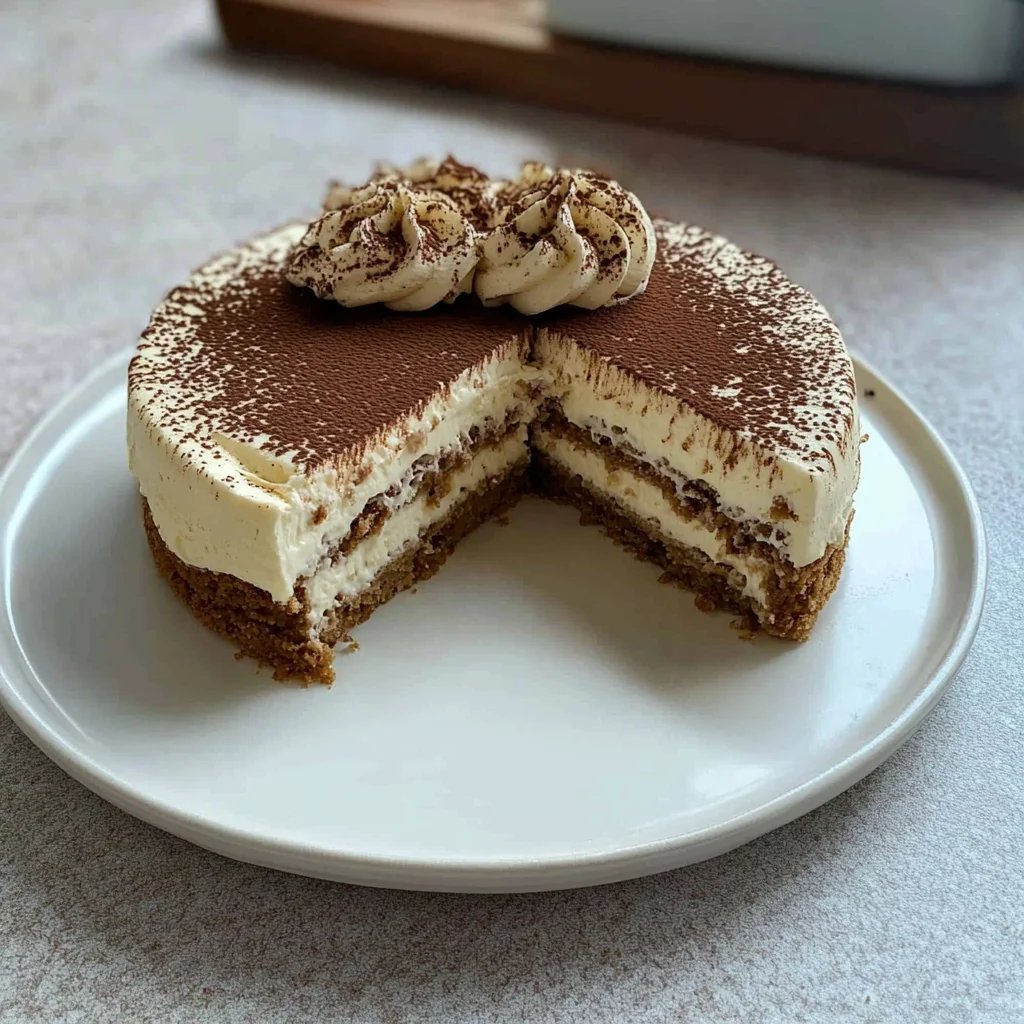
Imagine sinking your fork into a slice of Tiramisu Cheesecake, where the creamy richness of mascarpone and cream cheese dances playfully with the bold aroma of coffee and the delicate crunch of ladyfingers. The cocoa dusting on top adds an elegant finish, enticing you to indulge in each luscious bite that feels like a warm hug from your favorite Italian café.
As you take in that first heavenly mouthful, you’ll find yourself transported to a cozy kitchen filled with laughter and love. This recipe is not just about creating a stunning dessert; it’s about savoring the simple joy of baking something truly special. With easy-to-follow steps and ingredients that come together beautifully, you’ll discover how effortless it can be to impress family and friends with this delightful treat.
Why You'll Love This Recipe
- Tiramisu Cheesecake combines the rich, creamy texture of classic cheesecake with the bold flavors of traditional tiramisu, creating a delightful dessert that’s sure to impress.
- This recipe is not only easy to follow, but it also showcases beautiful layers that make for an eye-catching presentation.
- The optional coffee liqueur adds a touch of sophistication, making it perfect for special occasions or casual gatherings alike.
- With its harmonious blend of flavors and textures, Tiramisu Cheesecake is destined to become a favorite in your dessert repertoire.
Now that you’re excited about making this delectable dessert, let’s dive into the detailed recipe instructions!
The first time I served Tiramisu Cheesecake at a family gathering, the delighted gasps were priceless. As everyone savored each creamy bite, I felt a warm glow knowing I had created something that brought us all together in pure joy.
Now, let’s dive into the recipe steps for this decadent dessert!
Essential Ingredients
To create a delicious Tiramisu Cheesecake, gather the following essential ingredients for the crust, filling, coffee mixture, and topping.
Graham cracker crumbs: Use finely crushed graham crackers for a buttery and crisp crust that complements the creamy filling.
Granulated sugar: This sweetener enhances the overall flavor of both the crust and the cheesecake filling, balancing the rich ingredients.
Unsalted butter: Melted unsalted butter is crucial for binding the crust ingredients together and adding richness to the flavor.
Cream cheese: Ensure your cream cheese is softened to room temperature for easy mixing and a smooth texture in the filling.
Mascarpone cheese: This rich Italian cheese adds a creamy texture and authentic tiramisu flavor; bring it to room temperature before using.
Granulated sugar: Used again here, it sweetens the cheesecake filling, creating a perfect balance with the coffee flavors.
Large eggs: Room temperature eggs help achieve a smooth and fluffy cheesecake consistency; beat them in one at a time for best results.
Vanilla extract: A splash of vanilla enhances the overall flavor profile of your cheesecake, making it richer and more aromatic.
Heavy cream: Chilled heavy cream is whipped to stiff peaks and folded into the mixture, providing lightness to your cheesecake filling.
Strong brewed coffee: Brew your favorite coffee strong for a robust flavor; allow it to cool before using it in the recipe.
Coffee liqueur: Optional but recommended, this adds depth to the coffee flavor; choose a quality liqueur for best results.
Cocoa powder: Dusting with cocoa powder not only adds visual appeal but also provides that classic tiramisu taste on top of the cheesecake.
Whipped cream: Fresh whipped cream makes an excellent garnish, adding a light touch that complements this rich dessert beautifully.
The full ingredients list, including measurements, is provided in the recipe card directly below.
Let’s Make It Together
Step 1: Prepare the Crust:Begin by preheating your oven to 350°F (175°C). In a mixing bowl, combine 1 cup of finely crushed graham cracker crumbs, 1/4 cup of granulated sugar, and 1/2 cup of melted unsalted butter. Mix until all the crumbs are evenly coated and the mixture resembles wet sand. Press this crumb mixture firmly into the bottom of a 9-inch springform pan to create an even layer. Bake for 10 minutes until it’s lightly golden and fragrant, then let it cool completely while you prepare the filling.
Step 2: Make the Cheesecake Filling:In a large mixing bowl, beat together 16 oz of softened cream cheese and 1 cup of softened mascarpone cheese with an electric mixer until smooth and creamy, about 2-3 minutes. You should see a silky texture forming as you mix. Gradually add in 1 cup of granulated sugar and continue mixing until fully incorporated. Next, add the 3 large eggs one at a time; ensure each egg is well mixed before adding the next. Then, incorporate 1 teaspoon of vanilla extract for that delightful aroma. In another bowl, whip 1 cup of chilled heavy cream until stiff peaks form—this adds a lightness to your cheesecake! Gently fold this whipped cream into your cheesecake mixture using a rubber spatula, being careful not to deflate it.
Step 3: Assemble the Cheesecake:Get ready for some delicious layers! In a shallow dish, combine 1 cup of cooled brewed coffee with 1/4 cup of coffee liqueur (if you’re using it). Quickly dip each ladyfinger into this coffee mixture—just a quick dunk is all you need to avoid sogginess! Arrange these soaked ladyfingers in a single layer on top of your cooled crust. Spread half of your creamy cheesecake filling over the ladyfingers, smoothing it out evenly with a spatula. Repeat this layering process with another round of soaked ladyfingers followed by the remaining cheesecake filling, ensuring everything looks lovely and smooth.
Step 4: Chill to Perfection:Once assembled, cover your cheesecake with plastic wrap or aluminum foil and refrigerate for at least 4 hours—preferably overnight—to allow it to set properly. The longer it sits, the better those flavors meld together!
Step 5: Serve the Cheesecake:When you’re ready to serve your Tiramisu Cheesecake, carefully remove the sides of the springform pan. Dust the top generously with cocoa powder for that classic touch and garnish with whipped cream as desired. Slice into beautiful pieces and enjoy every creamy bite!
Now that you’ve mastered these steps, let’s dive into some creative serving suggestions that will elevate your Tiramisu Cheesecake experience!
Add Your Touch
Get creative with your Tiramisu Cheesecake! Consider swapping the graham cracker crumbs for crushed chocolate cookies for a richer crust. If you’re feeling adventurous, try incorporating a splash of hazelnut extract into the filling or adding a layer of chocolate ganache between the cheesecake and ladyfingers. For a fruity twist, fold in some mascarpone cheese with lemon zest or fresh berries. Remember, this dessert is all about personalizing it to your taste, so don’t hesitate to experiment and make it uniquely yours! Now, let’s dive into serving suggestions that will elevate your cheesecake experience.
Storing & Serving
To keep your Tiramisu Cheesecake fresh and flavorful, store it in the refrigerator, tightly covered, for up to 5 days. For best results, allow the cheesecake to chill for at least 4 hours or overnight before serving. When ready to serve, dust with cocoa powder and garnish with whipped cream for an elegant finish that enhances its delicious layers.
Now that you know how to store and serve this delightful dessert, let’s explore some creative variations you can try!
Chef's Helpful Tips
- 1. Ensure your cream cheese and mascarpone cheese are at room temperature before mixing to avoid lumps in your Tiramisu Cheesecake filling. This step is crucial for achieving a smooth and creamy texture that blends beautifully with the whipped cream.
- When soaking the ladyfingers in the coffee mixture, do it quickly to prevent them from becoming too soggy. A quick dip will allow them to absorb just enough moisture while maintaining their structural integrity in the cheesecake layers.
- For a richer flavor, consider using a high-quality coffee liqueur in your coffee mixture, as this will enhance the overall taste of your Tiramisu Cheesecake. Just be cautious not to over-soak the ladyfingers to maintain the perfect balance between flavor and texture.
Now that you have some helpful tips, let’s dive into the detailed preparation steps for creating this delectable dessert!
As I served my Tiramisu Cheesecake at a family gathering, the smiles and delighted exclamations reminded me why I love baking—it’s all about creating joy and lasting memories together.
How to Know It’s Done Perfectly
Your Tiramisu Cheesecake should have a smooth, creamy top with slight firmness when gently shaken. The edges will be set, while the center remains slightly jiggly. Expect a delightful aroma of coffee and cocoa, ensuring your flavors are on point. Remember, small variations are normal—trust your instincts!
Now that you know how to check for perfection, let’s move on to serving suggestions that will elevate your dessert experience.
FAQ
What is Tiramisu Cheesecake?
Tiramisu Cheesecake is a delightful dessert that combines the creamy texture of cheesecake with the rich flavors of traditional tiramisu, featuring layers of coffee-soaked ladyfingers and a luscious filling made from cream cheese and mascarpone.
Can I make Tiramisu Cheesecake ahead of time?
Absolutely! In fact, it’s recommended to refrigerate Tiramisu Cheesecake for at least 4 hours, or preferably overnight, to allow it to set properly, enhancing its flavor and texture.
How do I store leftover Tiramisu Cheesecake?
Leftover Tiramisu Cheesecake should be stored in an airtight container in the refrigerator. It will retain its delicious taste for up to 5 days.
Can I use decaf coffee for the coffee mixture in Tiramisu Cheesecake?
Yes, using decaf coffee is a great option if you want to enjoy the flavors of Tiramisu Cheesecake without the caffeine kick.
Is it necessary to use coffee liqueur in the Tiramisu Cheesecake recipe?
The coffee liqueur adds an extra depth of flavor, but it is optional. You can still achieve a wonderful taste by using just the brewed coffee in your cheesecake filling.
This FAQ section answers common questions while providing clarity on preparing your own delectable Tiramisu Cheesecake. Now let’s explore some tips for perfecting this recipe even further!
Tiramisu Cheesecake
Ingredients
Method
- Preheat your oven to 350°F (175°C).
- In a mixing bowl, combine graham cracker crumbs, granulated sugar, and melted butter. Mix until the crumbs are evenly coated.
- Press the mixture firmly into the bottom of a 9-inch springform pan to form an even layer. Bake for 10 minutes, then remove from the oven and let cool.
- In a large mixing bowl, beat the softened cream cheese and mascarpone cheese with an electric mixer until smooth and creamy, about 2-3 minutes.
- Add the granulated sugar and mix until fully incorporated.
- Add the eggs one at a time, mixing well after each addition. Then, add the vanilla extract and mix until smooth.
- In a separate bowl, whip the heavy cream until stiff peaks form. Gently fold the whipped cream into the cheesecake mixture using a rubber spatula, being careful not to deflate the cream.
- In a shallow dish, combine the cooled brewed coffee and coffee liqueur (if using).
- Quickly dip each ladyfinger into the coffee mixture, ensuring they are soaked but not soggy. Arrange a layer of soaked ladyfingers on top of the cooled crust.
- Spread half of the cheesecake filling over the ladyfingers, smoothing it out evenly.
- Repeat with another layer of soaked ladyfingers and the remaining cheesecake filling.
- Smooth the top and refrigerate for at least 4 hours, preferably overnight, to allow the cheesecake to set.
- Once set, carefully remove the sides of the springform pan.
- Dust the top with cocoa powder and garnish with whipped cream as desired.
- Slice and serve chilled. Enjoy your Tiramisu Cheesecake!