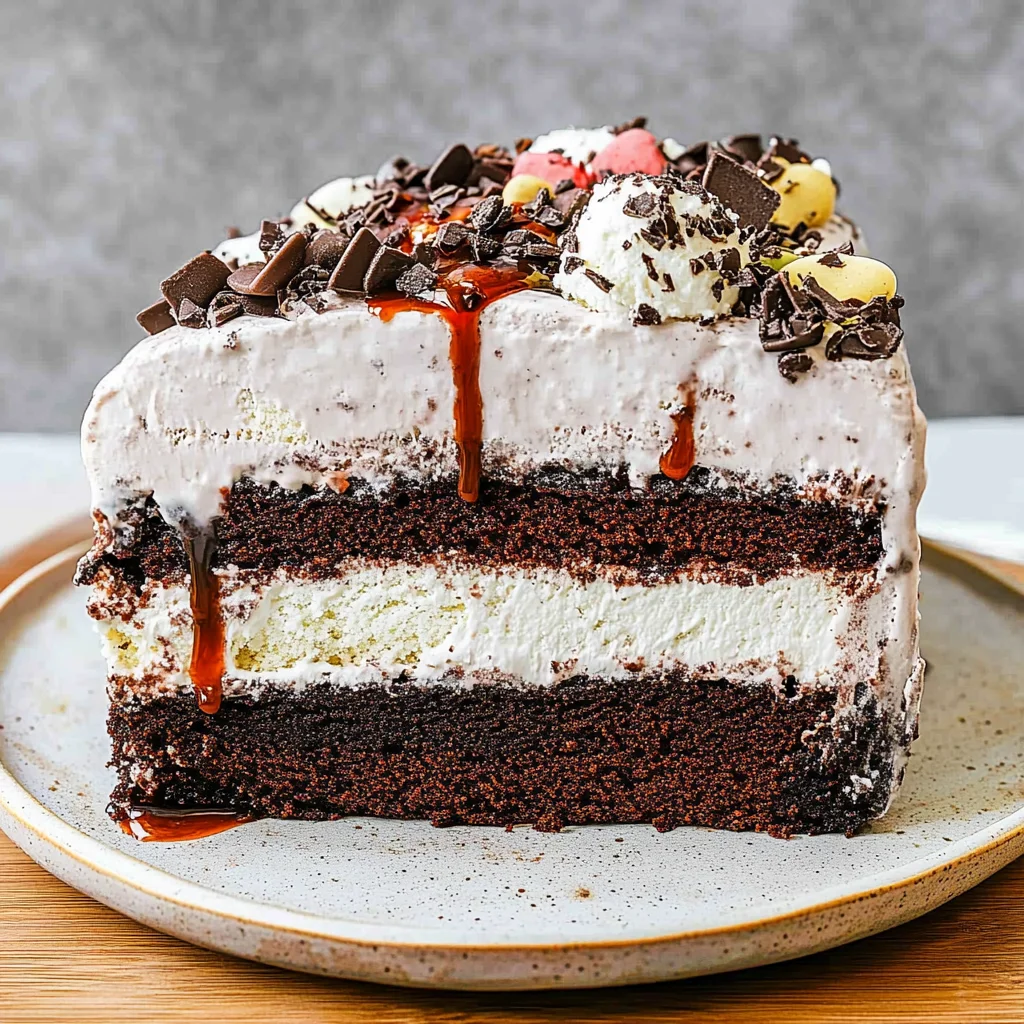
Imagine slicing into a decadent homemade ice cream cake, where rich chocolate layers meet velvety vanilla ice cream, creating a delightful contrast of textures and flavors. The aroma of freshly baked chocolate cake wafts through the air, enticing everyone around as you prepare to indulge in this sweet masterpiece. Each bite reveals a harmonious blend of creamy and cake-like goodness that dances on your palate, making it the perfect treat for any celebration or just a cozy night in.
Remember those childhood moments spent eagerly awaiting dessert? This homemade ice cream cake will bring back those feelings of joy and nostalgia while being surprisingly easy to make. With simple ingredients and straightforward steps, you’ll find yourself rewarded with a stunning dessert that will impress family and friends alike. So roll up your sleeves and get ready to create something truly special!
Why You'll Love This Recipe
- You’ll adore this homemade ice cream cake for its delightful combination of rich chocolate and creamy vanilla flavors that will please every palate.
- The simplicity of the recipe allows you to whip up a stunning dessert without any baking anxiety, making it perfect for any occasion.
- Visually, the layers of cake and ice cream create a showstopper that’s sure to impress your guests.
- Plus, its versatility means you can customize it with your favorite toppings or ice cream flavors, making each cake uniquely yours.
Now that you’re excited about this delicious treat, let’s dive into the detailed recipe instructions for creating your own masterpiece!
Last summer, as we sliced into the homemade ice cream cake, my kids’ faces lit up with joy. The combination of rich chocolate and creamy vanilla brought smiles all around, making it a sweet memory I’ll cherish forever. Now, let’s dive into the recipe!
Essential Ingredients
To create the perfect homemade ice cream cake, gather these essential ingredients for each delectable layer.
All-purpose flour: Sifted to ensure a light texture, this is the foundation of your chocolate cake.
Granulated sugar: This sweetener balances the cocoa’s bitterness and adds moisture to the cake.
Unsweetened cocoa powder: Sifted for even mixing, it gives the cake its rich chocolate flavor.
Baking powder: A leavening agent that helps your cake rise and achieve that fluffy texture.
Baking soda: Works in conjunction with baking powder to provide lift and a tender crumb.
Salt: A pinch enhances all the flavors and balances sweetness in your cake.
Large egg: At room temperature, it helps bind ingredients together and adds moisture.
Milk: Also at room temperature, it contributes to a moist batter and improves texture.
Vegetable oil: This adds richness and keeps the cake moist longer than butter would.
Vanilla extract: A must-have for enhancing flavors, it brings warmth to your chocolate cake.
Vanilla ice cream: Softened slightly at room temperature, it creates a creamy layer that complements the chocolate perfectly.
Heavy whipping cream: Chilled before whipping, this forms a light and fluffy topping for your cake.
Powdered sugar: Used in the whipped cream, it sweetens without adding graininess to your topping.
Chocolate shavings or chocolate chips: These add an extra layer of indulgence and texture on top of your cake.
Sprinkles: Use colorful sprinkles for decoration; they bring a festive touch to your homemade ice cream cake!
The full ingredients list, including measurements, is provided in the recipe card directly below.
Let’s Make It Together
Step 1: Preheat and Prepare:Start by preheating your oven to 350°F (175°C). While it warms up, grease and flour two 9-inch round cake pans. This will ensure your chocolate cakes release easily after baking. The smell of the warm oven is just the beginning of the deliciousness to come!
Step 2: Mix Your Dry Ingredients:In a large mixing bowl, whisk together the sifted all-purpose flour, granulated sugar, unsweetened cocoa powder, baking powder, baking soda, and salt until everything is well combined. The rich scent of cocoa will fill your kitchen, enticing everyone to gather around!
Step 3: Combine Wet Ingredients:In another bowl, beat together the room-temperature egg, milk, vegetable oil, and vanilla extract until fully combined. You want a smooth mixture with a lovely sheen. This step is crucial; using room-temperature ingredients helps create a more even texture in your cake.
Step 4: Create the Batter:Pour the wet ingredients into the dry mixture and whisk on medium speed with an electric mixer for about 2 minutes until smooth. The batter should be glossy and slightly thick, inviting you to taste it (but resist!). Divide this luscious batter evenly between your two prepared pans.
Step 5: Bake to Perfection:Place both pans in your preheated oven and bake for 25-30 minutes. Keep an eye on them; you’ll know they’re done when a toothpick inserted into the center comes out clean. As they bake, enjoy the delightful aroma wafting through your home—it’s pure chocolate heaven!
Step 6: Cool Down Before Assembly:Once baked, allow the cakes to cool in their pans for about 10 minutes before turning them out onto a wire rack to cool completely. Patience here is key—rushing can lead to crumbling layers later! Once cooled, you’re ready to assemble your homemade ice cream cake.
Now that we’ve mastered the cake layers, let’s dive into assembling our delightful ice cream layer!
You Must Know
- For a richer flavor, use high-quality cocoa powder in the chocolate cake layer; it truly elevates the taste.
- I always opt for Dutch-processed cocoa for its deep, complex notes.
- Let the vanilla ice cream soften for about 10-15 minutes before spreading.
- This makes it easier to work with and creates a smoother layer, which I learned from countless attempts at perfecting this cake.
- To achieve a stunning finish with your whipped cream topping, ensure your bowl and beaters are chilled beforehand.
- This little trick helps create perfectly fluffy peaks every time, as I’ve discovered through trial and error.
As you embark on making your homemade ice cream cake, remember that patience in each step leads to delightful results.
Add Your Touch
Feel free to customize your homemade ice cream cake to match your taste! Consider swapping the vanilla ice cream for chocolate, mint, or even cookie dough for a unique twist. You can also add crushed Oreos or fruit between the cake layers for extra flavor and texture. For a richer experience, drizzle some fudge sauce over the ice cream before adding the second layer. Remember, this cake is all about your creativity—experiment confidently and make it your own! Now that you’ve got the basics down, let’s explore some delicious serving suggestions to elevate your dessert experience.
Storing & Serving
To maintain the best flavor and freshness of your homemade ice cream cake, store it in the freezer wrapped tightly in plastic wrap or in an airtight container. It can be kept frozen for up to one week. For serving, slice the cake directly from the freezer for optimal texture, allowing each piece to stand for a few minutes at room temperature before enjoying its creamy layers. Now that you have mastered storage and serving, let’s explore some delightful variations to customize your cake!
Chef's Helpful Tips
- 1. Sift Your Dry Ingredients: Always sift the flour, cocoa powder, and baking powder together to prevent clumps and ensure a smooth batter. This helps your chocolate cake rise beautifully and results in a tender texture in your homemade ice cream cake.
- Soften Ice Cream Properly: When softening your vanilla ice cream, take it out of the freezer about 10-15 minutes before using it. This makes spreading it over the cake layers much easier without melting it too much, maintaining that perfect ice cream layer consistency.
- Chill Your Tools: For the best whipped cream topping, chill your mixing bowl and beaters beforehand. This helps the cream whip up faster and achieve those stiff peaks needed for a fluffy finish on your homemade ice cream cake.
With these tips in hand, you’re ready to conquer the next steps in creating your delightful dessert!
As I served the homemade ice cream cake at my daughter’s birthday party, the joy on her face as she took her first bite was priceless, reminding me that simple treats create lasting memories. This recipe truly brings everyone together in a delicious celebration.
How to Know It’s Done Perfectly
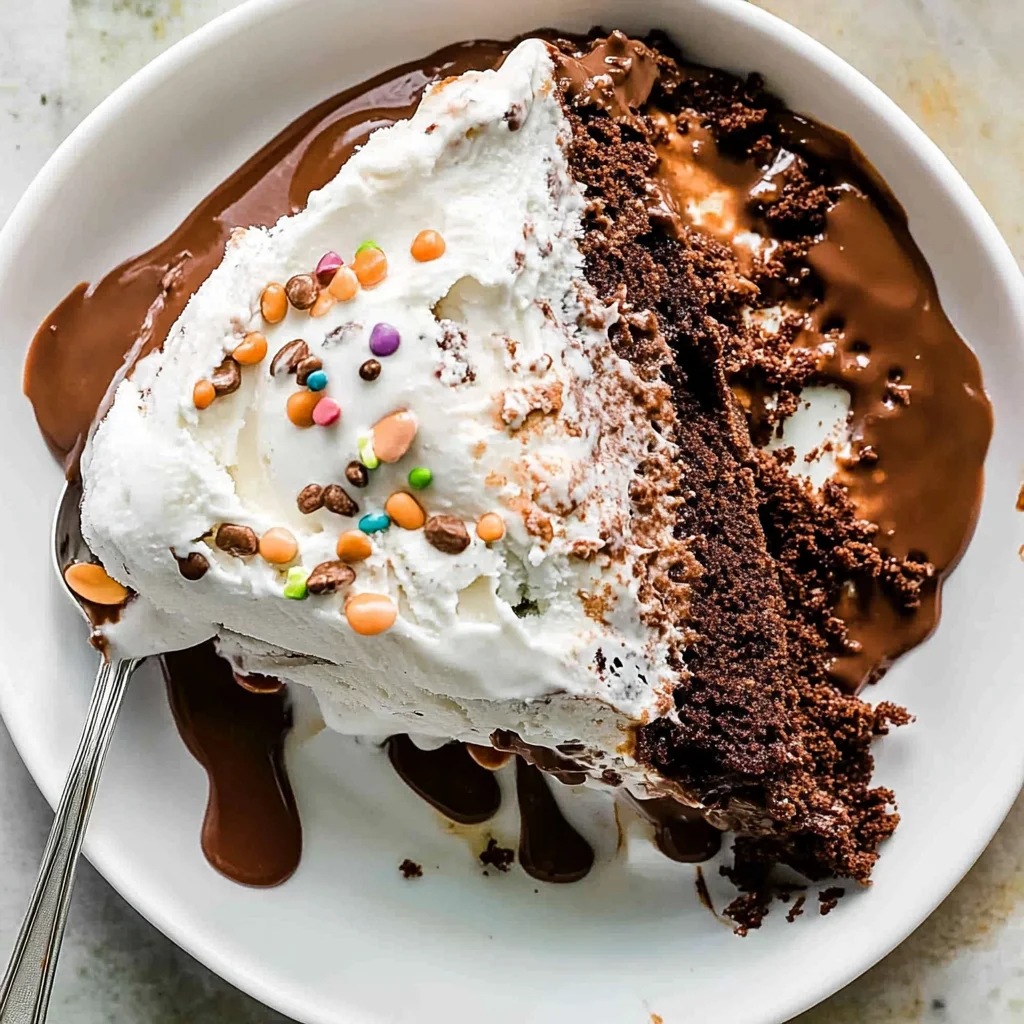
Your homemade ice cream cake should have a rich, moist chocolate cake with a velvety ice cream layer that’s firm yet creamy. The whipped cream topping should be fluffy and hold its shape, adorned with chocolate shavings and sprinkles. Remember, slight variations in texture or sweetness are perfectly normal and can add to its charm.
Now that you’re confident in your creation, let’s explore how to serve this delightful treat!
FAQ
What is homemade ice cream cake made of?
Homemade ice cream cake typically consists of layers of chocolate cake, softened vanilla ice cream, and a whipped cream topping, creating a deliciously rich dessert that combines the best of both worlds.
How long does it take to make homemade ice cream cake?
The preparation time for homemade ice cream cake is about 30 minutes, followed by 2 hours in the freezer for the ice cream layer to firm up and an additional 30 minutes for the whipped cream topping to set.
Can I use different types of ice cream for my homemade ice cream cake?
Absolutely! While this recipe uses vanilla ice cream, you can experiment with different flavors such as chocolate, strawberry, or mint chocolate chip to customize your homemade ice cream cake to suit your taste.
How do I store leftover homemade ice cream cake?
To store leftover homemade ice cream cake, wrap it tightly in plastic wrap or place it in an airtight container and keep it in the freezer. This will help maintain its texture and flavor for several days.
Can I make homemade ice cream cake ahead of time?
Yes, you can prepare your homemade ice cream cake a day or two in advance. Just ensure it’s well-covered and stored in the freezer until you’re ready to serve it during your next gathering or celebration.
Now that we’ve addressed some common questions about making this delightful dessert, let’s explore tips for personalizing your homemade ice cream cake further.
Homemade Ice Cream Cake
Ingredients
Method
- Preheat your oven to 350°F (175°C). Grease and flour two 9-inch round cake pans.
- In a mixing bowl, combine the sifted flour, sugar, cocoa powder, baking powder, baking soda, and salt. Whisk together until well mixed.
- In another bowl, whisk together the egg, milk, vegetable oil, and vanilla extract until fully combined.
- Pour the wet ingredients into the dry ingredients and mix with an electric mixer on medium speed for about 2 minutes until smooth.
- Divide the batter evenly between the two prepared cake pans.
- Bake in the preheated oven for 25-30 minutes, or until a toothpick inserted into the center comes out clean.
- Allow the cakes to cool in the pans for 10 minutes, then turn them out onto a wire rack to cool completely.
- Once the cakes are completely cooled, place one layer on a cake stand or serving plate.
- Spread one pint of softened vanilla ice cream evenly over the top of the first cake layer. Use a spatula to smooth it out.
- Place the second cake layer on top of the ice cream layer, pressing down gently.
- Cover the entire cake with plastic wrap and freeze for at least 2 hours, or until the ice cream is firm.
- In a chilled mixing bowl, combine the heavy whipping cream, powdered sugar, and vanilla extract.
- Using an electric mixer, whip the cream on medium-high speed until stiff peaks form. This will ensure a light and fluffy topping.
- Remove the cake from the freezer and spread the whipped cream evenly over the top and sides of the cake.
- Decorate with chocolate shavings and sprinkles as desired.
- Return the decorated cake to the freezer for an additional 30 minutes to set the whipped cream.
- Slice and serve the cake directly from the freezer for the best texture.