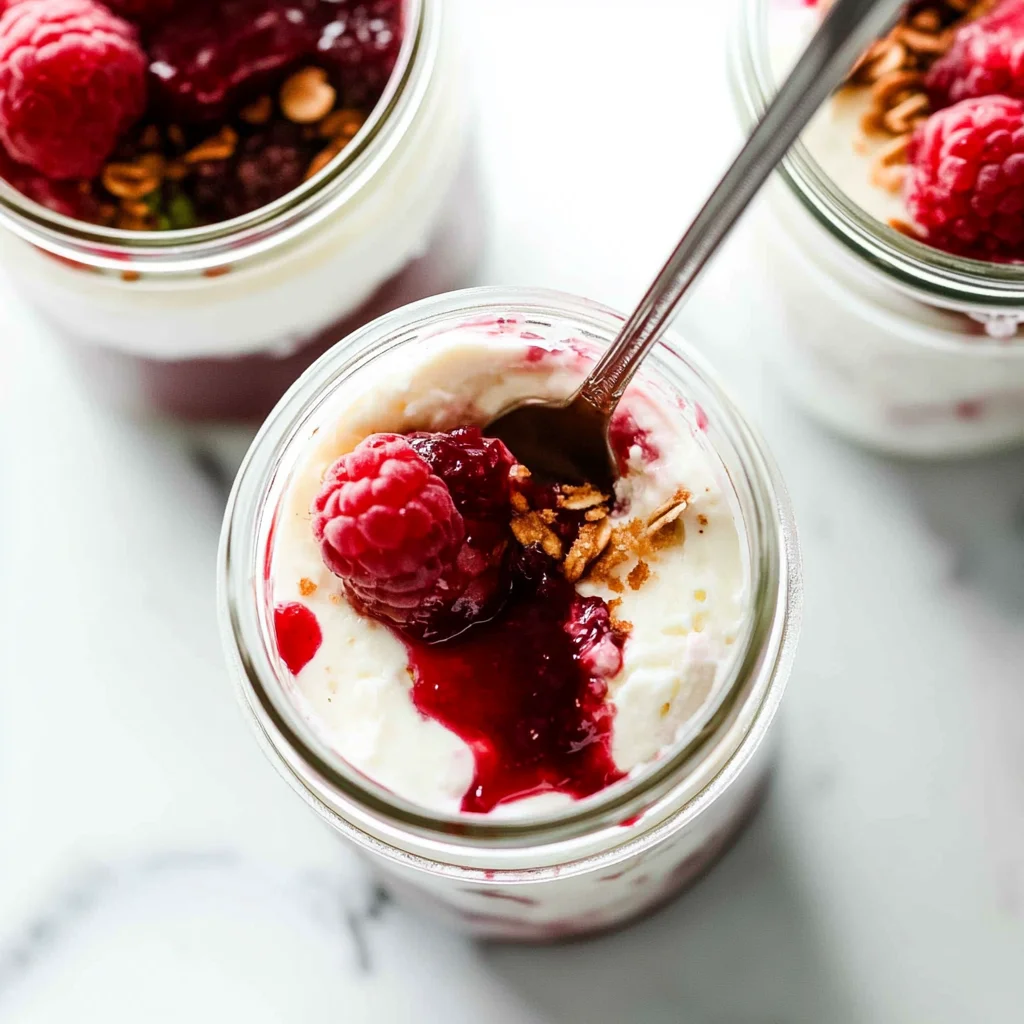
There’s something comforting about making No-Bake Cheesecake Jars. The creamy filling and crumbly crust come together beautifully, filling your kitchen with a sweet aroma.
You can definitely create this dessert at home. Just follow the steps closely, and remember, it doesn’t have to be perfect to taste great.
Why This Recipe Works
This No-Bake Cheesecake Jars recipe succeeds because it balances the creamy filling with a crunchy graham cracker crust, creating a delightful texture. The whipped cream gives the filling lightness, while the lemon juice provides a refreshing tang that cuts through the sweetness. Refrigerating the jars allows the flavors to meld beautifully.
Now that you understand why this recipe is effective, let’s move on to the delicious assembly process!
The One Thing That Makes It Work
- The key to perfecting No-Bake Cheesecake Jars lies in the combination of whipped cream and softened cream cheese.
- Whipping the cream to stiff peaks and gently folding it into the cream cheese ensures a light, airy texture that balances the creamy filling.
- This technique is essential for achieving the ideal consistency without baking.
Now that you know what makes this recipe successful, let’s move on to the step-by-step instructions for creating these delightful treats.
Essential Ingredients
To create the perfect No-Bake Cheesecake Jars, gather the following ingredients for a deliciously creamy treat.
- 1 cup Graham cracker crumbs: Finely crushed for an ideal crust texture that holds together nicely.
- 3 tablespoons Granulated sugar: Adds sweetness to the crust, enhancing the flavors of the cheesecake.
- 5 tablespoons Unsalted butter: Melted to help bind the crust ingredients together for a firm base.
- 8 ounces Cream cheese: Ensure it’s softened to room temperature for a smooth and creamy filling.
- 1/2 cup Granulated sugar: Provides sweetness to balance the tanginess of the cream cheese.
- 1 teaspoon Vanilla extract: Adds a rich flavor that complements the overall taste of the cheesecake.
- 1 cup Heavy whipping cream: Chilled and whipped to stiff peaks for a light and airy filling texture.
- 1 tablespoon Lemon juice: Freshly squeezed to introduce a delightful tang that balances sweetness.
- 1/2 cup Fresh berries: Choose strawberries, blueberries, or raspberries for vibrant color and flavor on top.
- 2 tablespoons Mint leaves: Use fresh mint as a garnish for added color and refreshing taste.
The full ingredients list, including measurements, is provided in the recipe card directly below.
Do This, Not That
- Use finely crushed graham cracker crumbs to create a sturdy crust, rather than leaving them too chunky, which can make it difficult to hold together.
- Opt for softened cream cheese at room temperature for a smooth filling, instead of cold cream cheese that can lead to lumps in your cheesecake mixture.
- Choose fresh berries for topping, rather than frozen ones, as they provide a vibrant color and texture contrast that enhances the presentation of your No-Bake Cheesecake Jars.
Now that you have the essential tips for perfecting your cheesecake jars, let’s move on to the recipe preparation steps.
Step-by-Step Method
Start by preparing the crust. In a mixing bowl, combine the graham cracker crumbs, granulated sugar, and melted butter. Mix everything together until the crumbs feel moist and resemble wet sand. This texture will help the crust hold together nicely.
Next, divide the crust mixture evenly among your jars. Use the back of a spoon to press it down firmly, creating a solid base for your cheesecake. It should feel compact but still crumbly enough to enjoy when you dig in.
Now it’s time to make the cheesecake filling. In a separate bowl, beat the softened cream cheese with an electric mixer until it becomes smooth and creamy, ensuring there are no lumps left behind. This step is key for a silky filling.
Add the granulated sugar and vanilla extract to the smooth cream cheese. Continue mixing until everything is well combined and you can smell that lovely vanilla aroma blending in. Then, whip the chilled heavy cream in another bowl until stiff peaks form; this will give your filling a light texture.
Gently fold the whipped cream into the cream cheese mixture using a spatula. Be careful while folding to avoid deflating the whipped cream too much. Finally, add the freshly squeezed lemon juice and fold it in until just combined; this adds a tangy note that brightens up your cheesecake.
Spoon the cheesecake filling into each jar over the crust layer, smoothing it out with your spatula for an attractive finish. Cover them with lids or plastic wrap and refrigerate for at least 4 hours or overnight if you can wait; this helps set everything perfectly before serving.
Once chilled, finish by topping each jar with fresh berries and a mint sprig for color and freshness. Enjoy these delightful No-Bake Cheesecake Jars as a refreshing treat! Now let’s explore some tips for customizing your cheesecake flavors even further.
Troubleshooting (If Something Goes Wrong)
If your cheesecake filling is lumpy, ensure the cream cheese is fully softened before mixing. If the whipped cream doesn’t hold stiff peaks, try chilling your mixing bowl and beaters before whipping. Lastly, if the crust crumbles too easily, make sure to press it down firmly into the jars. Remember, mistakes happen, and they can often be fixed! Now that you have the recipe down, let’s explore some creative ways to customize your No-Bake Cheesecake Jars.
Variations You’ll Actually Want to Try

Feel free to switch up the berries with your favorites, like diced peaches or cherries, for a different fruit flavor. You can also try adding a tablespoon of cocoa powder to the cheesecake filling for a chocolate twist. If you enjoy a bit of spice, consider mixing in some cinnamon or nutmeg for warmth. There’s plenty of room for creativity! Now that you have the basics down, let’s explore some serving and presentation tips.
Pick Your Flavor Path
- For a spicy twist, add a sprinkle of cinnamon to the crust mixture before pressing it into the jars.
- If you’re in the mood for something fresh, incorporate a layer of zesty lemon curd on top of the cheesecake filling.
- For a cheesy kick, mix in some finely grated zest from your favorite citrus fruit into the cream cheese filling.
These simple flavor directions let you customize your No-Bake Cheesecake Jars while maintaining their delightful essence.
FAQ
How long do No-Bake Cheesecake Jars need to set in the refrigerator?
Refrigerate for at least 4 hours, or overnight for best results.
Can I substitute the cream cheese in No-Bake Cheesecake Jars?
For a lighter option, use mascarpone cheese as a substitute for cream cheese.
How should I store leftover No-Bake Cheesecake Jars?
Store covered in the refrigerator for up to three days for optimal freshness.
With these helpful tips, you’re well on your way to creating delightful No-Bake Cheesecake Jars!
No-Bake Cheesecake Jars
Ingredients
Method
- In a mixing bowl, combine the graham cracker crumbs, granulated sugar, and melted butter. Mix until the crumbs are evenly coated and resemble wet sand. This will help the crust hold together when pressed into the jars.
- Divide the crust mixture evenly among the jars, pressing it down firmly with the back of a spoon to create an even layer. This forms the base of your cheesecake.
- In a separate mixing bowl, beat the softened cream cheese with an electric mixer until smooth and creamy. This step is crucial to avoid lumps in your filling.
- Add the granulated sugar and vanilla extract to the cream cheese, and continue to beat until well combined.
- In another bowl, whip the heavy cream until stiff peaks form. This will give your cheesecake a light and airy texture.
- Gently fold the whipped cream into the cream cheese mixture using a spatula. Be careful not to deflate the whipped cream; this keeps the filling light.
- Add the lemon juice and fold it in until just combined. The lemon juice adds a nice tang and balances the sweetness.
- Spoon the cheesecake filling evenly into the jars over the crust layer. Use the spatula to smooth the top for a neat presentation.
- Cover the jars with lids or plastic wrap and refrigerate for at least 4 hours, or overnight if possible. This allows the flavors to meld and the filling to set properly.
- Before serving, top each jar with fresh berries and a sprig of mint for a pop of color and flavor.
- Enjoy your delicious no-bake cheesecake jars chilled for the best experience!