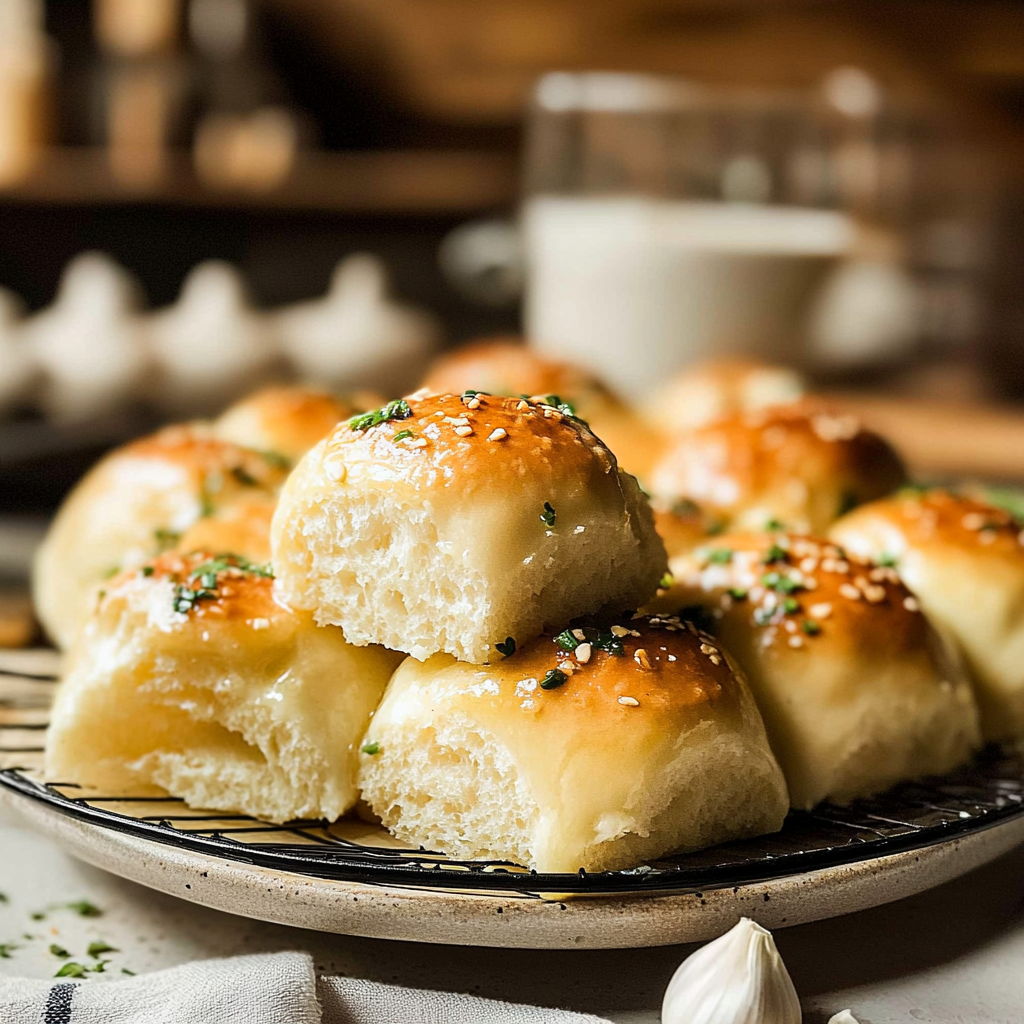
There’s nothing quite like the aroma of freshly baked Homemade Garlic Butter Rolls wafting through your kitchen. Picture this: warm, fluffy rolls slathered in rich, buttery goodness and fragrant garlic that dances on your taste buds. creamy pumpkin parmesan risotto It’s the type of comfort food that could turn even the most mundane Tuesday into a festive occasion.

Now, if you’re like me and believe that life is too short to skip carbs, then these rolls are your golden ticket to happiness. Imagine pulling apart a warm roll, the steam rising as you dip it into a pool of melted garlic butter—pure bliss. Whether it’s a cozy family dinner or a holiday gathering, these rolls are sure to steal the show and win hearts.
Why You'll Love This Recipe
- Homemade Garlic Butter Rolls are incredibly easy to prepare, making them perfect for novice bakers.
- Each bite bursts with flavor, thanks to the delectable garlic and butter infusion.
- Their golden-brown crust and fluffy interior make them visually appealing on any table.
- Versatile enough to serve as a side dish or appetizer for any meal!
Every time I whip up these rolls, I’m transported back to my childhood kitchen where my grandma would have her apron on and flour dust all over her cheeks. I can still hear our laughter mixed with the clinking of forks and knives as we devoured these heavenly creations together.

Essential Ingredients
Here’s what you’ll need to make this delicious dish: For more inspiration, check out this Delicious Patty Melts Recipe recipe.
- All-Purpose Flour: The backbone of any great roll! Choose unbleached flour for a better texture and flavor.
- Active Dry Yeast: Make sure it’s fresh for optimal rising; otherwise, you’ll end up with dense bricks instead of fluffy rolls!
- Warm Water: Approximately 110°F (43°C) helps activate the yeast—just warm enough for a cozy yeast party.
- Sugar: Just a touch to feed the yeast and enhance the flavor—think of it as giving your dough a little treat!
- Salt: Enhances flavor; don’t skip it! A pinch goes a long way in elevating these rolls.
- Butter: You’ll want unsalted butter for this recipe; we will add our own salt later for better control.
- Garlic: Fresh garlic cloves are ideal here; they add an aromatic punch that makes these rolls irresistible.
- Parsley (optional): A sprinkle adds a burst of color and freshness, making your rolls Instagram-ready!
The full ingredients list, including measurements, is provided in the recipe card directly below.
Let’s Make it Together
Activate Your Yeast: In a bowl, mix warm water with sugar and sprinkle yeast on top. Let it sit until bubbly—around 5-10 minutes—like magic happening right before your eyes!
Mix Your Dough: In a large mixing bowl, combine flour and salt. Pour in your bubbly yeast mixture along with melted butter. Stir until it forms a shaggy dough; don’t worry about perfection here—it’ll come together!
Knead Like You Mean It: Transfer dough onto a floured surface. Knead for about 8-10 minutes until smooth and elastic. Think of it as stress relief; take out all your frustrations on that dough!
First Rise: Patience Is Key!: Place the kneaded dough in an oiled bowl, cover with a clean cloth, and let rise in a warm place until doubled—around 1 hour. It’s like giving your dough some well-deserved spa time!
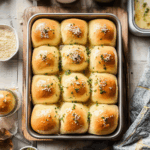
Shape Those Rolls!: Punch down the risen dough gently (it won’t mind) and divide into equal pieces. Roll each piece into balls and place them in a greased baking dish—make them cozy together!
The Garlic Butter Bath!: Melt butter in a small saucepan over low heat with minced garlic. When it’s bubbling slightly (not boiling), remove from heat and brush generously over shaped rolls before baking.
Let those beauties rise again for about 30 minutes while you preheat your oven to 375°F (190°C). Then bake until golden brown—around 20-25 minutes—filling your house with an aroma so good it might just attract neighbors!
When you pull out those Homemade Garlic Butter Rolls from the oven, let them cool slightly before diving in. mini meatloaves for lunch Brush more garlic butter on top if you’re feeling fancy (spoiler alert: you should be).
Now you’re ready to enjoy! Serve these delightful rolls warm alongside pasta dishes, soups, or simply as they are—trust me when I say they won’t last long.
These Homemade Garlic Butter Rolls can elevate any meal from ordinary to extraordinary with their irresistible flavors and wonderful aromas filling your home. refreshing cucumber salad Happy baking!
You Must Know
- Homemade garlic butter rolls are not just bread; they are a warm hug in food form.
- The aroma of fresh garlic and melted butter is simply irresistible, making your kitchen feel like a cozy bakery.
- These rolls are perfect for dinner parties or simply to indulge yourself on a quiet evening.
Perfecting the Cooking Process
Start by mixing your dough ingredients thoroughly, allowing it to rise until doubled in size. While waiting, prepare the garlic butter so it’s ready to slather on those fluffy rolls right out of the oven.
Add Your Touch
Feel free to customize your homemade garlic butter rolls by adding herbs like rosemary or thyme for extra flavor. unique dark lime bread You can also sprinkle cheese on top for a delightful twist that’s sure to impress your guests.
Storing & Reheating
Store leftover rolls in an airtight container at room temperature for up to two days. To reheat, wrap them in foil and warm them in a 350°F oven for about 10 minutes to regain their softness.
Chef's Helpful Tips
- For perfectly soft and airy rolls, knead the dough well to develop gluten, helping it rise beautifully.
- Avoid over-proofing; watch for the dough doubling but don’t let it collapse.
- Lastly, brush with garlic butter immediately after baking for maximum flavor.
It was during a chilly winter evening that I first made these homemade garlic butter rolls for family dinner. Everyone couldn’t stop raving about them, and I felt like a culinary superstar as I served them warm from the oven. For more inspiration, check out this Easy Chicken Spring Rolls Recipe recipe.
FAQ
What type of flour is best for homemade garlic butter rolls?
All-purpose flour works best for these rolls due to its balanced protein content, giving you that perfect chewiness without being too dense or too light.
Can I freeze homemade garlic butter rolls?
Absolutely! After baking and cooling, wrap the rolls tightly in plastic wrap and aluminum foil before freezing. Just thaw and reheat when you’re ready to enjoy them again!
How can I make these rolls even more flavorful?
Add roasted garlic instead of raw for a sweeter taste or include grated cheese into the dough mix for cheesy garlic butter rolls that take flavor to another level!
Homemade Garlic Butter Rolls
- Total Time: 40 minutes
- Yield: Serves approximately 12 rolls 1x
Description
Indulge in the irresistible delight of Homemade Garlic Butter Rolls, where warm, fluffy bread meets rich garlic and buttery goodness. These easy-to-make rolls are perfect for any occasion, elevating family dinners and holiday gatherings with their aromatic appeal. Each bite is a comforting experience that will leave your taste buds dancing!
Ingredients
- 3 1/4 cups all-purpose flour
- 2 1/4 teaspoons active dry yeast (1 packet)
- 1 cup warm water (110°F or 43°C)
- 2 tablespoons sugar
- 1 teaspoon salt
- 4 tablespoons unsalted butter (melted)
- 4 cloves fresh garlic (minced)
- Fresh parsley (optional, for garnish)
Instructions
- Activate the yeast: In a bowl, mix warm water with sugar and sprinkle yeast on top. Let it sit until bubbly, about 5-10 minutes.
- Mix the dough: In a large bowl, combine flour and salt. Add the yeast mixture and melted butter; stir to form a shaggy dough.
- Knead the dough: Transfer to a floured surface and knead for 8-10 minutes until smooth and elastic.
- First rise: Place in an oiled bowl, cover with a cloth, and let rise until doubled in size, about 1 hour.
- Shape the rolls: Punch down the dough, divide into equal pieces, roll each into balls, and place them in a greased baking dish.
- Prepare garlic butter: Melt remaining butter with minced garlic over low heat; brush generously over the rolls before baking.
- Second rise: Let rolls rise again for about 30 minutes while preheating your oven to 375°F (190°C).
- Bake: Bake rolls for 20-25 minutes until golden brown. Let cool slightly before serving.
- Prep Time: 15 minutes
- Cook Time: 25 minutes
- Category: Side Dish
- Method: Baking
- Cuisine: American
Nutrition
- Serving Size: 1 roll (60g)
- Calories: 170
- Sugar: 1g
- Sodium: 150mg
- Fat: 6g
- Saturated Fat: 3g
- Unsaturated Fat: 2g
- Trans Fat: 0g
- Carbohydrates: 26g
- Fiber: 1g
- Protein: 4g
- Cholesterol: 10mg