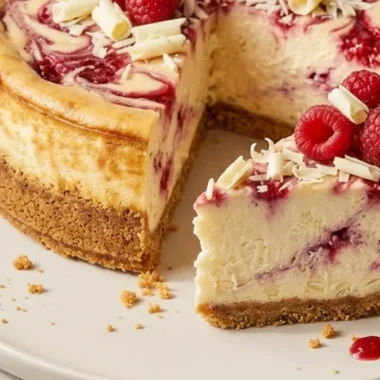
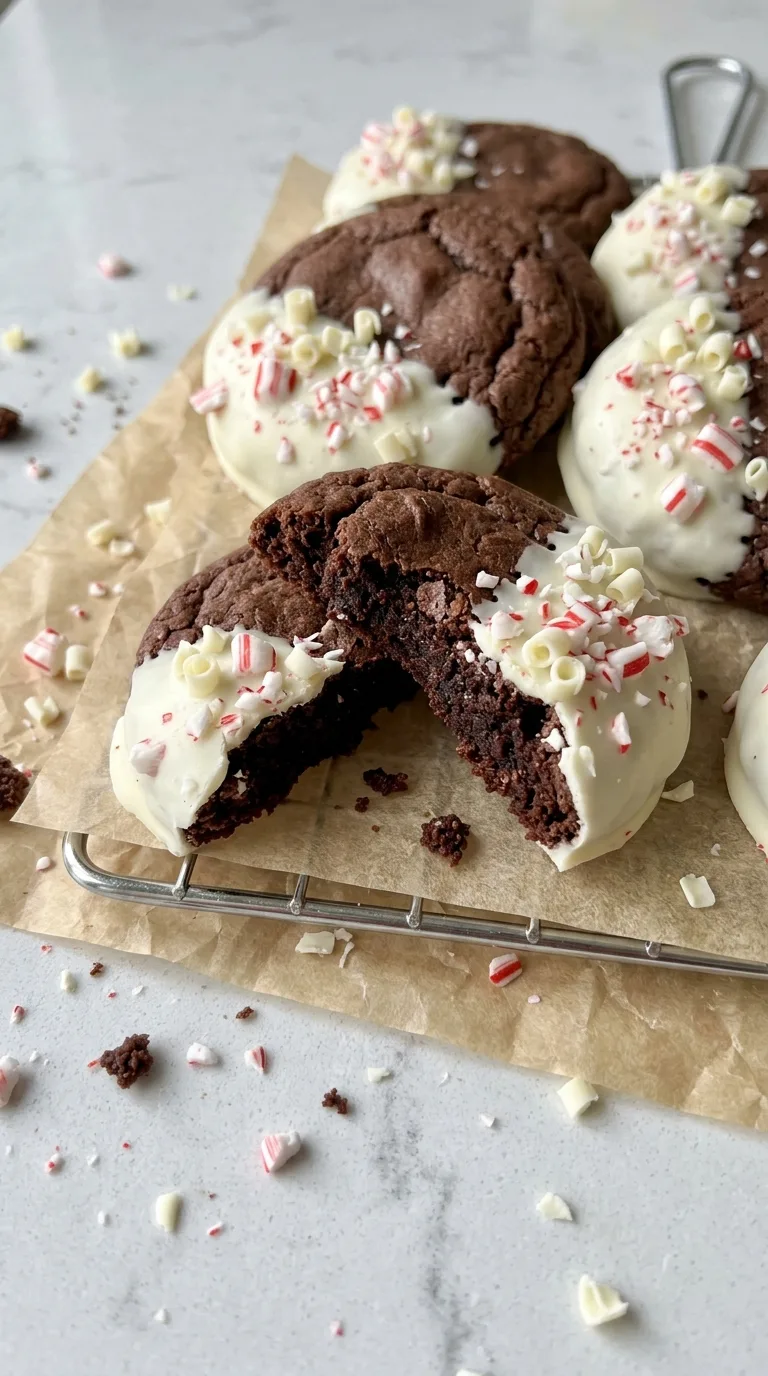
White Chocolate Dipped Peppermint Chocolate Cookies combine rich, soft chocolate cookies with a creamy white chocolate coating and a crunchy peppermint candy topping. Each cookie has a tender, slightly fudgy center, lightly set edges, and a refreshing peppermint flavor that complements the cocoa without overpowering it. The contrast between dark chocolate cookies, smooth white chocolate, and crushed candy canes makes them especially appealing for the holiday season.

These cookies are made with a straightforward cocoa-based dough that requires a short chill before baking. Once the cookies have cooled completely, they're dipped in melted white chocolate and sprinkled with crushed peppermint candy. They're a practical make-ahead option for Christmas cookie platters, holiday dessert boxes, and homemade edible gifts.
Recipe at a Glance
- Prep Time: 25 minutes
- Cook Time: 11 minutes per batch (22 minutes for two batches)
- Additional Time: 1 hour 20 minutes (30 minutes chilling, 20 minutes cooling, 30 minutes chocolate setting)
- Total Time: 2 hours 7 minutes
- Yield: 24 cookies
- Servings: 24 (1 cookie per serving)
- Category: Dessert
- Cuisine: American
- Cooking Method: Oven Baking
- Difficulty: Easy
- Calories Per Serving: Not calculated
Why This Recipe Works
- Cocoa powder creates a rich chocolate base. Unsweetened cocoa gives the cookies a deep chocolate flavor without adding extra moisture that could affect their shape.
- Brown sugar supports a soft, chewy center. Its moisture and molasses content help keep the cookies tender after baking.
- Chilling controls spreading. A short rest in the refrigerator firms the dough, encouraging thicker cookies with soft centers.
- Peppermint extract adds a concentrated mint flavor. A small amount brings a refreshing contrast to the cocoa and white chocolate without making the cookies taste overly minty.
- White chocolate and crushed candy canes add contrasting textures. The smooth coating balances the dark chocolate cookie, while the peppermint pieces provide a light crunch.
Equipment Needed
- Stand mixer with paddle attachment or electric hand mixer
- Large mixing bowl
- Medium mixing bowl
- Measuring cups and spoons
- Two large rimmed baking sheets, approximately 18 × 13 inches (46 × 33 cm)
- Parchment paper
- 1½-tablespoon (22 ml) cookie scoop
- Wire cooling rack
- Microwave-safe bowl or double boiler
- Small rolling pin or heavy utensil for crushing candy canes
- Resealable food-safe bag for containing candy pieces during crushing
Ingredients List
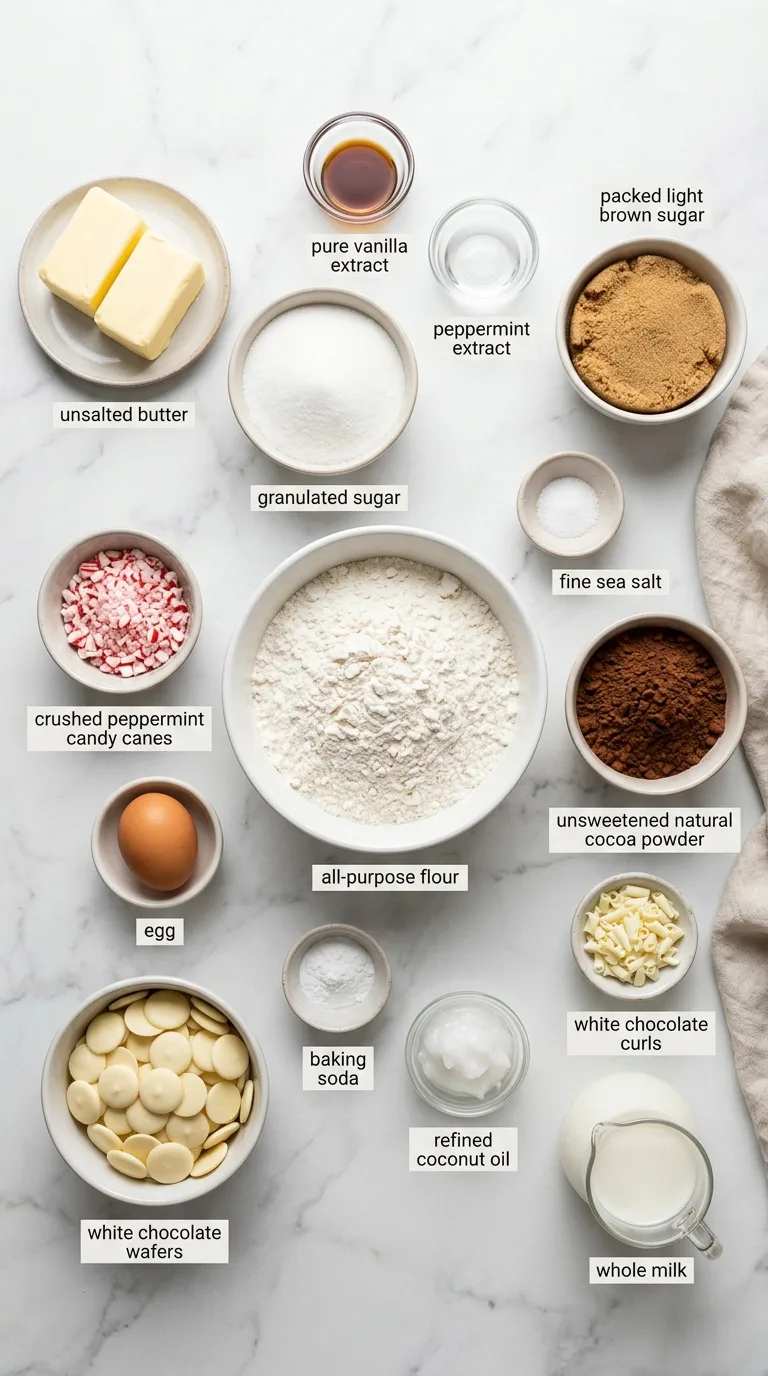
For the Chocolate Peppermint Cookies:
- ½ cup (113 g) unsalted butter, softened to room temperature
- ¾ cup packed (150 g) light brown sugar
- ½ cup (100 g) granulated sugar
- 1 large egg (about 50 g without shell), at room temperature
- 1 teaspoon (5 ml) pure vanilla extract
- ¼ teaspoon (1.25 ml) peppermint extract
- 1½ cups (180 g) all-purpose flour, spooned and leveled
- ½ cup (43 g) unsweetened natural cocoa powder, sifted if lumpy
- ½ teaspoon (2.5 g) baking soda
- ½ teaspoon (3 g) fine sea salt
- 2 tablespoons (30 ml) whole milk, at room temperature
For the White Chocolate Coating:
- 10 ounces (285 g) white chocolate melting wafers or real white chocolate, finely chopped if using a bar
- 1 teaspoon (5 ml) refined coconut oil, optional, for thinning the coating
For the Peppermint Topping:
- ⅓ cup (approximately 50 g) crushed peppermint candy canes or peppermint candies
- 2 tablespoons (approximately 20 g) white chocolate curls, optional, for garnish
Ingredient Notes
Unsweetened Cocoa Powder
Natural unsweetened cocoa powder gives these cookies their rich chocolate flavor and dark brown color. It also contributes structure by absorbing moisture from the dough.
Dutch-process cocoa powder can produce a smoother, less acidic chocolate flavor and a darker appearance. However, because this recipe uses baking soda, natural cocoa powder is the more reliable choice for the intended texture and rise.
Avoid sweetened hot cocoa mix because it contains added sugar and other ingredients that can change the dough's consistency.
Peppermint Extract
Peppermint extract gives the cookies their refreshing mint flavor without adding excess liquid.
Because peppermint extract is concentrated, a small amount is enough. Adding too much can make the cookies taste harsh or medicinal.
If peppermint extract is unavailable, you can omit it and rely on the crushed peppermint candy topping for a milder mint flavor.
Avoid substituting peppermint essential oil unless it is specifically formulated and labeled for culinary use, with appropriate food-use directions.
White Chocolate
White chocolate provides a creamy, sweet coating that contrasts with the dark chocolate cookies.
White chocolate melting wafers are convenient because they melt smoothly and generally set without tempering.
Real white chocolate made with cocoa butter offers a richer dairy flavor, but it may require careful temperature control to produce a firm, glossy coating.
White chocolate chips can be used if necessary, although they often contain stabilizers that make them thicker and harder to melt smoothly.
Light Brown Sugar
Brown sugar contributes moisture, chewiness, and a subtle caramel flavor.
Dark brown sugar can replace light brown sugar in equal amounts, producing a slightly deeper molasses flavor and potentially a softer texture.
Replacing all the brown sugar with granulated sugar is not recommended because it can make the cookies less chewy.
Crushed Peppermint Candy
Crushed candy canes add sweetness, peppermint flavor, and a crisp texture.
Round peppermint candies can be used in the same quantity.
For a softer topping, finely chopped peppermint-flavored white chocolate may be used instead, although it will not provide the same crunchy texture.
Candy cane pieces can become sticky when exposed to humidity, so add them while the white chocolate is wet and store the finished cookies in a dry, airtight container.
Ingredient Notes and Substitutions
Unsweetened Cocoa Powder
Peppermint Extract
Peppermint extract gives the cookies their refreshing mint flavor without adding excess liquid.
White Chocolate
White chocolate provides a creamy, sweet coating that contrasts with the dark chocolate cookies.
White chocolate melting wafers are convenient because they melt smoothly and generally set without tempering.
Light Brown Sugar
Brown sugar contributes moisture, chewiness, and a subtle caramel flavor.
Crushed Peppermint Candy
Crushed candy canes add sweetness, peppermint flavor, and a crisp texture.
Round peppermint candies can be used in the same quantity.
Step-by-Step Instructions
Cream the Butter and Sugars
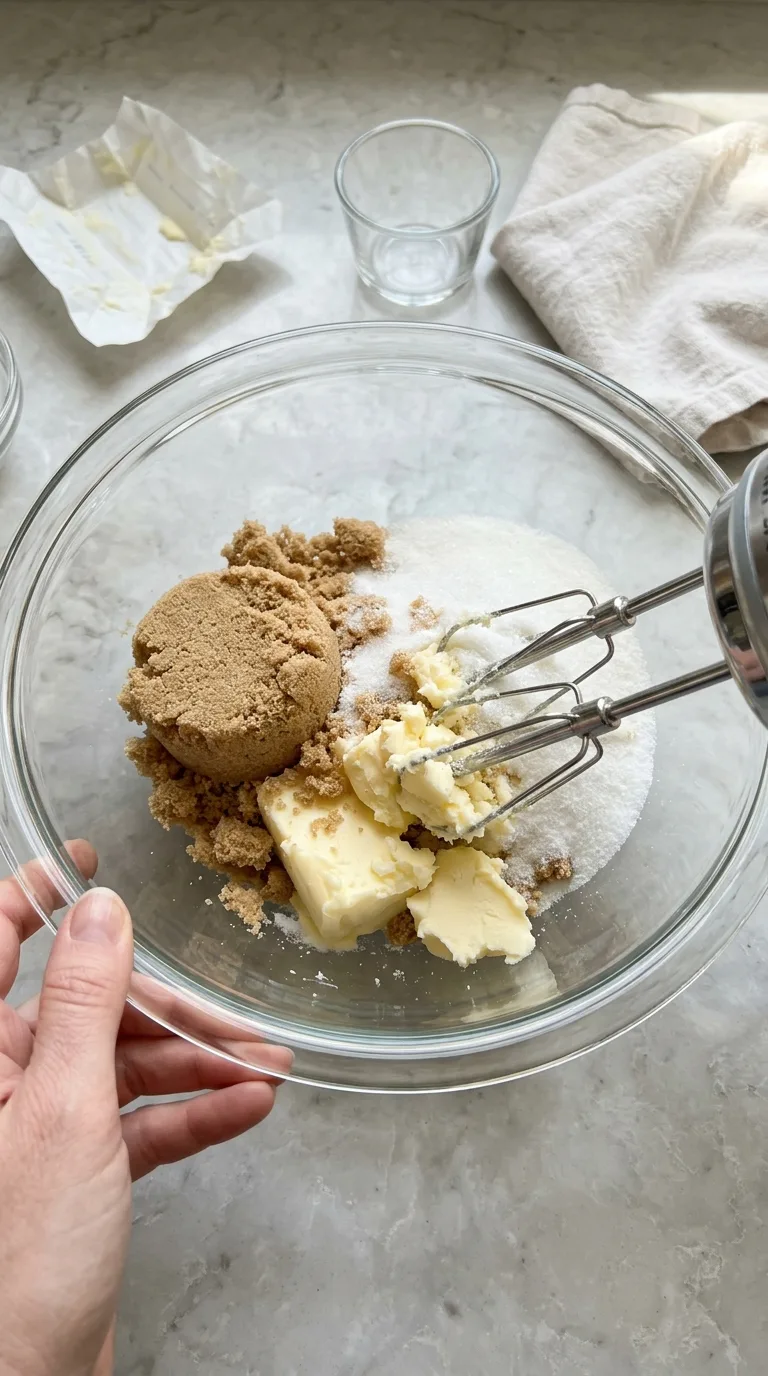
In a large mixing bowl, combine ½ cup softened unsalted butter, ¾ cup packed light brown sugar, and ½ cup granulated sugar.
Beat with an electric mixer on medium speed for approximately 2–3 minutes, until the mixture looks creamy, slightly lighter in color, and evenly blended.
Scrape down the sides and bottom of the bowl as needed.
The mixture should be smooth and fluffy rather than greasy or melted.
Add the Egg and Flavorings
Add 1 large egg, 1 teaspoon pure vanilla extract, and ¼ teaspoon peppermint extract.
Beat on low to medium speed until fully incorporated.
The mixture should look smooth and cohesive, with no visible streaks of egg.
Avoid adding extra peppermint extract at this stage because its flavor becomes more noticeable after baking.
Combine the Dry Ingredients
In a separate medium bowl, whisk together 1½ cups all-purpose flour, ½ cup unsweetened natural cocoa powder, ½ teaspoon baking soda, and ½ teaspoon fine sea salt.
Whisk until the mixture is evenly colored and no large cocoa lumps remain.
This helps distribute the leavening evenly and prevents dry pockets in the finished cookies.
Prepare the Chocolate Cookie Dough
Add approximately half of the dry mixture to the butter mixture and mix on low speed until partially combined.
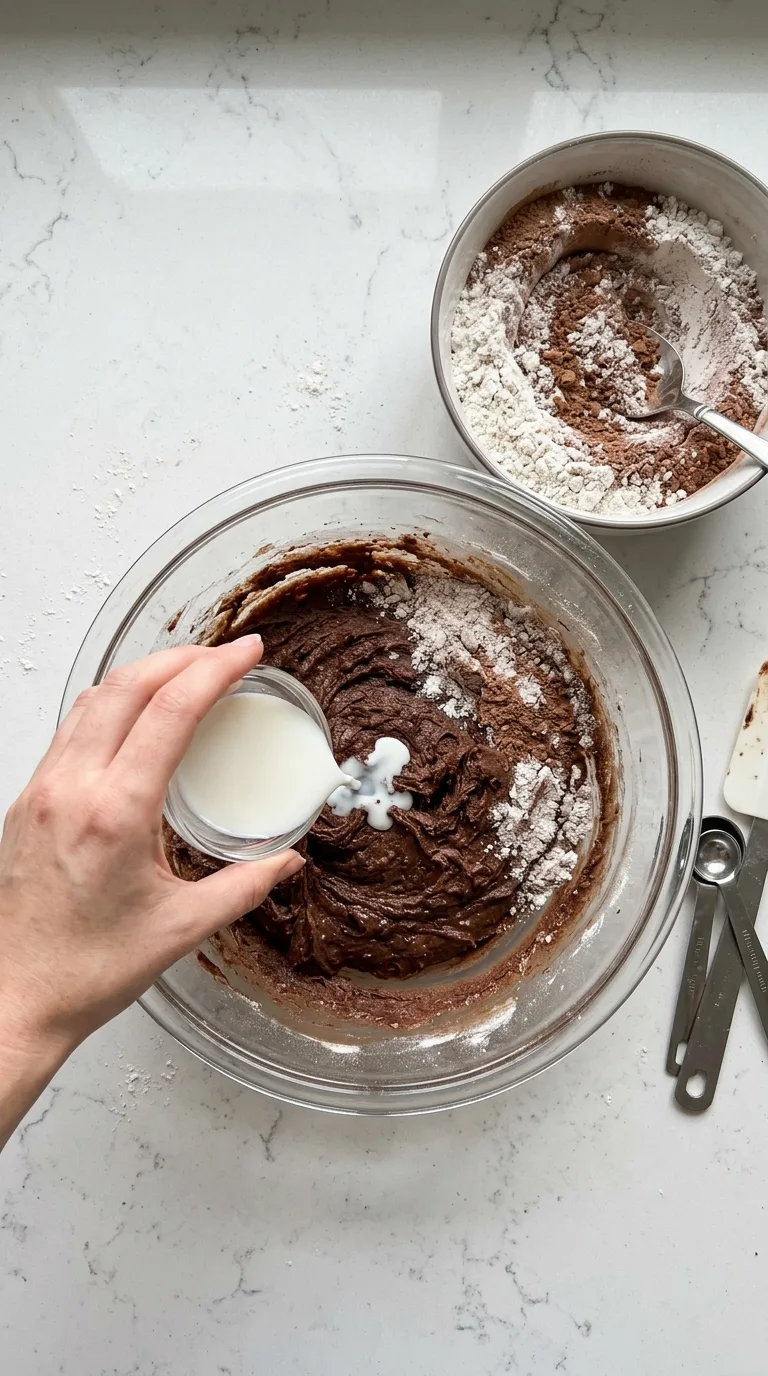
Add 2 tablespoons whole milk, followed by the remaining dry ingredients.
Mix just until a thick, soft chocolate dough forms.
The dough should be cohesive, slightly tacky, and firm enough to hold its shape when scooped.
If the dough looks dry at first, continue mixing briefly before making any adjustments. The flour and cocoa may need a few moments to absorb the moisture.
Avoid overmixing, which can make the cookies tough.
Chill the Dough
Cover the bowl and refrigerate the dough for 30 minutes.
Chilling helps firm the butter and allows the flour and cocoa powder to hydrate.
The dough should feel slightly firmer and less sticky after chilling.
If it becomes too hard to scoop, leave it at room temperature for a few minutes before shaping.
Preheat the Oven and Prepare the Baking Sheets
Near the end of the chilling time, preheat the oven to 350°F (175°C).
Position a rack in the center of the oven.
Line two large baking sheets with parchment paper.
Avoid greasing the baking sheets heavily because excess fat can encourage the cookies to spread.
Scoop and Shape the Cookies
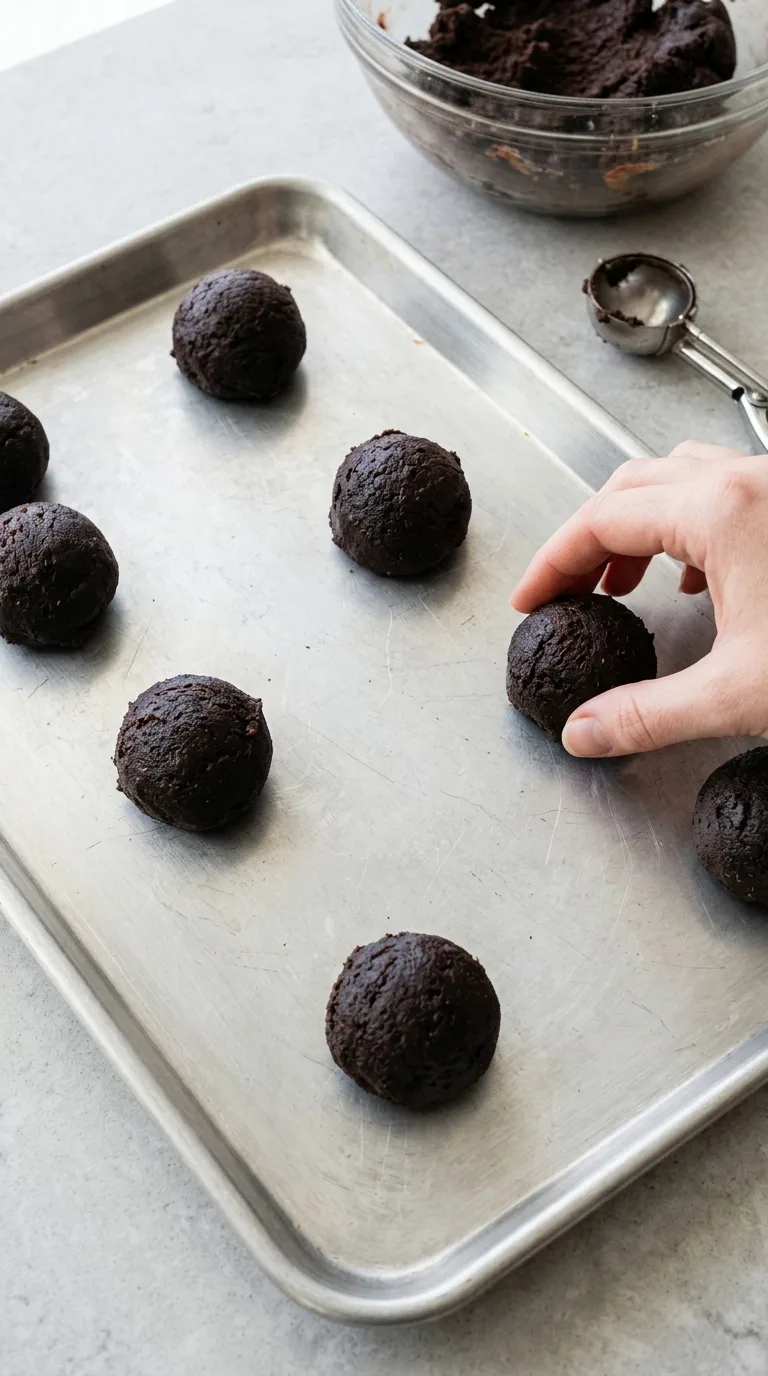
Use a 1½-tablespoon cookie scoop to divide the dough into 24 evenly sized portions.
Roll each portion gently between your palms to create a smooth ball.
Arrange 12 dough balls on each baking sheet, leaving approximately 2 inches (5 cm) between them.
Press each ball down slightly to create a thick disk.
The dough should remain relatively thick so the centers stay soft during baking.
Bake the Chocolate Cookies
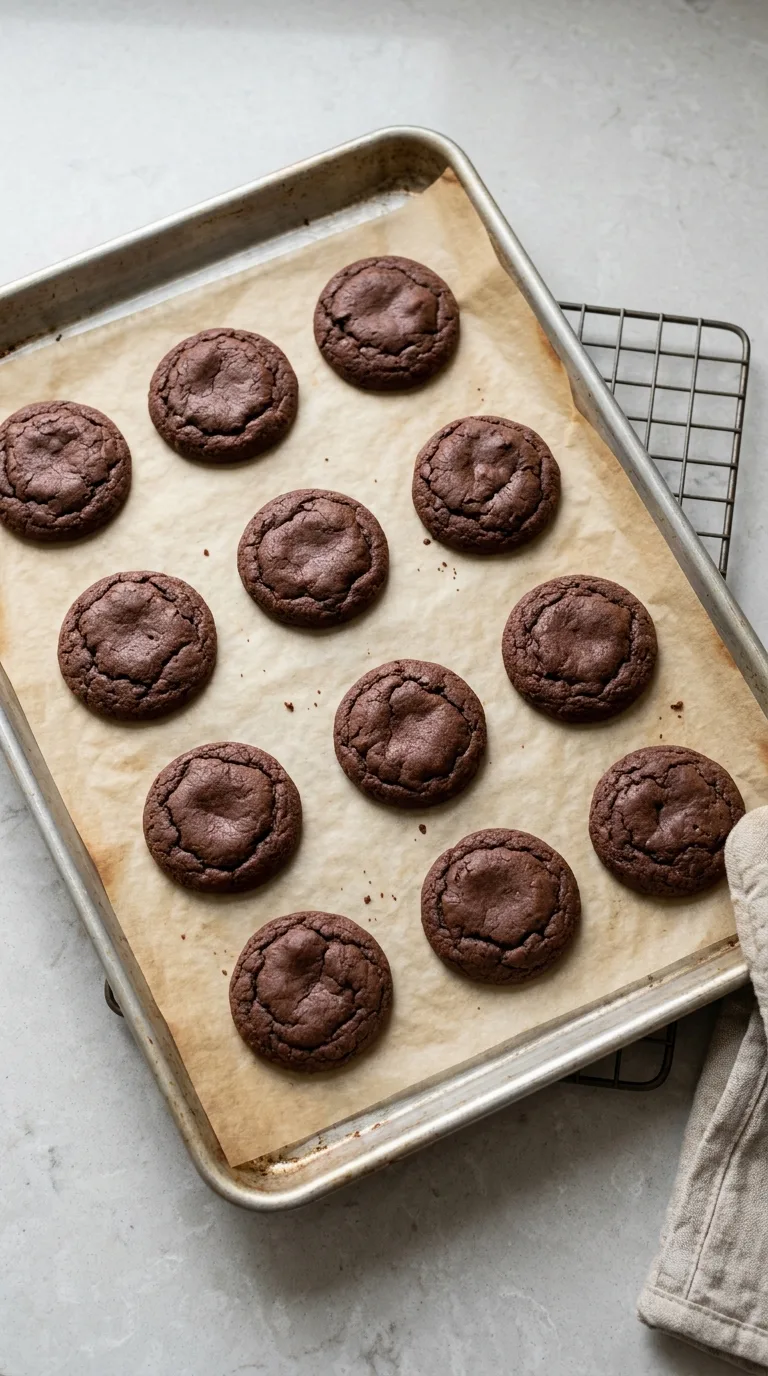
Bake one sheet at a time for approximately 10–12 minutes.
The cookies should look set around the edges, with centers that are slightly soft but no longer wet or glossy.
Because the dough is dark, color alone is not a reliable indication of doneness.
Look for a slightly puffed surface with small cracks and edges that hold their shape.
Avoid overbaking, as chocolate cookies can become dry once they cool.
Cool the Cookies Completely
Remove the baking sheet from the oven and allow the cookies to rest on the sheet for approximately 5 minutes.
They may feel delicate immediately after baking but will firm up as they cool.
Transfer them carefully to a wire rack and let them cool for approximately 15 additional minutes.
Make sure the cookies are completely cool before dipping them into white chocolate.
Warm cookies can soften the coating and make it difficult to achieve a neat finish.
Crush the Peppermint Candy
Place the candy canes or peppermint candies in a resealable food-safe bag.
Seal the bag and gently crush the candy with a rolling pin or another heavy utensil.
Aim for a mixture of small pieces and fine crumbs.
Avoid leaving very large chunks, which can make the cookies difficult to bite.
Measure ⅓ cup of crushed candy and set it aside for decorating.
Melt the White Chocolate
Place 10 ounces white chocolate melting wafers or finely chopped white chocolate in a clean, completely dry microwave-safe bowl.
Microwave at 50% power in 15–20-second intervals, stirring thoroughly between each interval.
Stop heating when most of the chocolate has melted, then continue stirring until smooth.
White chocolate can scorch more easily than dark chocolate, so avoid overheating it.
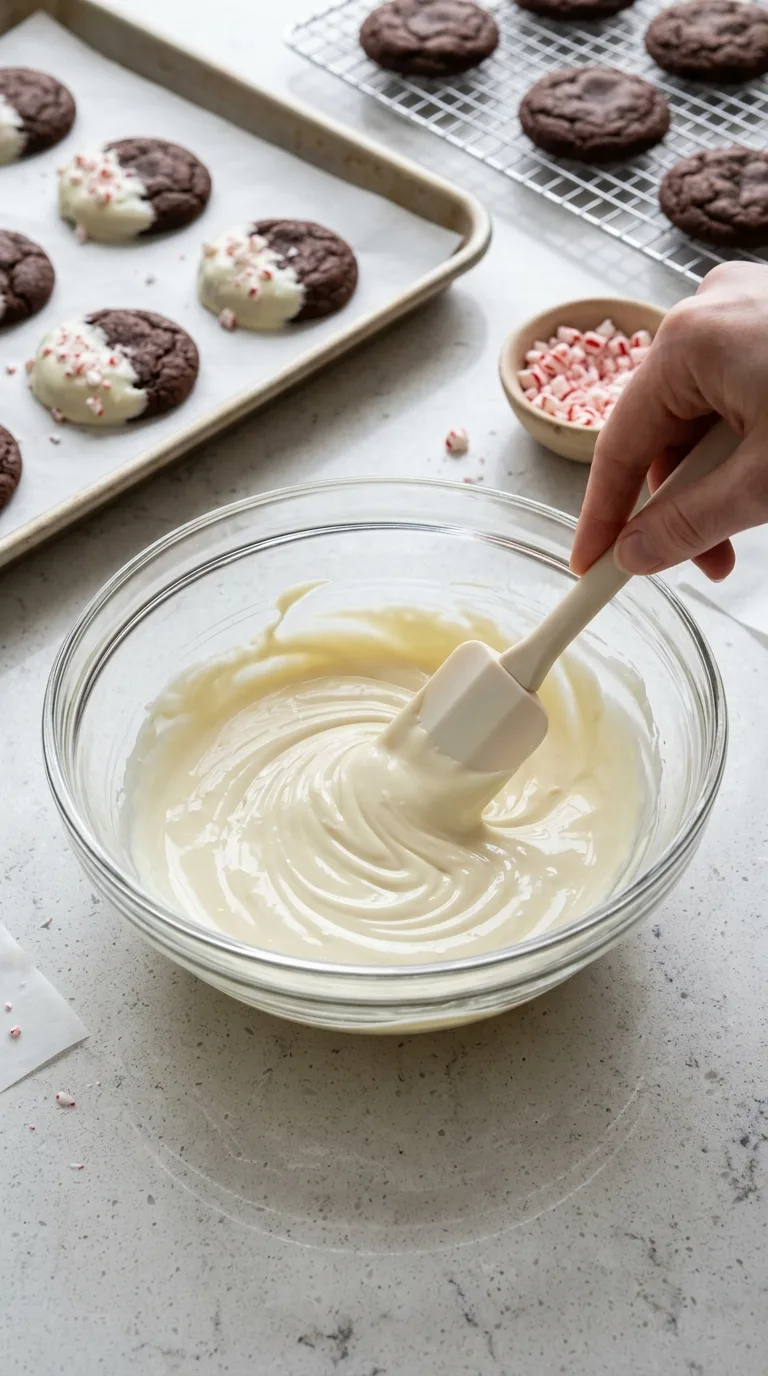
If the coating is too thick for dipping, add the optional 1 teaspoon refined coconut oil and stir until fully incorporated.
The melted chocolate should be glossy and fluid enough to coat the cookies without forming a heavy layer.
Dip the Chocolate Cookies
Hold a completely cooled cookie by one edge and dip approximately half of it into the melted white chocolate.
Lift it slowly and allow excess chocolate to drip back into the bowl.
Gently scrape the bottom edge against the bowl if necessary.
Place the dipped cookie onto a parchment-lined baking sheet.
Repeat with the remaining cookies.
If the chocolate begins to thicken, warm it briefly at low power and stir until smooth again.
Add the Crushed Peppermint Topping
While the white chocolate coating is still wet, sprinkle the dipped portion of each cookie with crushed peppermint candy.
If desired, add a few of the optional white chocolate curls for an extra decorative finish.
Press the peppermint pieces very gently if needed so they adhere to the coating.
Avoid adding too much candy, which can overwhelm the chocolate flavor and make the topping difficult to keep in place.
Let the White Chocolate Set
Leave the dipped cookies undisturbed at a cool room temperature for approximately 30 minutes, or until the coating feels firm.
The setting time depends on the type of white chocolate and the temperature of the room.
Melting wafers generally firm up more reliably than untempered real white chocolate.
If necessary, refrigerate the cookies briefly to help the coating set, but avoid prolonged chilling that may cause condensation to form on the candy topping.
Once the coating is firm, transfer the cookies to a serving plate or airtight storage container.
Storage, Freezing, and Make-Ahead Instructions
Store the completed cookies in an airtight container at room temperature for up to 5 days. For longer storage, freeze the cookies in a single layer, then transfer them to a resealable bag for up to 3 months. Thaw at room temperature before serving. The cookies can also be made ahead and stored in the refrigerator for up to a week before serving.
Storing & Freezing
Room-Temperature Storage
Store the completely cooled and dipped cookies in an airtight container at a cool room temperature for up to 4–5 days.
Place sheets of parchment paper between layers to prevent the white chocolate from sticking to neighboring cookies.
Keep the container away from direct sunlight, warm appliances, and humid areas.
Crushed peppermint candy can become sticky when exposed to moisture, so make sure the container is tightly sealed.
Refrigeration
If your kitchen is warm, store the cookies in an airtight container in the refrigerator for up to 1 week.
Separate the layers with parchment paper to protect the chocolate coating and candy topping.
For a softer cookie texture, allow the cookies to sit at room temperature for approximately 10–15 minutes before serving.
Keep the container closed while the cookies warm slightly to reduce condensation on the white chocolate.
Freezing Baked Cookies
For the best appearance and texture, freeze the baked chocolate cookies before dipping them in white chocolate.
Allow the cookies to cool completely.
Arrange them in a single layer on a baking sheet and freeze until firm.
Transfer them to a freezer-safe airtight container, separating layers with parchment paper.
Freeze for up to 3 months for best quality.
Thaw the cookies at room temperature while covered, then dip them in freshly melted white chocolate and decorate with crushed peppermint candy.
Fully decorated cookies can also be frozen, but the white chocolate may develop condensation and the peppermint topping may become sticky after thawing.
Freezing Cookie Dough
Portion the cookie dough into 24 balls and arrange them on a parchment-lined baking sheet.
Freeze until firm, then transfer the dough portions to a freezer-safe bag or container.
Store for up to 3 months.
When ready to bake, arrange the frozen dough portions on a lined baking sheet and allow them to soften slightly so they can be flattened.
Bake at 350°F (175°C), adding approximately 1–3 minutes to the baking time if the dough is still frozen.
Check for set edges and soft centers rather than relying only on the timer.
Make-Ahead Preparation
The cookie dough can be made up to 48 hours in advance and refrigerated in a covered container.
If the dough becomes very firm, let it stand briefly at room temperature before scooping.
You can also bake the chocolate cookies a day or two ahead and store them in an airtight container.
Dip the cookies in white chocolate and add the peppermint topping closer to the day you plan to serve or package them.
This helps keep the peppermint pieces crisp and the coating looking neat.
Keeping the Peppermint Topping Crisp
Peppermint candy absorbs moisture from the air over time.
Store the cookies in a cool, dry environment and avoid leaving them uncovered for extended periods.
Do not place warm cookies into a sealed container, as trapped moisture can soften the candy topping and make the cookies soggy.
Tips for Success
- Use natural cocoa powder for reliable results. It works with the baking soda to support the intended cookie texture and rise.
- Measure the flour and cocoa carefully. Too much of either ingredient can make the dough dry and produce crumbly cookies. Weighing the ingredients is the most consistent approach.
- Do not skip the dough chilling. Chilling helps limit spreading and produces thicker cookies with softer centers.
- Watch the baking time closely. Dark chocolate cookies can be difficult to judge by color. Look for set edges and soft centers rather than waiting for a darker surface.
- Melt white chocolate gently. High heat can cause white chocolate to become thick, grainy, or scorched. Use short heating intervals and stir frequently.
- Decorate before the coating sets. Crushed peppermint adheres best while the white chocolate is still wet. Once the coating hardens, the candy pieces may fall off.
FAQ
Can I use white chocolate chips instead of melting wafers?
Yes. White chocolate chips can be used, although they often contain stabilizers that make them thicker when melted. Heat them gently in short intervals and stir frequently. If the coating is too thick, add a small amount of the optional refined coconut oil to help it flow more smoothly.
Why are my chocolate peppermint cookies dry?
Dry cookies are often caused by too much flour or cocoa powder, excessive baking, or overmixing the dough. Measure the dry ingredients carefully and remove the cookies once the edges are set and the centers are still slightly soft. They will continue to firm up as they cool.
Can I make these cookies without peppermint extract?
Yes. Omit the peppermint extract and keep the vanilla extract in the dough. The crushed peppermint candy topping will still provide a noticeable mint flavor, although the chocolate cookie itself will taste more like a traditional soft chocolate cookie.
Can I freeze white chocolate dipped peppermint chocolate cookies?
Yes, but freezing the cookies before dipping produces better results. Freeze the fully baked and cooled chocolate cookies in an airtight container for up to 3 months. Thaw them while covered, then dip in melted white chocolate and decorate with freshly crushed peppermint candy. This helps prevent condensation and sticky toppings.
Why is my melted white chocolate thick or grainy?
White chocolate can become thick or grainy when overheated or exposed to water. Melt it gently using short microwave intervals at reduced power, stirring frequently. Make sure the bowl and utensils are completely dry. If the chocolate has scorched or seized severely, it may not be suitable for a smooth dipping coating.

Ingredients
Method
- Cream the Butter and Sugars: In a large mixing bowl, combine ½ cup softened unsalted butter, ¾ cup packed light brown sugar, and ½ cup granulated sugar. Beat with an electric mixer on medium speed for approximately 2–3 minutes, until the mixture looks creamy, slightly lighter in color, and evenly blended. Scrape down the sides and bottom of the bowl as needed. The mixture should be smooth and fluffy rather than greasy or melted.
- Add the Egg and Flavorings: Add 1 large egg, 1 teaspoon pure vanilla extract, and ¼ teaspoon peppermint extract. Beat on low to medium speed until fully incorporated. The mixture should look smooth and cohesive, with no visible streaks of egg. Avoid adding extra peppermint extract at this stage because its flavor becomes more noticeable after baking.
- Combine the Dry Ingredients: In a separate medium bowl, whisk together 1½ cups all-purpose flour, ½ cup unsweetened natural cocoa powder, ½ teaspoon baking soda, and ½ teaspoon fine sea salt. Whisk until the mixture is evenly colored and no large cocoa lumps remain. This helps distribute the leavening evenly and prevents dry pockets in the finished cookies.
- Prepare the Chocolate Cookie Dough: Add approximately half of the dry mixture to the butter mixture and mix on low speed until partially combined. Add 2 tablespoons whole milk, followed by the remaining dry ingredients. Mix just until a thick, soft chocolate dough forms. The dough should be cohesive, slightly tacky, and firm enough to hold its shape when scooped. If the dough looks dry at first, continue mixing briefly before making any adjustments. The flour and cocoa may need a few moments to absorb the moisture.
- Chill the Dough: Cover the bowl and refrigerate the dough for 30 minutes. Chilling helps firm the butter and allows the flour and cocoa powder to hydrate. The dough should feel slightly firmer and less sticky after chilling. If it becomes too hard to scoop, leave it at room temperature for a few minutes before shaping.
- Preheat the Oven and Prepare the Baking Sheets: Near the end of the chilling time, preheat the oven to 350°F (175°C). Position a rack in the center of the oven. Line two large baking sheets with parchment paper. Avoid greasing the baking sheets heavily because excess fat can encourage the cookies to spread.
- Scoop and Shape the Cookies: Use a 1½-tablespoon cookie scoop to divide the dough into 24 evenly sized portions. Roll each portion gently between your palms to create a smooth ball. Arrange 12 dough balls on each baking sheet, leaving approximately 2 inches (5 cm) between them. Press each ball down slightly to create a thick disk. The dough should remain relatively thick so the centers stay soft during baking.
- Bake the Chocolate Cookies: Bake one sheet at a time for approximately 10–12 minutes. The cookies should look set around the edges, with centers that are slightly soft but no longer wet or glossy. Because the dough is dark, color alone is not a reliable indication of doneness. Look for a slightly puffed surface with small cracks and edges that hold their shape. Avoid overbaking, as chocolate cookies can become dry once they cool.
- Cool the Cookies Completely: Remove the baking sheet from the oven and allow the cookies to rest on the sheet for approximately 5 minutes. They may feel delicate immediately after baking but will firm up as they cool. Transfer them carefully to a wire rack and let them cool for approximately 15 additional minutes. Make sure the cookies are completely cool before dipping them into white chocolate. Warm cookies can soften the coating and make it difficult to achieve a neat finish.
- Crush the Peppermint Candy: Place the candy canes or peppermint candies in a resealable food-safe bag. Seal the bag and gently crush the candy with a rolling pin or another heavy utensil. Aim for a mixture of small pieces and fine crumbs. Avoid leaving very large chunks, which can make the cookies difficult to bite. Measure ⅓ cup of crushed candy and set it aside for decorating.
- Melt the White Chocolate: Place 10 ounces white chocolate melting wafers or finely chopped white chocolate in a clean, completely dry microwave-safe bowl. Microwave at 50% power in 15–20-second intervals, stirring thoroughly between each interval. Stop heating when most of the chocolate has melted, then continue stirring until smooth. White chocolate can scorch more easily than dark chocolate, so avoid overheating it. If the coating is too thick for dipping, add the optional 1 teaspoon refined coconut oil and stir until fully incorporated. The melted chocolate should be glossy and fluid enough to coat the cookies without forming a heavy layer.
- Dip the Chocolate Cookies: Hold a completely cooled cookie by one edge and dip approximately half of it into the melted white chocolate. Lift it slowly and allow excess chocolate to drip back into the bowl. Gently scrape the bottom edge against the bowl if necessary. Place the dipped cookie onto a parchment-lined baking sheet. Repeat with the remaining cookies. If the chocolate begins to thicken, warm it briefly at low power and stir until smooth again.
- Add the Crushed Peppermint Topping: While the white chocolate coating is still wet, sprinkle the dipped portion of each cookie with crushed peppermint candy. If desired, add a few of the optional white chocolate curls for an extra decorative finish. Press the peppermint pieces very gently if needed so they adhere to the coating. Avoid adding too much candy, which can overwhelm the chocolate flavor and make the topping difficult to keep in place.
- Let the White Chocolate Set: Leave the dipped cookies undisturbed at a cool room temperature for approximately 30 minutes, or until the coating feels firm. The setting time depends on the type of white chocolate and the temperature of the room. Melting wafers generally firm up more reliably than untempered real white chocolate. If necessary, refrigerate the cookies briefly to help the coating set, but avoid prolonged chilling that may cause condensation to form on the candy topping.